Search My Blog!!

Showing posts with label Brownies. Show all posts

Saturday, December 31, 2011

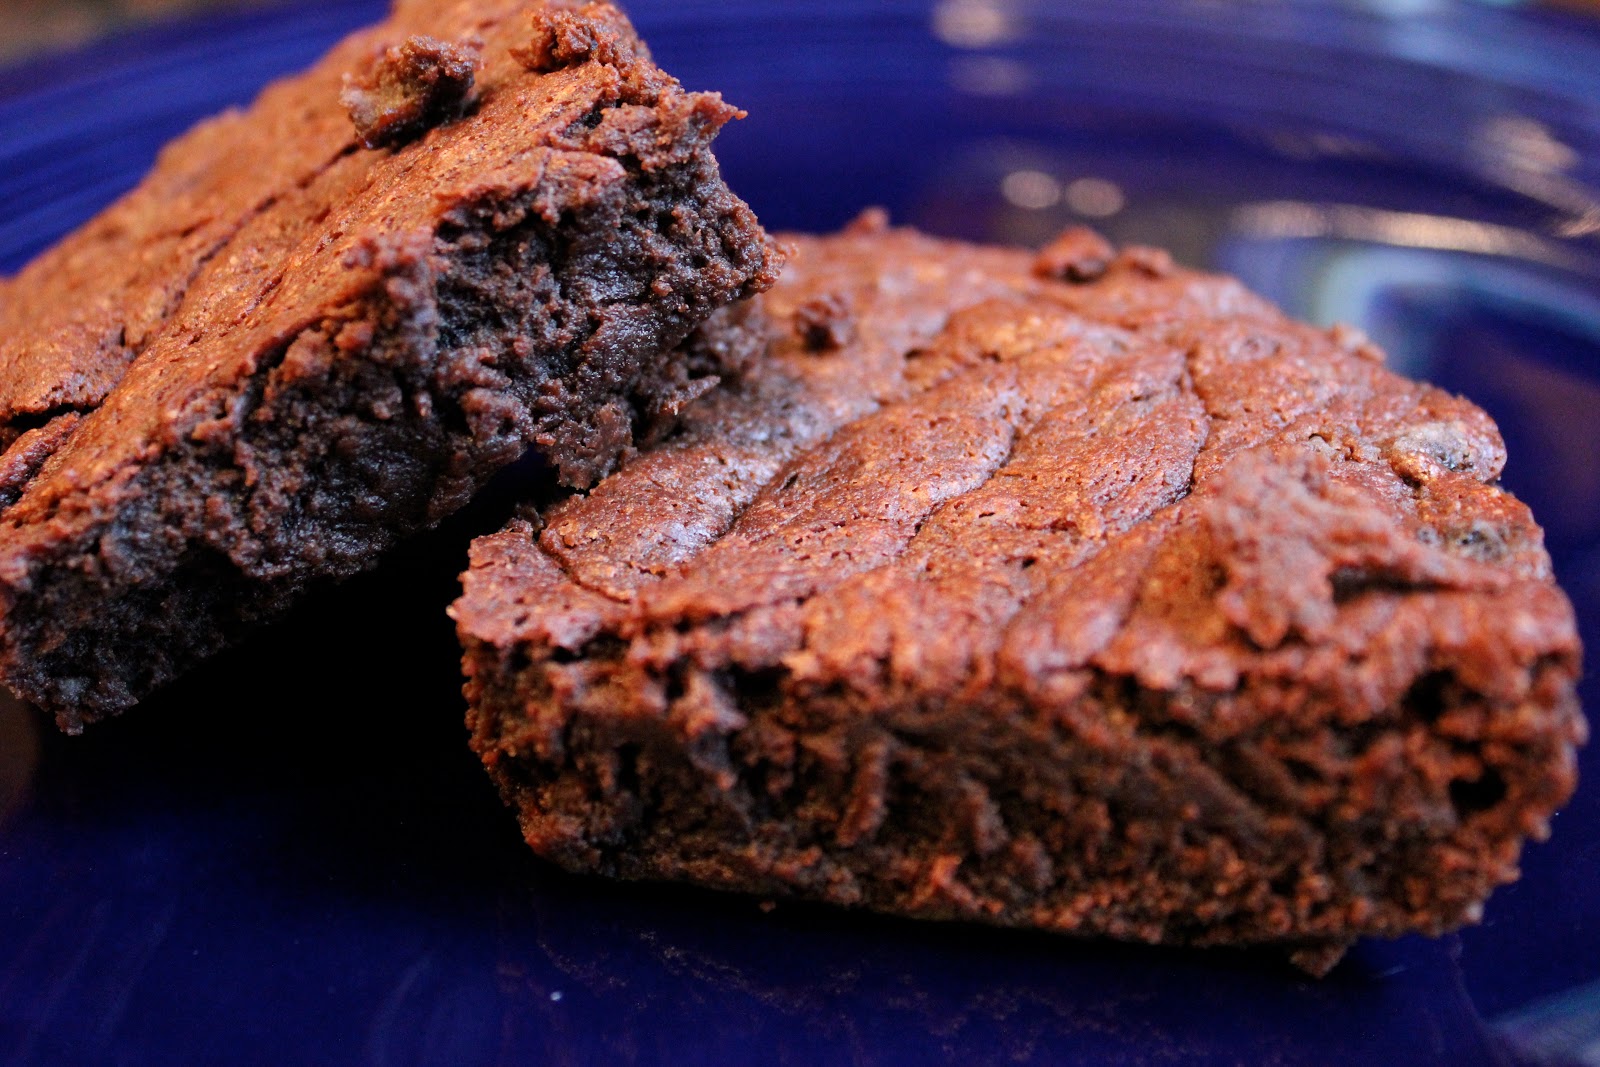
"Baked" Brownie

Well, another year has come and gone. I'd be lying if I said I wasn't incredibly eager to welcome 2012.
I clicked on my New Year's Eve post from last year and laughed when I read through it. I was excited about 2010 and the prospects that were to come in 2011. After the new year began, I was all about the lucky foods that we would eat to ring in the New Year. Well, wow. We sure ate well but I'm 110% confidant that all of that stuff about foods bringing "luck" was a total crock of crap! 2010 was a good year. 2011, not so much. But... it has been a year of growth and lessons learned. So, that's a healthier way to look at it. And that is my New Year's resolution: to think more positively and to look forward. In regards to 2011, I will remember the positive things that did happen. My sister got engaged! Ron's career blew up. We traveled across the country, saw new places, and we vacationed in Whistler, B.C. and San Francisco. I managed to finally make my law school's Dean's List, a task I had been intent on doing since I began school but always fell short. Even more exciting, it was during my only full-time semester and when I had the hell that was Advocacy! So, bravo to me! (Toot toot.) We also grew: as people, as a couple... and we are stronger, so much stronger. So in every storm, there is sunshine. And most importantly, we closed out the year by getting married. After an eight year courtship, Ron and I finally became husband and wife. And it was such a happy occasion.

I wrote in last year's posting: "It will be interesting to read what this post says next year: Ironman, J.D. graduate, and a Reed!!" Oh boy. Hmm, I'm not an Ironman. I never got there. (Insert positive spin now.) But, I'd likely be dead if I had attempted it in the physical and mental state I was in. There will be other times and other events; it just wasn't in the cards this time around. So, cheers to being alive! Technically I'm not done with school. (Insert positive spin now.) But I only have one more week! That's right, only 5 days! And, I'm not even a Reed. (Insert positive spin now.) Well, okay. I am a Reed! I only say that I am technically not a Reed because: (1) our marriage pretty much just happened (7 days ago) so in terms of being all lawyerly like, the name change hasn't been filed, and (2) I don't intend to fully change my name (and Ron is okay with that so long as I am a 'Reed' on facebook :) ) so I'll be a hyphenated pseudo-Reed. But, we are married. I am a wife. Ron is my husband. And of all of the three things I thought I'd be on December 31, 2011, being a pseudo-Reed is the absolute best of the bunch. Truthfully, the fact that we closed out this year on such a high note takes away almost all of the pain that we experienced to get here.

I've long heard that phrase: "If you want to make God laugh, tell him your plans." And I've since heard: "God does not give us anything we cannot handle." And when I look back at this year, I'll remember it as a year that we triumphed, pushed through, and made the most of what we had. We stuck together, put our heads down, and just barreled through a number of obstacles. I learned my lesson: I will not plan my life so meticulously. And when I stray, I will not feel so defeated when I end up needing to turn back because I hit a dead-end. Life is a bit crazy right now anyway with our future residence up in the air. So, I suppose 2012 will be a year of whatever the hell it wants to be. As the Cheshire Cat so wisely informed Alice, "If you don't know where you are going, any road will get you there." So, so be it. I'm open to the future. But I do intend to stick with some of my New Year traditions. I've already baked the Neujahrspretzel. And, well, like 2008 and 2010's good fortune, Ron and I are going back to Orlando to participate in the Disney Marathon Weekend to kick-off the year. With any luck, I'll convince Ron that Disney Marathon Weekend is our best New Year's tradition. As it is, I've already locked us in to the 2013 event.

I close out this year with a treat that I've had on my mind to make for nearly one year, the amazing Baked brownie. It is a famous recipe. And for good reason. Fudgey in the middle and with a thin crust on the top, there is enough chocolate to curb your sweet tooth for a month (or immediately make you run to the platter and grab another one). My oh my, it's pretty damn delicious and incredibly decadent. Friends, thank you for reading my musings and for sticking by me when I fall off radar and vent about my daily struggles. This blog often serves as my therapy, so thank you for being my counselors. Cheers to turning the page on one chapter and starting the next. I wish you a peaceful, prosperous and safe journey throughout 2012. Happy New Year!
Baked Brownie
recipe on Brown-Eyed Baker who adapted from Baked: New Frontiers in Baking
Yield: 24 brownies (or 12 if you make giant Ron sized brownies)
Ingredients
  • 1 1/4 cups AP flour
  • 1 tsp salt
  • 2 Tbsp dark unsweetened cocoa powder
  • 11 ounces dark chocolate, coarsely chopped
  • 1 cup (8 ounces) unsalted butter, cut into 1 inch pieces
  • 1 tsp instant espresso powder
  • 1 1/2 cups granulated sugar
  • 1/2 cup packed light brown sugar
  • 5 eggs, at room temperature
  • 2 tsp vanilla extract
Instructions
  1. Preheat the oven to 350 degrees F. Butter the sides and bottom of a 9x13-inch glass or light-colored baking pan. Line the pan with parchment paper.
  2. In a medium bowl, whisk the flour, salt and cocoa powder together.
  3. Put the chocolate, butter and instant espresso powder in a bowl set over a pot of simmering water, stirring occasionally, until the chocolate and butter are completely melted and smooth. Turn off of the heat, but keep the bowl over the water and add the sugars. Whisk until completely combined, then remove the bowl from the pan. The mixture should be at room temperature.
  4. Add 3 eggs to the chocolate mixture and whisk until combined. Add the remaining eggs and whisk until combined. Add the vanilla and stir until combined. Do not overbeat the batter at this stage or your brownies will be cakey.
  5. Sprinkle the flour mixture over the chocolate mixture. Using a rubber spatula (not a whisk), fold the flour mixture into the chocolate until just a bit of the flour mixture is visible.
  6. Pour the batter into the prepared pan and smooth the top. Bake in the center of the oven for 30 minutes, rotating the pan halfway through, until a toothpick inserted into the center of the brownies comes out with a few moist crumbs attached. Let the brownies cool completely, then lift them out of the pan using the parchment paper. Cut into squares and serve. 
  7. Store at room temperature in an airtight container or wrap with plastic wrap for up to 3 days. Enjoy!

Wednesday, October 12, 2011

Chocolate and Pecan Biscoff Blondies

Several weeks ago, I started noticing a number of recipes posted for Biscoff this or Biscoff that. Quickly, I learned that the makers of those fabulous little cookies had begun selling a peanut-butter like spread. Bloggers were talking about the spread on their sites and coming up with fancy new ways to use the goodie in their recipes. So, as a lover of all spreads. And as a lover of all things Biscoff. I immediately rushed to the grocery store only to find that my efforts were thwarted by the Biscoff company, who had not yet begun to distribute the product to Washington state.
Naturally, I turned to the interweb to discover that Cranberry Township, Pennsylvania, as per usual, had the products in store. So I did what I always do. I phoned home. And even though I said "just look for it the next time you run to the store," but thirty short minutes later, I received word that Biscoff spread had been purchased and was practically en route to Washington in a fancy little care package. I am so spoiled.

I had fun for the first few weeks eating this delicious Biscoff spread. You might recall that I made bread with it. Then I made ice cream with it. Ron made "adventure sandwiches" with it. (Ask him if you are interested.) And for a few nights, it was used in place of peanut butter for my daily peanut butter and graham snack. (This occurred before I swore off peanut butter and graham crackers, a sad and devastating day that I have yet to recover from, but that's another story.) But most importantly, I made these blondies when the recipe was posted on this amazing blog.

These blondies are so good that I can't even begin to describe how good they are. I always brag about my ability to portion control but I seriously couldn't portion control with these. There was almost a fight for the last crumb! Thank goodness I halved the recipe or Ron and I would be oompa-loompas right now. Nothing stopped me from eating them - not even skinny models who bring on periods of self-loathing. (I browsed through a Victoria's Secret catalog while polishing a blondie off. I subsequently threw the catalog across the room shouting offensive comments at the innocent women inside the magazine, but that's a diversion. . .) But just trust me on this, these are THAT good. And who cares if it sets you back a few extra calories for the day (or week?) because they are worth it. Just be sure to check online to see if your local grocery store carries Biscoff spread. Otherwise, it looks like Mommy Dearest will be sending you a care package too!
Chocolate and Pecan Biscoff Blondies
from Duchess of Fork, adapted from Joy the Baker
Ingredients
  • 10 Tbsp butter, cut into cubes
  • 1 1/2 cups brown sugar
  • 1 cup Biscoff spread (please don't substitute this!)
  • 2 eggs
  • 1 1/2 tsp vanilla extract
  • 1/2 tsp salt
  • 2 cups flour
  • 1 tsp baking powder
  • 1 cup chocolate chips
  • 1 cup chopped pecans
Instructions
  1. Preheat oven to 325 degrees F and grease a 9x13 inch pan with cooking spray.
  2. In a medium saucepan over medium heat, melt butter and sugar together until butter is just melted and mixture is smooth. Remove from stove and allow to cool for 5 minutes, then stir in Biscoff spread.
  3. Allow mixture to cool for 5 minutes more, then whisk in eggs and vanilla. (Mixture will be thick.)
  4. In a separate bowl, whisk together salt, flour, and baking powder. Add dry ingredients into wet ingredients. Stir until just incorporated. Fold in chocolate chips and pecans.
  5. Pour batter into prepared pan and smooth out.
  6. Bake for 30-35 minutes, or until a toothpick inserted into the center comes out clean. Enjoy!

Tuesday, February 8, 2011

Marshmallow Crunch Brownie Bars

Perhaps it is because I am still sobbing over the Steelers loss.  Or perhaps it is because it is February - winter is far from over - and it is negative sixteen outside.  Perhaps it is because I just spent thirty minutes battling my cat for the sunny and warm spot in the house.  Or perhaps it is because my "lunch" consisted of crushed tortilla chips and brown rice.  Whatever "it" is. . . I am not in the best of moods today.  The annual winter funk is in full swing.  So instead of a healthy and delicious dinner option, I am posting another dessert recipe that is sure to put a smile on my face.  Oh, and I think it will put a smile on your face too. :)

I made this batch of marshmallow crunch brownie bars for the Super Bowl this past Sunday.  Prior to realizing that I could not find a Clark bar anywhere in town, I had originally intended to bake crushed Clark bars in the brownies!  I guess it is a good thing that I couldn't find them because these brownies were certainly decadent without the added candy bar.  I absolutely loved these brownies and so did everyone who tried them.  They were delicious!  I had made marshmallow topped brownies in the past, but I was very intrigued by the chocolate and pb krispie topping.  These are totally worth checking out.

My only complaint about these brownies was that I should have cut the recipe in half!  This recipe makes an entire 9x13 pan.  That's a lot of brownies and they were cut pretty big.  And because I didn't want to bombard my office with more brownies, I sent the leftovers with Ron where a number of Packers fans dined on them.  Grrrr.....
Marshmallow Crunch Brownie Bars
from Brown Eyed Baker
Ingredients
For the Brownie Base
  • 4 ounces unsweetened chocolate
  • 2/3 cup unsalted butter
  • 1 1/4 cups semisweet chocolate chips, divided
  • 1 1/3 cups all purpose flour
  • 1 tsp baking powder
  • 1/2 tsp salt
  • 4 large eggs, at room temperature
  • 2 cups granulated sugar
  • 2 tsp vanilla extract
For the Topping
  • 1 bag (10 1/2 ounces) miniature marshmallows
  • 1 1/2 cups milk chocolate chips
  • 1 cup smooth peanut butter
  • 1 Tbsp unsalted butter
  • 2 cups rice krispies cereal
Instructions
  1. Preheat oven to 350 degrees F.  Grease a 9x13-inch pan.
  2. For the brownies: In a medium saucepan, melt the unsweetened chocolate, butter, and 3/4 cup of the semisweet chocolate chips over medium heat.  Stir occasionally while melting. Set aside and cool for 5 minutes.
  3. In a medium bowl, sift the flour, baking powder and salt.  Set aside.
  4. In a large bowl, whisk the eggs thoroughly. Add the sugar and vanilla and whisk until well blended. Stir the melted ingredients into the egg mixture, mixing well. Stir in the dry sifted ingredients and mix well.  Fold in the remaining 1/2 cup semisweet chocolate chips.
  5. Pour the batter into the prepared pan, smoothing the surface with a spatula.  Bake for 25-30 minutes, or until a cake tester inserted into the corner of the pan comes out with moist crumbs.
  6. Remove the brownies from the oven and immediately sprinkle the marshmallows over them. Return the pan to the oven for 3 more minutes.
  7. For the Krispie topping: Meanwhile, place the milk chocolate chips, peanut butter, and butter in a medium saucepan.  Melt over low heat, stirring constantly, until completely melted. Remove from heat, add the rice krispies and mix well.  Allow to cool for 3 minutes.
  8. Spread the mixture evenly over the marshmallow layer.  Refrigerate until chilled before cutting.

Tuesday, February 1, 2011

Brookies

Not too long ago, Ron and I watched a show on Food Network that highlighted a Pumpple Cake. The Flying Monkey, located in Philadelphia's Reading Terminal Market, created this amazing dessert: pumpkin and apple pies baked in chocolate and vanilla cake.  Everything is fused together and surrounded by buttercream icing.  Now, there are some fusions that I don't have much desire to try (for instance, a turducken) but I would be more than willing to give any dessert fusion a try.  I love fusing desserts!  Honestly, what can make sugar even more appealing?  Add more sugar!

These, my friends, are Brookies.  Brookies consist of half chocolate chip cookie and half fudge brownie.  How fun!  I was on a search to find an enjoyable treat to bring in to the office to celebrate a birthday. When I saw these, I had to make them.  They seemed fun, festive and they were something I hadn't tried before.

The original recipe called for a rich buttercream frosting layer to top the brownies.  I struggled for a good while determining whether I should mix up the frosting.  And while I admit that the buttercream would have made these even more amazing, I was a bit concerned that the frosting would make the treat toooo sweet.  So, I opted to leave it off this time but I think they turned out just fabulous.  The recipe itself was incredibly easy to mix up.  The bottom layer is a classic chocolate chip cookie batter.  It bakes for 20 minutes or so.  In the meantime, you mix up the brownie layer and once the cookie layer is baked, you get to pour the brownie layer over top, an oddly satisfying step.  The end result? A delicious, buttery, chocolate filled birthday treat that is definitely worth sharing!
Brookies
from Bakingdom
Yield: One 8x8 inch pan
Ingredients
  • Cookies
    • 3/4 cup all-purpose flour
    • 1/2 tsp baking powder
    • 1/2 tsp salt
    • 6 Tbsp unsalted butter, melted and cooled
    • 3/4 cup brown sugar
    • 1 egg
    • 1 tsp vanilla extract
    • 1/2 cup semi-sweet chocolate chips
  • Brownies
    • 1/2 cup (1 stick) unsalted butter
    • 1 cup sugar
    • 2 eggs
    • 1 tsp vanilla
    • 1/3 cup dark cocoa powder
    • 1/2 cup flour
    • 1/4 tsp salt
    • 1/4 tsp baking powder
Instructions
  1. Preheat the oven to 350 degrees. Spray an 8x8-inch square baking dish with non-stick baking spray.
  2. Make the Cookie Layer: In a small bowl, combine the flour, baking powder, and salt; set aside. In a medium bowl, whisk the melted butter and brown sugar together. Add the egg and vanilla; mix until well combined. Fold the flour mixture into the egg mixture until just mixed. Fold in the chocolate chips and spread the batter into the prepared pan and bake for 20 minutes.
  3. While the cookie layer bakes in the oven, Make the Brownie Layer: In a medium saucepan, melt the butter. Once melted, remove from heat and whisk in the sugar until combined. Add the eggs, one at a time, mixing well after each addition. Stir in the vanilla. Whisk in the dry ingredients until combined. Once the cookie layer comes out of the oven, immediately pour the brownie batter on top and return the pan to the oven. Bake for 30-35 minutes, or until toothpick inserted in the middle comes out with a few crumbs clinging to it. 
  4. Allow to cool completely before serving.

Tuesday, October 19, 2010

Fudge Brownies

When in doubt, bake brownies.  This is what my facebook status said the other day.  Anybody who was doing their detective work on my page would find that just seconds before I posted my brownie update, I had made an unfortunate comment about the lack of progress I was making in midterm preparations.  Hence, the brownies.  Thank goodness they were still around after the midterm.  Sigh.  When is school going to end?  I miss feeling like a smart person.

Anyway, I entered the kitchen with one thought and one thought only:  comfort food.  I knew I had planned to make brownies the next time I was interested in chocolately, cakey goodness.  And, I knew just the recipe I wanted to try.  The brownie recipe came from a Cooking Light recipe several years ago.  Normally, I'm hesitant to try the C.L. dessert recipes.  Sometimes the recipes can be just the same as other recipes, except they cut the portions into itty bitty bites to cut the nutritional values!  Sneaky, sneaky.  Other times, the recipes come out pretty dry.  And, I wanted a true, fudge cake brownie, not something infused with applesauce and bland tasting.

BUT, this recipe DID NOT taste like a "light" version of a brownie.  It was delicious!  I only used 75% of the sugar the recipe called for and I used espresso instead of instant coffee granules.  WOAH.  I took one bite and was seriously, seriously happy with how these turned out.
Fudge Brownies
adapted from Cooking Light
Yield:  One 9x9 pan of brownies
Ingredients
  • cooking spray
  • 2 Tbsp espresso granules (or instant coffee)
  • 1/4 cup hot water
  • 1/4 cup butter
  • 1/4 cup dark chocolate chips
  • 1 1/2 cups AP flour (about 6 3/4 ounces)
  • 3/4 cup + 2 Tbsp sugar
  • 1/2 cup unsweetened cocoa
  • 1 tsp baking powder
  • 1/2 tsp salt
  • 1 tsp vanilla
  • 2 eggs
  • 1/4 cup chocolate chips (or toffee chips)
Instructions
  1. Preheat oven to 350 degrees F.  (As per usual, mine preheated to about 400, then decreased to about 375.  For the majority of the time, it baked at 375 and was left in for about 20 minutes.)
  2. Coat bottom of 9-inch square baking pan with cooking spray.
  3. Combine granules and 1/4 cup hot water, stirring until the granules dissolve.
  4. Combine butter and chocolate chips in a small microwave-safe bowl.  Microwave on HIGH for 1 minute or until butter melts; stir until chocolate is smooth.
  5. Mix flour, sugar, cocoa, baking powder, and salt in a large bowl, stirring with a whisk.
  6. Combine coffee mixture, butter mixture, vanilla, and eggs in a medium bowl, stirring with a whisk.
  7. Add coffee mixture to flour mixture; stir until just combined.  (Batter will be thick.)
  8. Spread evenly onto a prepared pan and sprinkle evenly with chips.
  9. Bake at 350 for 22 minutes and cool on wire rack.

Tuesday, August 10, 2010

Marshmallow Brownies

I haven't been blogging lately.  I've been cooking and baking, but not blogging about it.  I have a bunch of good recipes stored in my que to add, but for now, I am enjoying my computer-free lifestyle.  It's quite nice, actually.  No email, no facebook, no twitter, no internet!  Most days, I've kept my computer use to an hour or less.  I'm trying to clear out my mind before school begins again and before I am stuck in front of a computer for hours and hours at a time.

I baked these brownies a few weeks ago when Ron's sister came to visit.  I had been craving brownies and knew that this was an interesting spin on your typical cake brownie.  Both Ron and his sister said they would have preferred some type of graham cracker crust on the bottom.  But then the brownies would have been s'more brownies and that is just a whole different recipe!

But, these were pretty good and very easy to make.  They actually seemed to taste a lot better the second day.  By that time, we were eating the brownies in the middle, which I prefer over the hard, dense ends.  Yum!!
Marshmallow Brownies
Ingredients
For Brownies
  • 1 C butter, melted
  • 2 C sugar
  • 1/4 C cocoa
  • 4 eggs
  • 2 tsp vanilla
  • 1 tsp salt
  • 1 1/2 C flour
  • 3/4 C chopped nuts (optional)
  • 2 1/2 C mini marshmallows
For Frosting

  • 1/4 C butter, melted 
  • 2 Tbsp milk
  • 1/3 C cocoa
  • 1 1/4 C powdered sugar
Instructions
  1. Mix together melted butter, sugar, cocoa, eggs, vanilla and salt.
  2. Add flour and mix just until combined.
  3. Fold in nuts, if desired.
  4. Bake in a greased 9x13 pan at 375 degrees for 25 minutes.
  5. Immediately top with marshmallows and bake an additional 2 minutes.
  6. Use a knife dipped in water to spread marshmallows evenly.  Cool completely.
  7. To make frosting, whisk ingredients together until smooth.  Spread frosting over cooled marshmallow layer.

Thursday, March 11, 2010

Thin Mint Brownies

I love Girl Scout Cookies, yet I'm not sure why.  They are good, but I've had better cookies.  But, I still purchase these cookies every single time someone approaches me with the option.  Somehow, we ended up with 7 boxes of girl scout cookies this year.  S.E.V.E.N.  What the heck?  For someone who bakes as much as I do, this is completely unnecessary.  Apparently, I must have been making up for cookie-less times in past years (or I was shopping on an empty stomach) when I ordered these damn things.  


So, I decided to do something fun with this impulse purchase.  Originally, I decided to have a mini-Girl Scout Challenge in my kitchen.  I have a ton of copycat recipes for girl scout cookies and thought it would be fun to have a bake-off/taste-test, etc.  Then I realized that it would be even more absurd to have double the amount of cookies in our house.  So, I settled on a single brownie recipe instead.   These brownies are baked with chunks of thin mint cookies.  


I love dark chocolate and decided these would be made best with all things dark.  I opted for Hershey's dark cocoa powder instead of unsweetened cocoa powder.  I also used 8 ounces of dark chocolate (61% cacao) Ghiradelli baking chips instead of baking chocolate because I didn't have it on hand (although convenient, chocolate in bar form retains chocolate flavor much better than chips, it makes a difference in baked goods, try it!).  These brownies were an explosion of chocolate and pretty good.  I made mint brownies last year (during one of my 3am baking binge sessions at finals) with Andes baking chips and a chocolate ganache frosting.  Those turned out to be pretty good and I think that if I baked again, I would use that recipe w/ the thin mint pieces and add the ganache.  The brownies would be absolutely amazing.  I need to find that recipe...


On a side note, my mom suggested that I start bringing some of my baked goods to a shelter or a senior citizen's community.  I often bring goodies into work/school, but I'm fearful that people get annoyed when I do this.  I'm weird, I know, but if someone was always shoving baked goods into my face, I'd feel compelled to eat them and I would feel bad if I turned them down.  I wish I had a place to bring all of these goodies (like a bakery shop that I own!!) and I am on a hunt to find a willing place.  I still intend to bring goodies into work/school, but for how much I bake, this stuff needs to go elsewhere too!  
Thin Mint Brownies
adapted from The Food Librarian
Ingredients
  • 1 cup all-purpose flour, spooned and leveled
  • 1/4 cup unsweetened cocoa powder 
    • I used Hershey's dark cocoa powder
  • 1/2 teaspoon baking powder
  • 1/2 teaspoon salt
  • 8 tablespoons (1 stick) unsalted butter, cut into pieces
  • 8 ounces semisweet or bittersweet chocolate, chopped 
    • I used dark Ghiradelli baking chips
  • 1 1/4 cups sugar
  • 3 large eggs
  • 1 sleeve Girl Scout Thin Mint cookies, chopped. 
    • (16 cookies)
Instructions
  1. Preheat oven to 350 degrees. 
  2. Line 9 x 9 square pan with parchment paper and butter or spray with Pam with flour.
    1. I could not find my 9x9 so I used an 8x8.  It worked fine.
  3. In a small bowl, whisk flour, cocoa, baking powder, and salt; set aside.
  4. Place butter and semi-sweet or bittersweet chocolate in a large heat-proof bowl set over (not in) a saucepan of gently simmering water. 
    1. I used my double-boiler.
  5. Heat, stirring occasionally, until smooth. 
  6. Remove bowl from heat. 
  7. Add sugar; mix to combine. 
  8. Add eggs one at a time, and mix to combine. 
  9. Add flour mixture; mix just until moistened (do not overmix). 
  10. Fold in chopped Girl Scout Thin Mints. 
  11. Transfer batter to prepared pan; smooth top.
  12. Bake until a toothpick inserted in center comes out with a few moist crumbs attached, 40-50 minutes. 
    1. Original recipe note: be sure to check them early.  The original recipe says "50-60 minutes" but she found them to be done at 50.
      1. With 8x8 pan, mine took about 46 minutes (with a wavering oven).  
  13. Cool in pan for 30 minutes.  
  14. Using paper overhang, lift brownies out of pan; transfer to a rack to cool completely (still on paper). 
  15. On a cutting board, using a dampened serrated knife, cut into squares.