Search My Blog!!

Showing posts with label Snacks. Show all posts

Wednesday, January 25, 2012

School Bread (Skolebred)

In February 2011, I started planning our January Disney 2012 trip. I know, it seems a little ridiculous. Eleven months ahead? But trust me, it's necessary in order to carefully plan the best trip for value and to ensure that you get a spot at your favorite restaurant 180 days in advance of your vacation. Those get-in-the-park-before-opening-hours character breakfasts aren't available if you try to book two months out! And cast members will laugh at you if you walk right up and expect to get a table. I've become quite crafted at preparing the most awesome trip as Disney possible for myself and Ron. I take pride in this. We go often and I somehow manage to make sure that we do something new, try something new, and stay somewhere new each time. The Walt Disney World Resort is always changing, so I try to make sure that our trips are as new and fresh as possible. This involves a lot of careful planning and copious amounts of research. But I absolutely love this so should you ever have any specific Disney, Universal, or Orlando related questions, I'd be happy to help! I read Disney Imagineering books for fun and I can tell you things like "Walt Disney's "room" above the Ice Cream Parlor is the only window on Main Street that has a view of Cinderella's Castle."

So here we are in January 2012 and I've already planned out our entire 2013 Disney vacation. Yes, my friends. We're going back. We'll always be going back. I can't stay away from that place and I'm so grateful for my ever-so-patient husband who recognizes that I adore Disney. Besides, I owe myself a runDisney medal, as I did not receive one this past marathon weekend. Sad. Here's the story: I had no time, energy, or strength to run. J-Term beat the heck out of me. I finished the class, rushed to the airport, hopped on a plane and arrived in Orlando feeling super... exhausted. I was practically out of it by the time my flight arrived in Orlando at 10:00 at night. I was running on no sleep from the night prior, minimal food and hydration. So, strange things were coming out of my mouth when Ron picked me up at baggage claim. I was seeing more furry creatures than just the Disney characters in the airport. From there, we were off to our Disney hotel for the night to prep for the run the next day. You might be wondering, why did you plan a run the day after your class ended? Isn't this your fault? Well, friends... J-Term was not in the plan at the time Disney 2012 was booked.

We had a 3:00 a.m. wake-up call and it was already 11:30 a.m. by the time I climbed into bed. I started noticing that I was having heart rate issues. My breathing was stale and I was very clammy, something that happens when my heart rate spikes too fast. So, I tried to rest but watched the clock as it ticked by from midnight until 2:59 a.m. when the alarm went off. I got up to prep some coffee and noticed I was out of breath just from getting out of bed. I went outside and did a brief jog that solidified what I had been thinking the night before. It was not worth it to try and do the run. :'( I woke Ron up, who told me he felt the same (he had not slept either on his red-eye flight), and we decided that our trip was more important than face-planting the pavement during the race. We had 5 days of meticulously planned theme park a-going so we decided that we'd be back in 2013 to run the run we didn't do in 2012.
Looking back, I'm glad we didn't run. Our trip to Orlando was pretty incredible and we could have potentially ruined it if we'd forced ourselves to run. Granted, I know we would've finished but bad things happen to your body when you force a run on no sleep, no hydration, no food and no mental stability. Sigh. It still stings though. This is a bad habit that I need to break. Anyway, we had two days at the Hard Rock resort over by Universal (gorgeous hotel, within walking distance of the parks, early access, and front of line perks; highly, highly recommend!) then we shifted back to Disney where we stayed at the Beach Club Resort for the remainder of our trip. It was a blast. It was our first time at the Beach Club Resort and as a perk of visiting during the time we went, we received a free Disney Dining Plan (over a $300 value), which is something we'd never done before. I'd spent so much time researching dining options (what qualifies as a snack? where do you get the best bang for your buck? who has the best table-service menu? what is the best quick-service meal?) and had booked our table-service reservations by the time we arrived. However, choosing snacks and quick-service meals was so much fun! We would absolutely do it again and if you go down to Disney, I highly recommend the Dining Plan (at least if its free) and researching dining options ahead of time.

In Epcot's World Showcase, Norway has a well-known bakery called Kringla Bakery Og Cafe. We normally stop in there on our way to the Maelstrom ride to pick up a sweet pretzel or another treat. We'd never had the School Bread but I've always wanted to try it. So, we planned to use it as one of our snack options but was thrown off course after Ron learned it was covered with coconut shavings. This threw our "snack plan" into total derailment and Ron had a pout session because he was peeved about the addition of coconut. I recalled seeing the recipe on the Disney Food Blog site so I made a note to surprise him with some School Bread once we got back to Seattle. I did not end up using the recipe posted because I heard some mixed reviews, but I did find another similar recipe. School Bread is a Norwegian pastry that is often served around the holidays. It is filled with a sweet cream custard, dipped in glaze, and often coated with coconut... but the coconut can easily be omitted. They smell great while they are baking and they are so delicious when complete. It might be worth it to use all-purpose flour because the wheat can make the dough a bit tough, but I found my pastry filler to work just fine. The custard was very easy to make and tasted so good. Don't be fooled by the fact that I had a little too much fun with the custard, these pastries can easily be decorated for elegance. I'd love to make these again and even better, Ron satisfied his "school bread" snack craving.
Skolebred
from Bubbling Cauldron
Yield: 24 pastries
Ingredients
Skolebred
  • 1 (.25 ounce) package dry yeast
  • 1 1/2 cups warm milk
  • 1/3 cup butter, melted
  • 4 cups whole wheat flour
  • 1/2 cup sugar
  • 2 tsp ground cardamom
  • 1 egg, beaten
Glaze
  • 1 cup sifted powdered sugar
  • 2 Tbsp milk or water
  • 1/2 tsp vanilla
  • coconut, optional
Pastry Cream
  • 3 egg yolks
  • 1/4 cup sugar
  • 2 1/2 Tbsp cornstarch
  • 1 cup milk
  • 1 drop vanilla extract
  • 3 Tbsp unsalted butter
Instructions

  1. In a large bowl, dissolve the yeast in warm milk. Add melted butter, 2 cups whole wheat flour, 1/2 cup sugar and cardamom. Stir in the remaining flour, 1/2 cup at a time, beating well after each addition. When the dough has pulled together, knead the dough until it is shiny and pliable. Lightly oil a large bowl, place the dough in the bowl and turn to coat with the oil. Cover with a damp cloth and let rise in a warm place until doubled in volume, about 1 hour.
  2. Once the dough has risen, divide the dough into 24 equal pieces and form into rounds. Place the rounds on a lightly greased baking sheet, cover with a damp cloth and let rise until doubled in volume, about 20 minutes.
  3. Meanwhile, preheat the oven to 475 degrees F. Brush the risen rolls with the beaten egg and bake in the preheated oven for 8 to 10 minutes until nicely browned with pale sides. Cool completely on wire racks.
  4. Mix glaze by placing powdered sugar, milk and vanilla in a bowl and whisking until combined. Once the rolls are cooled, spread glaze across the top and then dip in coconut, if you prefer.
  5. To make the pastry cream: In a mixing bowl, whisk together the egg yolks, sugar, and cornstarch until well combined. Whisk in 2 Tbsp of milk. Place the remaining milk and vanilla in a medium saucepan. Bring the milk to a boil and slowly whisk it into the yolk mixture. Pour the mixture back into the saucepan and slowly bring it to a boil over medium heat, whisking constantly. Remove from the heat and whisk in the butter. Line a baking sheet with plastic wrap and spread the pastry cream over the plastic to let it cool as quickly as possible. Cover with the plastic wrap and refrigerate it until cold. Place the cooled pastry cream into a pastry bag and fill the buns with cream. 

Wednesday, October 5, 2011

Energy Bars

For some reason, I started drinking a lot more coffee since moving to Seattle. It was almost instant - as soon as we crossed into the county line - I started craving coffee. I'd get large to-go cups of 20 ounces of more when I was out running errands. I got a fancy new coffee pot that grinds fresh beans, in the loudest manner possible, in the earliest hours of the morning. I also lay in bed watching Frasier re-runs every night, secretly wishing there actually was a Dr. Frasier Crane, on a KACL radio station, and an actual Cafe Nervosa to go to in the mornings. On the one hand, at least I do not have a cup of coffee in one hand and a cigarette in the other, like everyone else in this town seems to have. But the coffee addiction is out of control. And it's not just coffee anymore! Now it's espresso too! I've developed this routine in the afternoon where I go for an afternoon walk to get an Americano around 2:00. Then, I sip on my Americano and listen to... Neil Diamond and shout the lyrics to "Cracklin' Rosie" until I feel happy enough to continue on my day. I don't get it either, I've never listened to Neil Diamond on a consistent basis before. But whatever makes us happy, right? And happiness is needed.
It's no secret that I'm not really, well, loving, liking, tolerating our time in Seattle. But instead of going off on a tangent about what I feel is stinky about this area, perhaps I should just work on the stinkiest thing of all: my attitude. Truthfully, it's quite exhausting being miserable. So I'm trying to change my attitude right now. And if Neil Diamond and copious amounts of coffee are going to assist in the process, then so be it. Every day, I count my blessings for the multitude of positive things I have, the health I have, and the people I am most grateful for. But I've had difficulty translating this to my general outlook and approach at life. Granted, I've never been one of those people with the brightest or sunniest demeanor. But I really need to focus on transitioning this gratitude-fueled energy to my outer well-being.

In addition to drinking coffee and Neil Diamond, I've also been finding happiness from these energy bars! This recipe come from my favorite Exercise TV motivator, Chris Freytag, a Minnesota native and serious exercise fanatic. Her workouts are kicking my butt, making me feel stronger, and I'm hoping that her workouts will transition me into wedding shape. These bars aren't free of sugar. (I might cut back next time.) But they are free of things that I don't like eating. They are adaptable (I'm thinking more seeds, or nuts, or raisins, or pretzels!), incredible, and delicious. They actually taste exactly like a Snickers or a Cliff MoJo bar. I've been using these to fuel on training runs for an upcoming marathon and they are definitely doing the trick and putting the pep in my step. Or is that the caffeine doing that? Whatever it is, try these next time you think about buying another PowerBar! An added bonus? They store easily! Wrap individual bars in wax paper and store in the freezer. Take them as you leave the house, let them dethaw for a few minutes, then enjoy!
Energy Bars
from Chris Freytag
Yield: 24 bars
Ingredients
  • 1 1/2 cups old-fashioned oats
  • 2 1/2 cups puffed wheat cereal
  • 1/2 cup almond slivers
  • 1/4 cup ground flax seeds
  • 1/2 cup sunflower seeds
  • 1/2 cup chopped walnuts
  • 1/2 cup chocolate chips
  • 1/4 tsp salt
  • 3/4 cup agave nectar
  • 3/4 cup brown sugar
  • 1/2 cup natural peanut butter
  • 2 Tbsp butter
  • 1 tsp vanilla
Instructions
  1. Combine oats, puffed cereal, almonds, flax seeds, sunflower seeds, walnuts, and chocolate chips in a large bowl.
  2. In a small saucepan, combine butter, peanut butter, brown sugar, salt, and agave nectar. Bring mixture to boil. Remove from heat and stir in vanilla.
  3. Pour mixture quickly over the dry ingredients (similar to Rice Krispie treats). Stir to combine. Note: the chocolate chips will melt.
  4. With wet fingers, wax paper, or the back of a spatula, press mixture VERY FIRMLY into a 9x13 pan lined with wax paper. Let harden. (Put in freezer for 15-20 minutes to harden quickly before cutting.) 
  5. Cut into approximately 24 pieces.

Sunday, September 18, 2011

Buffalo Wing Hummus

I pride myself on the fact that I eat relatively healthy. But I'm far from perfect as evidenced by the multitude of sugar-laden baked goods on this blog and the nearly-empty bag of chocolate chips in the fridge (none were used in any baked product). And I can't resist splurging every now and then. Buffalo Chicken Dip is one of those dips that I simply cannot resist and always save some room to splurge. We often serve it on game-days when watching the Steelers beat the crap out of other teams, like the Seattle Seahawks, who they shut out earlier this morning. . . (No comment about last week's ill-attempt at football from the Steelers.) But anyway, Buffalo Chicken Dip can certainly take its toll on one's waist! The average recipe has a minimum of 16 ounces of cream cheese, 1 cup of Ranch or Blue cheese dressing, and 1 1/2 cups of cheddar cheese. And most people enjoy it with Frito's! So, I normally limit myself to one or two pathetic little chips and sulk in a corner.
So, imagine my delight when I opened this month's Food Network magazine and saw this recipe for 'Buffalo Wing' hummus. Um, seriously? I pretty much schmear hummus on everything from vegetables to toast (it's second to my peanut butter addiction) so I was very excited, albeit skeptical, to try it out. But oh.my.goodness! This stuff is amazing! The magazine published two other recipes (from The Desert Cafe) - sour cream and onion hummus and pizza hummus - that I cannot wait to try! The company has over 175 versions, including kinds like pumpkin pie and butterfinger, but I'm not really into buying 6 x 8oz containers for one person. (At least not in daylight hours.) I might need to go to Baltimore... Anyway, this hummus tastes so good and any buffalo craving is absolutely satisfied. One word of caution though: this stuff makes nearly 4 cups of hummus. Looks like it's a hummus-fest for the next week!
Buffalo Wing Hummus
from The Desert Cafe, desertcafe.com, The Wild Pea, as seen in Food Network Magazine
Yield: 4 cups
Nutrition: Per 2 Tbsp: 39 cal, 1g fat
Ingredients
  • 3 cups canned chickpeas, drained and rinsed, plus 1/2 cup liquid reserved
  • 2-3 cloves garlic
  • 1/4 cup tahini
  • 1/4 cup fresh lemon juice
  • 1 1/2 tsp paprika
  • 2 Tbsp bbq sauce
  • 2-3 Tbsp cayenne red pepper hot sauce (I used Red Hot)
  • 1 Tbsp distilled white vinegar
  • 1 1/2 tsp kosher salt
Instructions
  1. Put the chickpeas, chickpea liquid, garlic, tahini, lemon juice, paprika, bbq sauce, hot sauce, vinegar and salt in a food processor. Puree until smooth and creamy.

Saturday, September 3, 2011

Cake Batter Ice Cream

I GOT AN ICE CREAM MAKER!!

Well, actually. I got the ice cream maker attachment to my KitchenAid mixer. But it works just as well and it is the most amazing thing in the world! Speaking of KitchenAid mixers, I finally got one and I've used it almost every single day! My mother has been spoiling the heck out of me lately (perhaps its because she's sick of hearing me complain on the phone). She had received some gift cards and gave them to me and I ordered the most beautiful machine ever. It's been put to great use!

And on the same day my mixer arrived, Hogwarts arrived! This beautiful decoration is sitting on top of the mantle as we speak, front and center. It was like Christmas in July!
So, yes. I had to get the ice cream maker attachment. I'm don't normally eat real ice cream. I always opt for that sugar-free, low-fat, or total watery crap for whatever reason. (Note: frozen pureed bananas are not watery-crap and if you haven't tried them, you must!) Well, watery crap no more! I was celebrating my unbirthday (a justified one; my half birthday) the other day and desperately needed good ice cream. So I got all the ingredients ready for this batter and began the process, super excited to eat the most delicious ice cream ever.

Fail. Apparently, I turned my custard into scrambled eggs. Scrambled eggs do not make good ice cream.

But I didn't give up and tried again. And I will never go eat watery ice cream crap again.
Cake Batter Ice Cream
from Annie's Eats
Ingredients
  • 2 cups heavy cream, divided
  • 3/4 cup yellow cake mix
  • 1/2 cup sugar
  • pinch of salt
  • 3 egg yolks
  • 2 tsp vanilla extract
  • 1 1/2 cups whole milk
Instructions
  1. In a medium saucepan, combine 1 cup of the heavy cream with the yellow cake mix, sugar, and salt. Heat over medium heat until warmed through. Meanwhile, place the egg yolks in a medium bowl and whisk until smooth. Combine the remaining cream, vanilla, and whole milk in a large mixing bowl with a fine mesh sieve over the top.
  2. When the mixture in the saucepan is warm, slowly pour a small amount into the bowl with the egg yolks to temper them, whisking constantly. Continue pouring the cream mixture in a steady stream, whisking continuously until completely combined. Return the mixture to the saucepan over medium heat. Continue heating, stirring and scraping the bottom of the pan, until the mixture thickens slightly and reads 170-175 degrees F on an instant-read thermometer.
  3. Immediately pour the custard mixture through the mesh sieve into the bowl with the remaining cream and milk and mix to blend. Cover and chill the mixture thoroughly in the refrigerator. Once chilled, freeze in an ice cream maker according to the manufacturer's instructions. Store in an airtight container in the freezer.

Thursday, August 11, 2011

Chubby Hubby Faux Ice Cream

I've put on a lot of miles since we've arrived in Seattle. For one, it's easier just to walk, run, or bike wherever you need to be. Less pollution, less stress, less money, less idiots... see, lots of benefits! Plus, I'm sure you've heard about Seattle traffic. Especially where we live, traffic is a bear. There's really only one main bridge that crosses over the Bay to our neighborhood. Shortly after we moved here, Ron was on his way home from work. He called around 2:30 to say there was a jam and they weren't moving over the bridge. (*You should know, we had plans to see the Harry Potter screening that night. This emphasized the horrific situation.) Flash forward to 5:00. I had finally hopped on a bus and was crossing over the West Seattle bridge to get into town during rush hour. I saw what had caused the jam: a semi had lost its back wheels (this apparently is not uncommon!) and blocked the entire entrance onto the bridge so no one was able to cross from I-5 for 4 hours. If you know anything about the highway system in Seattle, you will know that this was bad, bad news.
So I like my two legs and two wheels for many reasons. But, walking can be problematic because Seattle is a confusing city to navigate. At least I think so. I'm used to Chicago. And Minneapolis. Both intelligently designed cities that are laid out like a grid. Like a city should be laid out. So, if you are on one of the main streets heading south, you know that at some point you will intersect with the main street heading east/west. And you will be lost no more. Nope. Not here. Streets just end. At least in the neighborhoods they do.  And you have nowhere else to go! So, if you walked 1 mile down the street. Then you're walking 1 mile back to get to where you started. And apparently 'Dead End' signs do not exist around these parts.

There's been quite a few afternoon strolls that have turned into inadvertent treks. Like, the 3 mile walk that turned into 9.7. And the day that I accidently logged 18.3 miles total without realizing it until I tried to get out of bed the next day. And of course, yesterday. When I tried to go for a quick walk up to the running store to pick up my new running shoes. And naturally, got lost. 1.5 miles turned into 7.8, 4 of which were at an 8% grade (I know, I mapped it out!). So much for a rest day. I can't feel my butt.

So what does this "ice cream" have to do with this all? Nothing. Except the fact that I ate a lot of it as soon as I came home from yesterday's debacle. To me, frozen bananas are a perfectly fine substitute for ice cream. And because my waistline can't afford to eat real ice cream as much as I'd prefer, this is a wonderfully easy treat to enjoy after an adventurous day. Plus, you get the added bonus of getting rid of some bananas that are quickly running past their prime. You can add any mix-ins that you'd like - strawberries taste amazing! - but I prefer the sweet and salty flavors from this chubby hubby version.

*Fortunately, all was resolved shortly after and Ron somehow made his way into town in time for the Harry Potter screening.
Chubby Hubby Faux Ice Cream
adapted from Pennies on a Platter
Ingredients
  • 3 peeled and chopped, then frozen, bananas
  • 1/4 cup roasted almonds, chopped
  • 1/4 cup crushed pretzels
  • handful of chocolate chips
  • 2 Tbsp of peanut butter
Instructions
  1. Puree the bananas in a food processor or blender until smooth.
  2. Add the almonds, pretzels, and chocolate chips and pulse until mixed in.
  3. Stir in the peanut butter.
  4. Eat now! Or place in a container and freeze for later consumption.

Tuesday, August 9, 2011

All-Berry Jam

We've been here for a few Sundays now and each Sunday morning is the same. We wake up, grab some coffee, and walk to the farmer's market. I love farmer's markets. I started shopping at them back in Pittsburgh but really became a fan when we moved to Minnesota. We used to bike to our favorite market at Mill City but now our farmer's market is within walking distance!
The farmer's market is about 1.5 miles away and the trek is straight uphill for the way up. But it's always a reward to walk back down because we have a bag stuffed full of berries and fresh produce! I mentioned my obsession with cherries the other day. What I failed to mention was that I am also obsessed with all of the fresh produce at the market. Our fridge is stuffed with raspberries, blueberries, strawberries, peaches, snap peas, broccoli, cauliflower, carrots, beets, onions, etc. On a positive note, a lot of my vegetable and fruit shopping is done at the farmer's market. And have you ever eaten into a berry freshly picked from a patch? Oh. my. Word. You'll never buy berries or fruit from the market again! 


I'm really loving the farmer's market here in West Seattle. But I'm excited to try others. Each neighborhood has its own, unique market with varying farmers and local goods. They are year-round which is even better! Sure, there's Pike's Place right across the Bay. But Pike's Place is like the Mall of America. Who needs all of the tourist hype and crowds when you can go to a perfectly fine, less crowded market right up the road? We've done a good job of supporting local farmers with a variety of foods. Salmon was purchased the other day (delish!) and Ron started buying grass-fed beef, jerky and potatoes from a Seattle farmer who is a Minnesota native!!
Growing up, my family lived in Allentown, PA for several years. We had the most amazing orchard in the backyard! I don't remember much from my younger days but I definitely remember falling into the raspberry bushes and coming out covered in scrapes! We had an abundance of amazing apple trees, peaches, and raspberry bushes. And each summer, my mom would spend hours in the kitchen canning and preserving the goods so we could eat them year-round. I haven't ventured into preserving yet - I plan to do so at the end of the season - but I've been having a lot of fun with the berries I've been gathering at the market, even planning a u-pick session one of these days!

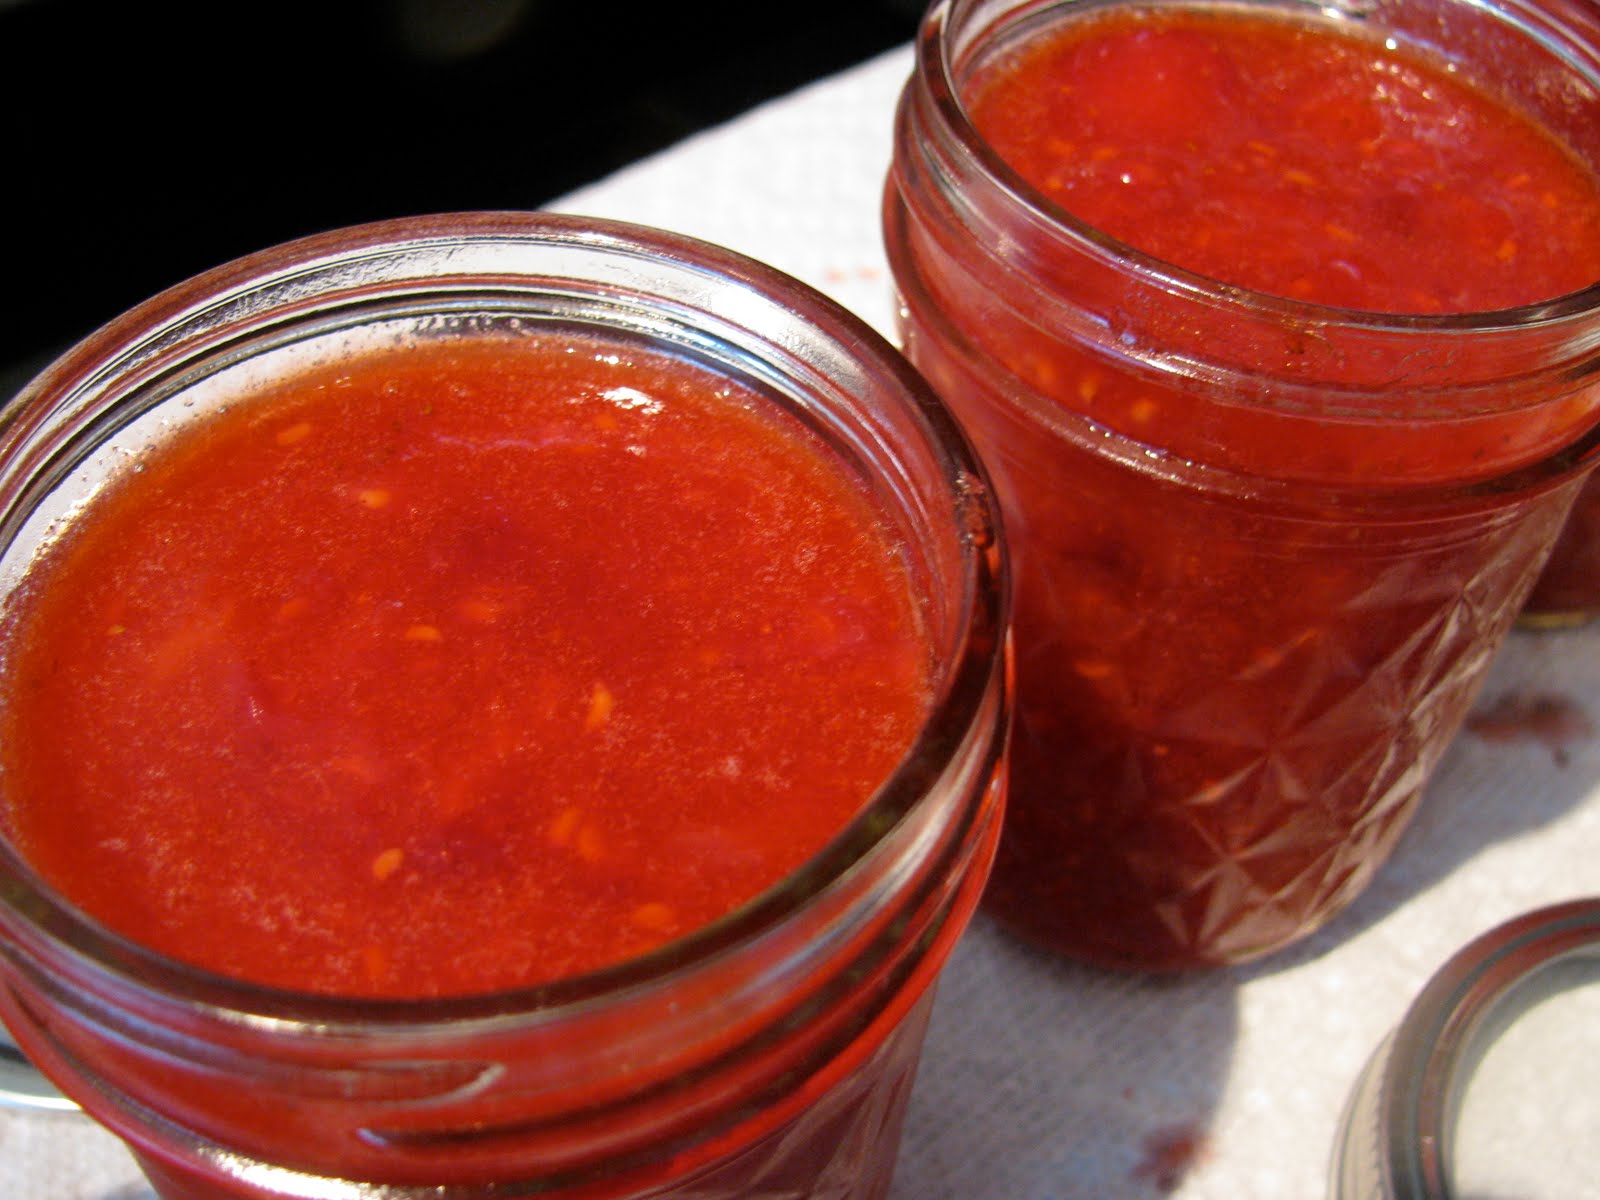
Jams are so simple. And considering my breakfast and daily snack consists of some type of bread with jam, I always have an abundance around the house. I've made jam with pectin before. But I'm not a fan of the artificial taste it leaves. So I decided to try my hand at some jam that leaves out the packaged pectin. This one is super, super, SUPER easy and it is just absolutely divine.

All-Berry Jam
Yield: 1 jar
Ingredients
  • 1 1/2 cups pitted cherries, washed
  • 1 1/2 cups blueberries, washed
  • 1 cup raspberries, washed
  • 2 Tbsp fresh lemon juice
  • 1/3 cup sugar
Instructions
  1. Place cherries, berries, and lemon juice in a food processor or blender. Pulse the ingredients to puree until smooth.
  2. Pour into a sauce pan over high heat and bring to a boil.
  3. Once boiling, stir in the sugar and bring to a boil again.
  4. Cook over heat for about 25 minutes, stirring often, until jam begins to thicken. 
  5. Remove from heat and let cool for a few minutes. Pour into a jar and store in the fridge for up to two weeks.

Sunday, March 27, 2011

Peanut Butter Pretzel Truffles

I absolutely love stumbling upon yummy dessert recipes that you can mix up in a matter of minutes. I actually mixed these up immediately after seeing them because I had all of the ingredients on hand. These peanut butter pretzel truffles are so delicious and ridiculously easy to make. Chocolate + peanut butter + pretzels = a fantastic combination! Enjoy. :)
Peanut Butter Pretzel Truffles
from How Sweet it Is, originally from Eating Well
Yield: about 20 truffles
Active Time: about 15 minutes
Total Time: 2 hours
Ingredients
  • 1/2 cup natural peanut butter
  • 1/4 cup finely chopped salted pretzels
  • 1/2 cup milk chocolate chips, melted
Instructions
  1. Combine peanut butter and pretzels in a small bowl. Chill in the freezer until firm, about 15 minutes.
  2. Shape the peanut butter mixture into about 20 balls (about 1 tsp each). Place on a baking sheet lined with parchment or wax paper and freeze until very firm, about 1 hour.
  3. Roll the frozen balls in melted chocolate.
  4. Place balls in refrigerator until chocolate is set, about 30 minutes.

Tuesday, March 1, 2011

Home-Made Graham Crackers

Holy cow! It's March 1st already!  March 1st is exciting for a few reasons: 1) It's national peanut butter lover's day.  Woah!!  WOAH.  2) I turned 28 today! I don't completely know how I feel about turning 28 yet, but I'm eager to take on the new year and find new ways to tackle my ever-slowing metabolism.  Even more important is the fact that I share a birthday with Ron Weasley!  3) It's also national pancake day.  Um, what??  Seriously, peanut butter lover's day AND pancake day?!  This is an unbelievable combination that must be made, stat.  4) The sun is out shining, blue skies, and we're supposed to have 38 degree temps later on in the day.  5) I'm on spring break - which means that I'm halfway through what is turning out to be a really tough semester - and by the time I return, it's all downhill from there! (Note: National Peanut Butter lover's Day was placed before my birthday... I mean, have you seen the name of my blog?! Originally, I had national pancake day ahead of my birthday as well. Then, I realized that my blog post would scream "oink oink" and I switched it up.)
Instead of posting pancakes for National Pancake Day.  And instead of posting a birthday treat.  And instead of posting one of the many recipes I have in my drafts that have yet to be posted, I'm posting a recipe that is pretty special to me.  The recipe is special because I finally attempted baking my own graham crackers AND I added peanut butter! As many of you know, I've had a serious peanut butter and graham cracker addiction for as long as I can remember. Hence, the name of my blog. My pantry is never without the two items. But given the fact that I eat "clean" fresh ingredients about 98% of my day, it's odd that my day turns to hell around 10:00p.m. when I crack open my box of graham crackers and enjoy a serving of ... well, I don't even know because I cannot pronounce many of the ingredients.


Since turning 28 a few hours ago, I've gotten wiser.  This just doesn't make sense to blow my day of clean eating with two delicious store-bought graham crackers.  So, baking my own seemed like a natural step.  This is definitely going to be one of the hardest habits to break, but it's one worth trying. The graham crackers were very easy to mix up and a breeze to roll out with the parchment paper.  I'm not 100% sold on the taste of them yet, but I think this is because I eye-balled the molasses and I am pretty sure that I added way too much.  Regardless, I kept munching on these and the flavors got better the next day, and the day after that, and the day after that.  I think it will take some time and tweaking to get them to the flavor and texture I am looking for, but I think it's definitely worth the challenge. 
Home-Made Graham Crackers
from FromAway
Ingredients
  • 1 3/4 cups WW flour
  • 3/4 cup AP flour
  • 1 tsp salt
  • 2 tsp baking powder
  • 1/3 cup chilled unsalted butter, cut into cubes
  • 1/4 cup honey
  • 1/4 cup molasses
  • 1/3 cup + 2 Tbsp sugar
  • 1 tsp cinnamon
  • 1/4 cup skim or 2% milk
  • 1/2 tsp vanilla extract
Instructions
  1. In a food processor, combine both flours, salt, and baking powder. Add cubes of butter and pulse until mixture takes on a coarse, crumb-like consistency. Add honey, molasses, and 1/3 cup sugar. Pulse again. Transfer to a large mixing bowl and add milk and vanilla. Mix using hands until a stiff dough forms, adding more milk if needed to make the dough hang together.
  2. Lightly oil two baking sheets. Lay a piece of parchment onto your work surface, and place half of the dough in the center. Cover with another piece of parchment, and roll out to a 1/4 inch thickness. Using a knife, pastry cutter, or cookie cutters, cut dough into 3" crackers, saving leftover scraps to rework into more cookies, by re-rolling and cutting again. Transfer to a baking sheet, leaving space between crackers. Prick the crackers all over with a fork and then sprinkle with 1 Tbsp of sugar and 1/2 tsp of cinnamon. Lightly press the sugar into the surface of each cracker with your hand.
  3. Repeat the rolling and cutting process for the other half of the dough, placing the crackers on the second baking sheet and sprinkling with the remainder of cinnamon and sugar. Place both baking sheets in the freezer, and freeze for 15 minutes. While the dough chills, preheat the oven to 350 degrees. Bake the chilled dough for 20-22 minutes, or until lightly browned around edges.
  4. Let cool completely before eating.

Thursday, September 2, 2010

Cinnamon Sugar Almonds

There are some smells in this world that can literally stop a person in their tracks.  For me, those smells involve anything with cinnamon and sugar.

Cinnabon cinnamon rolls in the mall.
Cinnamon sugar raisin bread in the toaster.
Cinnamon sugar pretzels at Auntie Anne's.
And of course, the worst culprit of them all, any type of cinnamon sugar coated nut: almonds, pecans, walnuts, etc., at any place that sells them!

My mom LOVES these nuts.  We often give them to her as gifts for birthdays or holidays.  And, she loves the nuts for a damn good reason.  They are awesome!  So, gift ideas were in the back of my head as I mixed them up.  :)

I see smell these nuts all the time.  At amusement parks, the mall, at Farmer's Markets, outside grocery stores, right in the middle of Vail Village in Colorado(?).  ("What an awesome day of skiing up on the mountains... I think it's time to buy some roasted nuts!")  But obviously, these things are sold anywhere because people will buy them, and I must admit that I purchased nuts in Vail Village before.  Seriously, once you smell them (often from a mile away), you subconsciously head in their general direction and inevitably purchase some.

So, one random Saturday morning, I was super excited to mix up my very own batch of cinnamon sugar coated almonds.  The kitchen smelled like a carnival, Ron wandered in from wherever he was and said "It smells awesome in here!," I took a bite of one of these almonds, then another, maybe a few more... and all was right in the world.
Cinnamon Sugar Almonds
from here
Ingredients
  • 1 egg white
  • 1 Tbsp cold water
  • 3 cups almonds
  • 1/4 cup brown sugar
  • 1/4 cup white or turbinado sugar
  • 1 1/2 tsp ground cinnamon
  • 1/4 tsp sea salt
  • 2 Tbsp melted butter
Instructions
  1. Preheat oven to 250 degrees F.
  2. Beat the egg white and water until frothy and foamy, prior to reaching the "soft peak" stage.
  3. Add in nuts and stir to coat. 
  4. In a separate bowl, mix together sugars, cinnamon and sea salt.
  5. Stir into the egg and nut mixture until well coated.
  6. Grease a large jelly roll pan or baking sheet with the melted butter.
  7. Spread nuts in a single layer and bake at 250 degrees for 1 hr and 15 minutes, stirring every 20-25 minutes.
  8. Remove from oven, stir to loosen from sheet.
  9. Enjoy!

Sunday, August 22, 2010

Maple Almond Cinnamon Butter

When I started this blog, I chose the name 'PB and Graham' because those two simple items are such a staple in my life.  In 2006, I was training for my first marathon and searching for some type of quick snack that would refuel me after my longer runs.  It was tricky.  I needed something that I could tolerate and something with protein.  I decided to try out some peanut butter on a graham cracker.  Fireworks went off around the room as I tested it out and our relationship began.  So simple, but so good.

Since then, I have had this snack every single day, even if I haven't run a long run.  Sometimes, the snack comes in the afternoon (and sometimes with added dark chocolate chips and cool whip!).  But most often, I eat this right before I go to bed, anywhere from 10:30 - 11:30 each night.  It's odd; I thought I would have been sick of this by now.  But, I crave this stuff and I'm convinced that my body needs it.  I can't seem to fall asleep without it.

2 full low-fat honey graham cracker sheets and 1-2 tbsp of peanut butter, preferred Skippy Natural, but will settle for Jif.

One day, I came across a recipe for almond butter on one of the blogs I followed.  It looked so appealing that I ran out to the store to buy a food processor.  However, I chose to buy an apartment size food processor and it could not handle the almonds!  Sadly, my first attempt failed, broke the food processor and I continued forward with peanut butter.

But, I never forgot about the almond butter recipe.  So, when I saw Macy's had a sale on Cuisinart, I rushed over to buy a 7-cup processor.  Super excited, I loaded up the ingredients, pressed ON and... nothing.  I purchased a broken food processor, learned a valuable lesson, and promptly returned it to get one that was equipped with a working motor.

Today, after nearly a year of waiting (pathetic!), I finally made this almond butter.  I roasted the almonds.  I waited patiently for them to cool.  I put everything in my food processor (having tested it first) and pressed ON. The nuts quickly crumbled into a fine dust and after about 10 minutes they became a smooth butter.  20 minutes later, the recipe was complete and I had a large jar of maple almond cinnamon butter.

It seemed fitting to try my new nut butter on a graham cracker as I had been waiting to do this for so many months.  I sat at the kitchen table, as Cali laid on the chair watching me with one eye open, and I took my first bite.

"Oh."
"My."
"Goodness."

I squealed.

"Cali, I think PB and Graham time just got ten times better."

Cali blinked, closed her eyes and went back to sleep, but I knew she understood.
Maple Almond Cinnamon Butter
Edible Perspectives
Ingredients
  • 1 c Almonds
  • 1.5 T maple syrup
  • 1 T maple syrup
  • 1/4 tsp salt
  • 1/2 tsp cinnamon
  • 1/2 T light-tasting oil
Instructions
  1. Preheat oven to 325 degrees F.
  2. Line a pan with parchment paper and pour the almonds on the pan with 1.5 T of the maple syrup, covering evenly.
  3. Roast for ~15 minutes, stirring 3 times, carefully watching so they don't burn.
  4. Cool nuts for ~10 minutes.
  5. Put in the food processor and turn processor on until the nuts get buttery, ~15 minutes, scrapping down the sides as needed.
  6. Add in the salt, cinnamon and 1T maple syrup.  Process again until smooth and combined.
  7. Stream in 1/2 T oil and process until smooth consistency is reached.  If it's still not as smooth, add another 1/2 T, but it probably shouldn't be necessary.

Friday, July 23, 2010

Freezer Jam

Shortly before the move, I took some time to go pick a ton of strawberries at local berry farm.  It was a lot of fun and a lovely way to spend an hour outdoors.  However, I ended up with an enormous load of berries.  Thankfully, my Foodsaver (gift from Mom) came in handy because I was able to vacuum pack about 15 pounds of berries.  Since then, I have opened the berries for snacking, blended into smoothies, and used as a topping for my morning waffles.  The berries still taste fantastic and the juice can be used in lieu of syrup or butter!

Nearly every Saturday, Ron and I had into town towards the Mill City Farmer's Market where I pick up the most fantastic jam from a local organic farmer.  I am hooked on the stuff.  It's like crack.  But, our new freezer doesn't have a lot of room, so I decided it was time to get rid of some of my berries, and try my hand at making my own jam.  I decided to mix raspberries and strawberries together, so I didn't make as much of a dent as I would have liked.  But, the end result was fantastic.  Now I have 5 jars of delicious jam and I'm thinking this could turn into a potential gift for family and friends.

Hmm, it's blueberry picking season right now.  I'm already thinking of canning options!
Freezer Jam
from Pectin package
Ingredients
  • 4 cups crushed berries (measured after they are crushed)
  • 1 1/2 cups sugar
  • 1 pkg pectin
  • 5 Bell 8 oz Freezer jars or Jelly jars
Instructions
  1. Stir sugar and pectin in a bowl.
  2. Add crushed fruit.
  3. Stir vigorously for 3 minutes.
  4. Ladle jam into clean jars and let stand for 30 minutes.
You can easily follow the instructions on the back of a pectin package.

Thursday, June 10, 2010

Chocolate and Peanut Butter Banana Bites

People are often surprised when they find out that I bake.  I think it's because I come across as relatively healthy.  I think of myself as pretty active, I don't drink or smoke or eat fast food, and I am able to fit into my pants (on most days).  But, I guess it's still kind of shocking, especially to people who have watched me turn down free food more often than not and assume I nibble on lettuce periodically throughout the day.

A lot has changed since we moved to MN.  My food allergies, which used to be pretty lax, have kicked in full-swing.  I have serious food allergies that have a lot of control over my life.  I often turn down food that I haven't made because I simply don't know what is in it, not because I don't want it.  When I cook/bake, I can see the preparation and I can see what ingredients are included in the recipe.  Trust me, I used to eat anything handed to me.  Then, after I first got sick, I realized I couldn't dine out as often anymore :-/  Dining out and eating other people's food has become very problematic in the past few years.  I'm like "that person" who is sending food back all the time.  I feel terrible, because people might be offended when I turn things down, but I really have no other choice.

Anyway, I do have an extreme sweet tooth.  And, I don't see a problem with indulging every single day.  But, I seem to have the ability to indulge sensibly.  I've been blessed with the gift of consuming things in moderation.  I can bake a whole tray of brownies, take one small bite, and be fine with not having anymore.  Unfortunately for Ron, this means he ends up eating 99% of them, but somehow the guy has lost 40+ pounds since we moved here and he started eating everything I make.

Contrary to this blog, my daily indulgences seem to be different from what others might expect them to be.  I get excited when I can have a bowl of berries, mixed with some granola and a few sprinkles of dark chocolate.  My favorite meals look like a rainbow and I have an array of flavors with fruits and veggies on my plate.  I crave water, lots of water, and never alcohol.  So, I guess those reasons might be why my pants still fit.  I also snack often through-out the day and eat something at nearly every hour.  But, snacks consist of apples and giant carrots (Hey... what's up Doc?)  I also spend a lot of time lifting, running, cycling, rollarblading, walking, doing yoga or pilates, swimming, or hiking . . .  I don't normally drive to the grocery store; I walk or bike there.  I don't normally drive to the dentist's office; I walk or bike there.  Do you see where I'm going with this?

So yes, I do still fit into my pants.  But, I'm not saying that my lifestyle is a great way to live life.  I struggle with this stuff, and some days are more difficult than others.  But, here's a brief look at the desserts I eat on a daily basis to satisfy my cravings.
Yep.  Chomp.  Those are my marks from my two front teeth.

Note:  Don't try and trick a non-fruit lover by telling him that these are ice cream balls.  He will take a bite, ask what is in it and if you say custard, he will take another bite then argue that it is not custard.  He will then look at it and scream "THIS IS A BANANA.  BLECK!!" and spit it all over the kitchen.  Ron has had a banana once before in his life.  Since then, he's been wondering for years if he would ever try one again.  Last night, he came to the conclusion that he is content with never eating them again.

Chocolate and Peanut Butter Banana Bites
adapted from (Never Home)maker
Yield:  about 6 servings
Ingredients
  • 1 banana
  • 1.5 squares of bittersweet chocolate, cut into small chunks
  • 3 T creamy peanut butter
  • sprinkle of coconut and almond slivers, if desired
Instructions 
  1. Cut banana into 6 equal pieces.
  2. Place chocolate and peanut butter in bowl and place in microwave for 1 minute.
  3. Remove bowl and stir chocolate and peanut butter until smooth.
  4. Dip banana pieces into melted chocolate and peanut butter until covered.
  5. Transfer banana to tray lined with parchment paper.  
  6. Drizzle more chocolate pb over bananas, if desired.  (You will have some leftover.)
  7. Sprinkle coconut and almond slivers on top, if desired.  (Or use other toppings.)
  8. Set in freezer to firm.  Then, enjoy!

Thursday, June 3, 2010

Lemon Hummus

WOAH!!!!  That's about all I can say.  


For some reason, I've held off on buying a food processor for the past several months.  I guess the main reason was my lack of kitchen storage space.  But, I grew sick and tired of seeing countless recipes for home-made pesto, hummus, nut butters, etc. and getting bummed out that I could not make them.  Finally, after a recipe for a maple-almond nut butter (it's coming!!) entered into my dreams, I decided it was time to purchase one.  Thank goodness I did.


This hummus.  This hummus has no words to describe it.  You just need to make it.  And eat it.  And never buy store bought hummus again.  
Lemon Hummus
adapted from Edible Moments


Ingredients
  • 1/4 cup tahini (sesame paste)
  • 3 tbsp fresh lemon juice
  • 3 tbsp olive oil
  • 2 cloves of garlic (minced)
  • 1/2 tsp ground cumin
  • 1/2 tsp salt
  • 1/4 tsp hot sauce
  • 1 1/2 cups of canned chick peas, drained and rinsed
Directions:
  1. Combine all ingredients in a food processor and puree. Place in bowl, sprinkle with paprika, and serve with pita wedges and chopped veggies.

Sunday, May 30, 2010

Soft Pretzels

I don't know why I haven't posted this recipe yet.  It was saved in my drafts for several weeks now.  We ate these back in April, so I don't know why the long wait, but I can assure you that these were awesome.


Not too much to add about the experience because I simply don't remember.  I do recall being frustrated with the rolling process, but this is not abnormal for my relationship with pretzel making.  I can never roll the dough thin enough to make a true pretzel shape.  Serve these with a cheese dip or a hot mustard sauce.  Yum!


Note:  the egg, technically, is not an essential ingredient unless you want your pretzels to turn brown.
Soft Pretzels
recipe from Alton Brown, Food Network 
Yield:  8 pretzels
Ingredients
  • 1 1/2 cups warm (110-115 degrees F) water
  • 1 Tbsp sugar
  • 2 tsp salt
  • 1 pkg active dry yeast
  • 22 ounces AP flour, approx 4 1/2 cups
  • 2 ounces unsalted butter, melted
  • veggie oil, for pan
  • 10 cups water
  • 2/3 cup baking soda
  • 1 large egg yolk beaten w/ 1 tbsp water
  • pretzel salt
Instructions
  1. Combine the water, sugar and salt in the bowl of a stand mixer and sprinkle the yeast on the top.  Allow to sit for 5 minutes or until mixture begins to foam.  
  2. Add the flour and butter and, if using dough hook attachment, mix on low speed until well combined.
  3. Change to medium speed and knead until the dough is smooth and pulls away from the side of the bowl, approx. 4-5 minutes.
  4. Remove the dough from the bowl, clean the bowl, and then oil it well.  
  5. Return the dough to the bowl.  Cover with plastic wrap and sit in a warm place for approx 50-55 minutes or until dough has doubled in size.
  6. Preheat the oven to 450 degrees F.
  7. Line 2 half-sheet pans with parchment paper and lightly brush with veggie oil.  Set aside.
  8. Bring the 10 cups of water and the baking soda to a rolling boil in an 8-quart saucepan.
  9. In the meantime, turn the dough out onto a slightly oiled work surface and divide into 8 equal pieces.  
  10. Roll each piece of dough into a 24-inch rope.  Make your pretzels:  Make a U-Shape with the rope, holding the ends of the rope, cross them over each other and press onto the bottom of the U in order to form the shape of a pretzel.  Place onto the parchment-lined half sheet pan.
  11. Place the pretzels, 1 by 1, for 30 seconds into the boiling water.  Remove them from the water by using a large flat spatula.  
  12. Return to the half sheet pan, brush the top of each pretzel with the beaten egg yolk and water mixture and sprinkle with the pretzel salt.
  13. Bake until dark golden brown in color, approx. 12-14 minutes.
  14. Transfer to a cooling rack to cool for 5 minutes before serving.

Tuesday, March 30, 2010

Baked Kale Chips

Every so often, I noticed a trend on food blogs.  There are some groups out there that choose a recipe, make/bake the recipe and subsequently post.  Those blogs normally overload the feed on Foodgawker or Tastespotting.  But, every so often, someone will make a recipe and others will take note.  This sparks a few subsequent posts and they always intrigue me.  Most recently, I noticed several posts about Baked Kale Chips.  I decided it was time to give in.  And, I am so glad that I did.  


I thought these were incredible.  You drizzle some olive oil over the Kale leaves and you can season them as much as you want.  Better yet, they are healthy!  Kale is an excellent source of vitamin A and vitamin C.. It is also a very good source of dietary fiber, copper, calcium, vitamin B6 and potassium.  I'm not sure if I'll omit regular baked potato chips from my life, but these will certain fill the crunchy/salty void when I'm looking for a snack.


Even Ron tried one.  (But, in true Ron fashion, he complained about the "damn parsley cnip green thing" taste that stuck with him for the entire day.)


Baked Kale Chips
Recipe from Smitten Kitchen
Ingredients
  • 1 bunch (about 6 ounces) kale
  • about 1 tbsp olive oil
  • seasoning, to taste 
Instructions
  1. Preheat oven to 300 degrees F.
  2. Rinse and dry the kale. 
  3. Remove stems and tough center ribs.
  4. Toss with olive oil and sprinkle with seasoning.
  5. Bake for about 20 minutes, or until crisp.

Saturday, February 13, 2010

Cookie Dough Truffles

I think I figured out how to use my camera.  This is an exciting day.  It is a lovely camera but I've never read the manual (sorry, mom) so I don't know how to take better shots.  I think this problem is solved.  YAY!  Anyway, I figured this out when I took the photo posted above.  I'm sure you can tell the difference between the rest of the photos.  Hopefully I remember what I did from here on out!

Anyway, today I decided it was necessary to celebrate my unbirthday.  I've had a rough week and I felt compelled to make something yummy.  Granted, I bake something every weekend (and I plan to bake again for Valentine's Day tomorrow) but I wanted something different than my usual cookies.  Hell, life is short.  Eat dessert!!

I saw a recipe for these truffles on one of my favorite food blogs, Annie's Eats.  Seriously, this woman is amazing and always posts incredible recipes.  Check out her site!!  These truffles appealed to me so I decided to bake them up.  I had all of the ingredients on hand so it was a win in all directions!

These were very easy to make.  My only complaint is about myself and my inability to dip things into chocolate without making a total mess.  Seriously, if you look at the picture from Annie's blog, there is a significant difference.  There was a total disaster going on in my kitchen.  We were out of toothpicks so I was trying to use forks, spoons and anything that could possibly dip the dough balls in the chocolate.  Somehow, I managed to get smudges of chocolate on every crevice in our kitchen.  Oh well.  It was worth it!
Cookie Dough Truffles
adapted from Annie's Eats who adapted from My Kitchen Cafe
Yield:  I got about 33 but I think you can probably get more if you make them smaller.

Ingredients 
  • 8 tbsp. unsalted butter, at room temperature
  • ¾ cup light brown sugar, packed
  • 2¼ cup all-purpose flour
  • 1 (14 oz.) can sweetened condensed milk
  • 1 tsp. vanilla extract
  • ½ cup mini semisweet chocolate chips
  • 1½ lb. semisweet (or bittersweet) chocolate, coarsely chopped
  • Mini chocolate chips (for garnish)
Directions
  1. Combine the butter and sugar in a mixing bowl and cream on medium-high speed until light and fluffy, about 2 minutes.  
  2. Beat in the flour, sweetened condensed milk and vanilla until incorporated and smooth. 
  3. Stir in the chocolate chips.  
  4. Cover with plastic wrap and refrigerate until the mixture has firmed up enough to form balls.
  5. Shape the chilled cookie dough mixture into 1-1½ inch balls.  
  6. Place on a baking sheet lined with wax paper.  
  7. Cover loosely, transfer the pan to the freezer and chill for 1-2 hours.
  8. When ready to dip the truffles, melt the chopped chocolate in a heatproof bowl set over a pot of simmering water.  
  9. Dip each chilled truffle, one at a time, coating in chocolate and shaking gently to remove the excess.  
    1. If at any point during dipping, the cookie dough balls become too soft, return to the freezer to chill for 30 minutes.
  10. Transfer to a wax-paper lined surface.  
    1. If using mini chocolate chips for garnish, sprinkle on top quickly after dipping each truffle before the chocolate sets.  
  11. Once all the truffles have been dipped, store them in the refrigerator until ready to serve.

Saturday, December 12, 2009

Pretzel Rolo Candies

I'm trying to make my own candy this year to give away at the holidays instead of buying it.  Here is a very, VERY quick and easy way to make up some REALLY yummy little candies.  Seriously, they may look boring but don't underestimate them.

The only annoying part is unwrapping the rolo candies.  Note:  if you buy rolo candies in the store at the check-out line, they are unwrapped.  However, you will have to buy several (depending on how many you plan to make) and it will add up. 

Buy some cute little holiday treat carriers from Michael's or Target to disburse individually.
 
Pretzel Rolo Candies
adapted from The Girl Who Ate Everything
Ingredients
  • Bag of mini pretzels (if you are lucky you can find the mini star holiday pretzels, they have them out here)
  • Bag of Rolos, unwrapped
  • Choose your Toppings:  Halved Pecans, Halved Cashews, M&Ms, Hersheys kissables, etc.
Directions
  1.  Preheat oven to 350 degrees. 
  2. Place pretzels on an ungreased cookie sheet. 
  3. Place unwrapped Rolos on top of pretzels and bake for 3 minutes.  (You don't want them too melted.)
  4. Remove from oven and push half of nut (or candy) halfway down into the melted Rolo. 
I put mine in the fridge to cool for a bit and then took them out.  They are really good!!


Saturday, November 28, 2009

Salty and Sweet Slow-Cooker Chex Mix

I love snacking on chex mix.  The following recipe makes a ton, lasts for days and is a great alternative to the traditional bagged chex mix in the stores.


Salty and Sweet Slow-Cooker Chex Mix
adapted from All Recipes with mild alterations reflected below

Ingredients
  • 4 cups Wheat Chex® cereal
  • 4 cups Cheese crackers
  • 3 cups mini-pretzels
  • 1 (12 ounce) can salted peanuts or mixed nuts
  • 1/4 cup butter or margarine, melted
  • 1 tablespoon worchestershire sauce
  • 3/4 teaspoon seasoned salt
  • 1/2 teaspoon onion salt
  • 1/2 teaspoon garlic powder or garlic pepper
Directions
  1. In a 5-qt. slow cooker, combine the first four dry ingredients.
  2. In a small bowl, melt butter.  
  3. Combine melted butter, worchestershire sauce, salts and garlic.
  4. Drizzle over dry mixture and mix well. 
  5. Cover and cook on low for up to 3 hours, stirring every 30 minutes. 
This can be served warm or at room temperature.