Search My Blog!!

Friday, December 31, 2010

Neujahrspretzel (New Year's Pretzel)

A few years ago, I started baking this New Year's Pretzel to serve for breakfast on New Year's day.  I'm a big fan of celebrating the start of the new year with foods that are meant to bring luck; success and wealth in the new year.  I'm not a very superstitious person except for this time of year.  It's a time to start fresh, so I do tend to tread carefully around what I eat on New Years Eve and New Years Day and I give into the hype.  Grapes, legumes, cooked greens, fish, pork and sauerkraut are always involved as they are believed to be lucky and improve the good vibes to start the year.  And I am very strict about what I will NOT eat:  poultry (the bird scratches backwards, which could tend to cause regret or dwelling) or any bird with wings (who wants their good luck to fly away?).  Also, lobsters move backwards, so stay away from them.

Overall, 2010 has been a pretty good year.  It started off with running 39.3 miles down in Disney World for the Goofy's Challenge, 13.1 of which were with my dad who lost nearly 60 pounds before the start!   I was asked to speak at a luncheon at Mitchell, which was an amazing honor, and I finished another year of law school.  Ron and I took a few trips to Chicago and realized that the city may just be our next place of residence and are excited about the prospect of only being 7 short hours from our families.  My sister, my mom, and my sister-in-law came out to visit us in the Twin Cities.  We moved into Minneapolis and fell in love with the city, finally, after two years of realizing that we are just not suburb people and probably never will be.  I ran a 5k with my mom (it was her first) while visiting California for the first time.  While there, we all ran a half marathon; dad ran his second half marathon and Erica, Bo, Ron and myself joined.  It was super exciting that Ron trained for and ran his first half with a smile on his face the entire time!  Ron bought a bike (mom did too!) and started riding everywhere with me!  We spent most of our weekends cycling to farmers markets and checking out new restaurants in Minneapolis.  I was able to travel for my first "work trip" which solidified my future career goals and I am excited that I will be able to start applying for jobs soon.  I finished the Twin Cities marathon.  I got to visit the Wizarding World of Harry Potter!  And after a lovely trip to Pittsburgh for the holidays and time spent with our families, Ron and I finally set a date to be married.  

It is always fun to look back on the year to see what it has brought.  Looking back, it was a very good year so I certainly don't want to forget it.  But I am excited to begin 2011.  2011 looks to bring lots of opportunity.  This will be my last year of law school.  It will also be my last year as a "single" girl; Ron and I are set to marry next December, shortly before Christmas.  And to chalk off a notch on my 'before I am 30' bucket list, I am registered for the 2011 Louisville Ironman competition in August.  It will be interesting to read what this post says next year:  Ironman, J.D. graduate, and a Reed!!
I've been extremely lucky thus far in life, but it's not to say that I couldn't use a little more.  This pretzel is a German tradition and is a symbol of good luck, so the tradition continues.  It is similar to a coffee cake, but it is in the shape of a giant pretzel!  (Though, I never tend to roll my pretzels thin enough to actually get the pretzel shape.  Oh well, no matter.)  Bake it for a New Years day breakfast.  And it is very important that you DO NOT use a knife to cut the pretzel.  It is tradition for people to rip off a portion with their fingers as this will help pass the luck of the pretzel into the new year to come!  Regardless of all of its superstitious background, it is a delicious treat that I highly suggest trying.  The recipe mixes up two giant pretzels, so I always cut it in half.  Enjoy!

And I wish you a peaceful, prosperous and safe journey on your path in life in 2011!
Neujahrspretzel
from (I don't remember!! :( )
Yield:  2 large Neujahrspretzels
Ingredients
  • 2 cups milk
  • 1/2 cup butter
  • 2 pkg yeast; active, dry
  • 2 tsp salt
  • 1/2 cup sugar
  • 7 cup flour; unbleached
  • 2 large eggs
  • 1 cup packed light brown sugar
  • 1 tsp maple extract
  • 2 Tbsp water
Instructions
  1. Heat milk and butter until very warm (120-130 degrees F).  
  2. Mix yeast, salt, sugar, and 1 cup flour.  Slowly beat into warm milk for 2 minutes.  
  3. Add eggs and 1 cup of flour; beat for an additional 2 minutes.
  4. Add enough flour to form a soft dough; knead until smooth and elastic, about 5 minutes.
  5. Place dough in a greased bowl; let rise in a warm place until doubled in bulk, about 1 hour.
  6. Punch dough down and let rise again until doubled; about 1 more hour.
  7. Divide dough in half and shape pretzels as follows:  roll dough into a rope about 30 inches long and 1 1/2 inches in diameter.  Repeat with remaining dough.  Place pretzels on greased baking sheets.  Let rise 15 minutes more.  
  8. Bake at 375 degrees F for 25-30 minutes or until golden brown.  Cool on wire racks.
  9. Make glaze:  Mix brown sugar, water and extract to form a thin icing. Drizzle icing on pretzels (it will be runny) and sprinkle with chopped nuts, if desired.

Thursday, December 30, 2010

Sweet Potato Casserole

It's well after the holidays now, but this holiday recipe is one that deserves sharing!  It was a delicious take on a sweet potato casserole that paired nicely with some Christmas turkey.  I highly recommending indulging in it, just for the day.  I only used about 1/2 of the butter that the recipe called for, but I still thought it tasted great and no one knew any different.  Keep it saved for next year and be sure to try it out!  Note:  The original recipe calls for pumpkin pie spice.  A small jar of pumpkin pie spice costs about $5.  Unless you make muffins or bread with it throughout the year, it's rarely used except for around December.  So, I substituted cinnamon and it worked just fine.
Sweet Potato Casserole
from McCormick
Ingredients
  • 1 can (15 1/2 ounces) crushed pineapple
  • 4 cups mashed sweet potatoes
    • I used about 4 large sweet potatoes (yams are fine, but avoid using the canned yams because they already contain a lot of sugar).  Pierce potatoes with a fork and place on paper towel.  Microwave on high for about 10 minutes until potatoes are tender.  Let cool for a few minutes until you can handle the potato without burning your hand and remove potato skins.  For some added nutritional benefits, you can leave some of the peel on, but given the rest of the ingredients, it's probably not worth it.  :)  Mash potatoes until you get 4 cups.
  • 1/4 cup granulated sugar
  • 2 Tbsp butter, melted
  • 1 Tbsp pure vanilla extract
  • 2 tsp pumpkin pie spice (or cinnamon), divided
  • 1/2 cup firmly packed brown sugar
  • 1/4 cup (1/2 stick) butter
  • 1/2 cup chopped pecans or walnuts
Instructions
  1. Preheat oven to 350 degrees F.  Drain pineapple, reserving 1/4 cup juice.  Mix reserved juice with sweet potatoes, granulated sugar, 2 Tbsp melted butter, vanilla and 1 tsp of the pumpkin pie spice (or cinnamon).  Pour into lightly greased 2-quart baking dish.  Top with crushed pineapple.
  2. Mix brown sugar, 1/4 cup butter and remaining 1 tsp pumpkin pie spice (or cinnamon) in a small saucepan.  Cook and stir on medium heat just until sugar dissolves.  Stir in nuts.  Spoon over sweet potato and pineapple mixture.
  3. Bake 35-40 minutes or until lightly browned and heated through.

Monday, December 27, 2010

S'mores Cupcakes

Since I've started baking and reading recipes for fun, choosing a holiday dessert has been an exciting task.  That might sound odd, but I begin anywhere from 3 weeks to one year ahead.  I start researching the recipes.  There is absolutely nothing better than a home-made baked good to end a delicious meal.  My original plans fell through shortly before the holiday, so I switched gears and started thinking about what I could make, a unique off-the-wall non-traditional holiday dessert, that would be delicious.  The last time I tried baking these cupcakes, I had some issues, so I was tempted to try them again with a good oven.  Once I committed, there was no turning back.  And thank goodness!  These were amazingly delicious.  And although it wasn't the maple gingerbread cake with salted caramel glaze that I had originally planned, everyone enjoyed them.  They were a fun and festive treat.

The cupcakes themselves don't take a whole lot of time.  There is a little bit more labor involved than a "pour cake mix from box and stir in 3 more ingredients" but they are totally worth it.  I loved them.  Dad said it was the best cupcake he ever ate.  Mom said they were delicious.  And Ron threatened to eat all of them.  In total, they took about an hour and half to make, including cooling time.  I highly recommend trying them and if you have a kitchen torch, I highly recommend browning the marshmallow icing to get that 'toasted' taste.  They would be perfect for a birthday, a holiday, or just a random in-need-of-a-cupcake day.  Enjoy!
S'mores Cupcakes
from Annie's Eats
Yield:  2 dozen cupcakes (recipe can be cut in half easily)
Ingredients
Crust
  • 1 1/2 cups crushed graham cracker crumbs (about 1 sleeve)
  • 1/4 cup sugar
  • 5 1/3 Tbsp unsalted butter, melted
  • 8 oz. bittersweet chocolate, finely chopped
Cake
  • 2 cups plus 2 Tbsp sugar
  • 1 3/4 cups AP flour
  • 3/4 cup plus 1 Tbsp cocoa powder
  • 1 1/2 tsp baking powder
  • 1 1/2 tsp baking soda
  • 1 tsp salt
  • 2 large eggs
  • 1 cup whole milk
  • 1/2 cup canola oil
  • 2 tsp vanilla extract
  • 1 cup boiling water
Frosting
  • 8 large egg whites, at room temperature
  • 2 cups sugar
  • 1/2 tsp cream of tartar
  • 2 tsp vanilla extract
Garnish
  • Extra graham cracker crumbs
  • Graham cracker segments
  • Chocolate pieces
Instructions
  1. Preheat the oven to 350 degrees F.  Line two cupcake pans with paper liners.  Mix up graham cracker crust:  in a small mixing bowl, combine the graham cracker crumbs, sugar and melted butter; mix well with a fork.  Drop about 1 Tbsp of the graham cracker mixture in the bottom of each cupcake liner and press down to line the bottom.  (A small glass that fits the bottom round of the cupcake liner works perfect here.)  Sprinkle a small amount of the chopped chocolate on top of the graham cracker crusts.  Bake for 5 minutes.  Remove from oven, and maintain the oven temperature.
  2. To make the cake batter:  Sift together the sugar, flour, cocoa powder, baking powder, baking soda and salt in the bowl of an electric mixer; mix on low speed just to combine.  In another mixing bowl, combine the eggs, milk, oil, and vanilla extract; whisk together.  Add to the dry ingredients and mix on low speed for 30 seconds.  Scrape down the sides of the bowl, then beat on medium speed for 2 minutes.  Add the boiling water and stir just to combine (batter will be thin).
  3. Divide the batter evenly between the prepared cupcake liners, filing each about 3/4 of the way full.  (Be careful with whole full you fill them to avoid having to pry them out with a knife like I did!)  Return the pans to the oven and bake about 18-20 minutes, until a toothpick inserted in the center comes out clean, rotating the pans halfway through baking.  Allow to cool in the pans for 5-10 minutes, then remove and transfer to a wire rack to cool completely.
  4. To make the frosting:  Combine the egg whites, sugar and cream of tarate in the top of a double boiler.  (I didn't have access to a double boiler, so I used a pot of simmering water and placed a mixing bowl over top.)  Heat the mixture, whisking frequently, until it reaches 160 degrees F with an instant-read thermometer.  Transfer the mixture to the bowl of an electric mixer fitted with the whisk attachment.  Whisk starting at low speed and gradually increasing to medium-high speed until stiff, glossy peaks form.  Mix in the vanilla until combined.  Frost cooled cupcakes as desired. 
  5. If you have one, brown the icing with a kitchen torch.
  6. Garnish with some chocolate pieces and graham cracker segments (totally optional, but totally worth it).

Sunday, December 26, 2010

Kung Pao Chicken

Asian cuisine might not seem like a normal entree to post on the blog the day after Christmas, but it's necessary because it's really the only "real food" that I have to post right now!  This was a Cooking Light recipe that I had tagged to make once I received the December magazine.  I cooked it up for mom and dad the other night and we enjoyed it with some brown rice.  I did add a bit too much cayenne pepper (I had also used a hot chili sesame oil) so it definitely had a kick to it.  Ron had some leftovers though and said he really liked it.  Dad really enjoyed it deeming it an "8 at a chinese restaurant."  But, mom and I had to make sure we had a peanut with every bite to take the spice down a notch.
It was very easy to mix together and an alternative to your chinese take-out.  Even though it's a cooking light recipe, I think it's totally ok to add more peanuts.  Honestly, 2 Tbsp of peanuts?!  Who are they kidding??
Quick and Easy Kung Pao Chicken
from Cooking Light, December 2010
Yield:  about 4 servings
Ingredients
  • 2 Tbsp dark sesame oil
  • 1 cup chopped onion
  • 2 garlic cloves, minced
  • 1 pound skinless, boneless chicken breast, cut into 1 inch pieces
  • 3/4 cup water
  • 3 Tbsp lower sodium soy sauce
  • 2 tsp cornstarch
  • 1 tsp brown sugar
  • 1/2 tsp bottle minced ginger
  • 1 to 1 1/2 tsp crushed red pepper
  • 1 cup thinly sliced red bell pepper (about 1 large)
  • 1 cup snow peas, trimmed
  • 2 Tbsp (or more) chopped unsalted, dry-roasted peanuts
Instructions
  1. Heat sesame oil in a large skillet over medium-high heat.  Add onion to pan; saute 3 minutes or until softened.  Add garlic; saute 30 seconds, stirring constantly.  Add chicken; saute 3 minutes or until chicken begins to brown.
  2. Combine 3/4 cup water and the next 5 ingredients (through crushed red pepper), stirring with a whisk until sugar dissolves.  Add water mixture to pan; bring to a boil.  Add bell pepper and snow peas to pan; cook for 2 minutes or until vegetables are crisp-tender and sauce thickens.
  3. Sprinkle with nuts and serve with rice.  Enjoy!

Friday, December 24, 2010

Peanut Butter Blossoms - Week Twelve

Merry Christmas Eve!!
Ron and I are back east for the holidays and have been for a few days (hence the lack of blogging).  Naturally, I've been on my feet from 8 a.m. to 11 p.m. nearly every night.  The holidays are always full of so much excitement.  Family, friends, holiday cooking, holiday shopping, holiday traffic, holiday visiting, holiday wrapping, holiday decorating, and of course, holiday baking.  I literally have hundreds of cookie recipes saved that I would have loved to make during the "12 Weeks of Holiday Cookies" but I decided on good ol' peanut butter blossoms to finish off the project.  To recap:
Twelve weeks of holiday cookies has been fun and exciting.  I'm not quite sure which one was my favorite.  Probably the Take Five's.  Ron said the same.  Therefore, you should probably make them.  But honestly, who doesn't love cookies??  And, when you get to eat them twelve weeks in a row, all the better.  Peanut butter blossoms are so easy to make and so delicious to eat.  I'd say they were a perfectly delightful final cookie choice.  Oomph, now it's time to go detox for the next twelve weeks.  :)

Enjoy your time with your loved ones!  Happy Holidays!  Eat good food and share good company!
Peanut Butter Blossoms
from How Sweet Eats
Yield:  About 4 dozen
Ingredients
  • 2 sticks butter, softened
  • 1 1/2 cups creamy peanut butter
  • 1 cup sugar
  • 1 cup packed brown sugar
  • 2 eggs
  • 1 tsp vanilla extract
  • 3 1/2 cups flour
  • 2 tsp baking soda
  • 1/2 tsp salt
  • 2 Tbsp milk
  • 1/2 cup sugar, for rolling
  • Hershey Kisses, about 48, unwrapped
Instructions  
  1. Cream butter and peanut butter together until smooth.  Add sugar and cream for 2-3 minutes.  Add eggs, one at a time, beating until combined.
  2. Stir in vanilla.
  3. Add flour, baking soda and salt, just mixing until combined, then add in milk.
  4. Cover and refrigerate dough for 30 minutes or for up to 2 days.
  5. Preheat oven to 375 degrees F.
  6. Roll cookies into 1 inch balls and roll in sugar.
  7. Lay on baking sheet about 1 inch apart.  Bake at 375 degrees for 5 minutes.  Remove from oven and puss Hershey's Kiss down into the middle of each cookie.  Return to oven and bake for 2 1/2 minutes more.  Remove and let cool completely.

Friday, December 17, 2010

Cinnadoodles - Week Eleven

I almost feel like I am cheating in '12 Weeks of Christmas Cookies' by posting this recipe.  You see, I have another delicious snickerdoodle recipe already posted on my blog.  This one isn't a heck of a lot different... but it's good and so I'm using it as week eleven's cookie!  This was actually the cookie I chose to bake for a coworker's cookie exchange party this past weekend.  I had over 8 dozen of them by the time I was done baking them.  But, because I could not get out of my driveway to get to the cookie exchange party, and because our freezer is small, neighbors and mailmen were able to experience the cinnamon/sugar goodness and not my coworkers.  :(

I am not going to lie.  12 weeks of Christmas cookies has me cookie'd out.  I suppose it may be a good thing.  Normally, mom and I bake anywhere from 4-6 different types of cookies shortly before the holiday.  Normally, I average about 4-6 cookies a day for about 4-6 weeks (or so it seems).  We try to do something all of the cookies to prevent this major indulgence and we often freeze them, which in turn makes the boys incredibly angry.  But, I don't think I'm going to be eating a ridiculous amount of cookies this year.  Let's face it - I've been baking cookies for eleven weeks straight!  Not to mention, mom sent 4 dozen of favorite cookie of all time, thumbprints, that arrived somehow on the morning of the blizzard (poor UPS man!)!  Between the thumbprints, the 8 dozen cinnadoodles, the past ten weeks of cookies, and the upcoming baking session with mom, I'm done with cookies.  I'm cookie'd out.

But, because you probably have not been suffocated with cookies, I do feel that you should find some cinnamon chips to make a batch of these cinnadoodles.  If you love cinnamon and sugar, they are amazing.  And, the cinnamon chips are the best thing ever.  I actually just used up the last of my bag in some eggnog cinnamon scones (recipe to be posted soon!) and questioned whether I should sprint to the store to buy more before some freak factory disaster removes them from the shelves for all eternity!  But, I didn't.  I actually just decided to bite into another cinnadoodle.  Oh boy.  Thank goodness I'm allowed to eat like a piggie during the winter months.  It's cold in MN; we could all use some extra skin!
Cinnadoodles
from Two Peas and Their Pod - A Martha Stewart recipe
Yield:  About 48
Ingredients
  • 2 3/4 cup AP flour
  • 2 tsp baking powder
  • 1/2 tsp salt
  • 1 cup (2 sticks) unsalted butter, softened
  • 1 1/2 cups sugar
  • 2 large eggs
  • about half a bag of cinnamon chips
  • 3 Tbsp sugar
  • 3 Tbsp cinnamon
Instructions
  1. Preheat oven to 350 degrees.
  2. Sift together flour, baking powder and salt; set aside.
  3. Put butter and 1 1/2 cups sugar in a bowl and mix with an electric mixer on medium speed until light and fluffy, about 3 minutes.  Mix in eggs.  Reduce speed to low; gradually mix in flour.  Add in cinnamon chips.
  4. Stir together 3 Tbsp cinnamon and 3 Tbsp sugar in a small bowl.  Shape dough into round balls; roll in cinnamon sugar.  Space 3 inches apart on baking sheets lined with parchment.
  5. Bake cookies, rotating sheets halfway through, until edges are golden, 12-14 minutes.  Don't overbake!  Let cool on a cookie sheet for a minute or two, then transfer to a cooling rack.

Thursday, December 16, 2010

Cranberry Wild Rice Loaf

Finals are finished!  As per usual, my blog got neglected and my neck is sore, but I am done!  One More Year.  I need to remember this for the coming term which is going to be my busiest and most challenging to date.  (No need to remind me of that pesky ol' Bar exam that occurs post-graduation.)  In one more year, I will be done and new exciting adventures are already in the works!  I've been celebrating with baking, of course.

Normally, when I choose recipes, I choose them because they sound good and appetizing.  I'm not saying that this bread didn't sound good and appetizing, but I actually chose to make it because it intrigued me.  The blog that I got it from mentioned that the idea came from a Minnesota diner that serves Cranberry Wild Rice French Toast.  She provided the recipe for the french toast, but I chose not to make it for one reason or another.  However, I plan on it in the future.  I also plan on finding this diner!  I was very intrigued by the idea of baking wild rice into a bread.  I kept wondering how the rice was going to cook in the loaf pan.  Was it going to get crunchy?  Oddly enough, it didn't!  (Well, a few bits of rice turned crunchy.)  I actually couldn't really tell that there was rice baked into the loaf, but it did provide a level of chewiness that I don't normally get from just a regular quick bread.  I did enjoy the bread though and even though I didn't make the french toast, I'm posting the recipe because the bread was decent enough to eat on its own.  Plus, I definitely plan on trying out this french toast recipe soon.  Enjoy!
Cranberry Wild Rice Loaf
from The Peas are Hollow
Ingredients
  • 2 1/2 cups bread flour
  • 1/2 cup whole wheat flour
  • 1 pkg (2 1/4 tsp) active dry or instant yeast
  • 2 tsp salt
  • 1 1/4 cups water, room temperature
  • 2 Tbsp molasses, room temperature
  • 1 Tbsp olive oil
  • 3/4 cup wild rice, cooked and cooled
  • 1/2 cup dried cranberries, chopped
  • 2 Tbsp unsalted butter, melted and cooled
Instructions
  1. Whisk together flours, yeast and salt.  Add water, molasses, and olive oil.  Mix until a shaggy dough forms, then knead until dough is smooth and elastic, about 7-8 minutes.
  2. Add cranberries and wild rice; knead until evenly distributed throughout.  Transfer dough to a lightly oiled bowl and toss to coat entire ball with oil.  Cover with plastic wrap and place in a warm area to rise for about 1 1/2 hours or until doubled in size.
  3. Spray a loaf pan lightly with oil.  Lightly deflate the dough and place entire dough ball in loaf pan.
  4. Cover with a oiled pieces of plastic wrap and let rise against for about an hour.  
  5. Meanwhile, preheat oven to 375 degrees F.  Brush the top of your loaf with melted butter and bake until golden brown for about 45-50 minutes.
  6. Let loaf cool in pan for about 30 minutes then remove and cool completely on wire rack.

Monday, December 13, 2010

Butter Chicken

We had a bit of a snowfall here in Minnesota over the weekend.  You might have heard.  It even caused the Metrodome roof to collapse!  Fortunately, Ron and I thought to run to the grocery store on Friday before the storm hit with the rest of the city.  Honestly, up until I was sitting at work on Friday, I had no idea that we were even supposed to get snow.  That sounds pathetic, but I tend to live in a bubble during finals period.  I do skim the headlines each day, but I think my brain is so overwhelmed that nothing I read, outside of law related items, actually sticks.  So, I found out it was supposed to snow and we stopped at the grocery store on the way home from Ron's hospital excursion (that's another story).
The blizzard was kind of fun and exciting.  I don't really remember the blizzard of '93 in Pittsburgh, but I'm sure it was as exciting as this one was.  I think it was exciting because we really had no place to go that Saturday.  Now, it's kind of annoying because we really can't get in and out of our driveway.  But, I'm surely glad we had food in the house for this whole ordeal because we certainly wouldn't have been able to leave to get some.  On Saturday night, after baking 6 dozen cookies for a cookie exchange party that I sadly could not get out of my driveway to attend, I mixed up this indian-spiced butter chicken recipe.  It was delicious!  I served mine on a bed of lettuce (and I wouldn't do that again; wilty lettuce) and was pleasantly pleased with the flavor.  The recipe does use some more bowls and kitchen appliances than I would have preferred, but overall it was a quick recipe to whip up and I enjoyed the change of pace.
Butter Chicken
from Baked Bree, from Good Life Eats
Ingredients
  • 1 onion, chopped
  • 2 Tbsp freshly grated ginger
  • 2 cloves minced garlic
  • 1 jalepeno, seeded and minced
  • 1 Tbsp olive oil
  • 2 tsp garam masala
  • 1 tsp chili powder
  • 1 tsp ground cardamom
  • 1/2 tsp ground coriander
  • 1 (6-ounce) can tomato paste
  • 2 1/2 cups chicken broth
  • 1/2 cup heavy cream
  • 2 bay leaves
  • 1 1/2 pounds boneless, skinless chicken breast cut into small cubes
  • 1/2 tsp grated pepper
  • 1 tsp salt
  • 1/4 cup butter
  • lime wedges
  • chopped cilantro
  • cooked basmati rice (cook according to package directions)
Instructions
  1. In large saute pan coated with olive oil, cook onions, jalepeno, ginger, and garlic over medium-high heat for about 5 minutes, or until lightly browned.
  2. Add the garam masala, chili powder, cardamom, and coriander.  Cook for 2 more minutes, stirring frequently.
  3. Scrape the onion and spice mixture into the bowl of a food processor.  Add the tomato paste and chicken broth.  Process until smooth.
  4. Add the puree back into the saute pan and add the bay leaves and cream.  Let come to a boil and reduce heat; simmer until it has reduced to about 3 cups, about 5-7 minutes.  Stir frequently.  Pour mixture into a large bowl and set aside.
  5. Season chicken with salt and pepper.  Preheat saute pan to high and add chicken w/ 1 Tbsp butter.  Cook the chicken until it starts to brown, about 3-4 minutes.
  6. Add the sauce back to the pan and cook over medium heat until the chicken is cooked through.  Add the remaining butter to the sauce and stir until it is melted and incorporated.
  7. Once chicken is cooked, spoon over rice.  Squeeze lime wedges over and sprinkle with cilantro leaves.  Enjoy!

Friday, December 10, 2010

Brazil Nut "Joy" Cookies - Week Ten

Happy Birthday to the Best Mom in the entire world!

Mom loves chocolate covered brazil nuts.  We get them for her every year around her birthday and the holidays.  She also loves almond joy candy bars.  So, I decided to celebrate mom's birthday by making her a cookie she would love and shipping it to her to enjoy on her special day!  These cookies were very, VERY good.  I call them brazil nut joy cookies because they are similar to an almond joy, but they use brazil nuts.  Go figure.  You could easily sub in almond for the brazil nuts, but I'd suggest adding some more coconut (or even coconut extract) if you are a fan of the stuff!
Brazil Nut Joy Cookies
adapted from Taste of Home
Yield:  4 1/2 - 5 dozen
Ingredients
  • 1 cup butter, room temperature
  • 1 cup sugar
  • 2 eggs
  • 1 1/2 tsp vanilla
  • 2 1/4 cups AP flour
  • 1/2 tsp salt
  • 1/4 tsp baking soda
  • 2 cups chopped brazil nuts
  • 1/2 cup coconut
  • 1/2 - 3/4 cup chocolate chips
Instructions
  1. Preheat oven to 350 degrees F.
  2. In a large bowl, cream together butter and sugar.  Add eggs one at a time and beating after each addition.  Beat in vanilla.
  3. Sift together flour, salt, and baking soda.  Slowly add to the wet ingredients and stir until combined.
  4. Fold in chopped nuts, coconut, and chocolate.
  5. Using a rounded teaspoon, drop cookies 2" apart on a baking sheet lined with parchment paper.  Bake for 11-14 minutes or until bottoms are lightly browned.
  6. Cool completely on wire racks.

Thursday, December 9, 2010

Butternut Squash Orzo

Fun news:  Ron recently purchased the domain name for me so I now officially own "PB and Graham."  That's pretty cool.  Thanks Ron!  Loves!

Finals are here so that means that I haven't been spending a lot of time in the kitchen.  Most of my time has been sitting in front of my computer with a book in front of me.  I guess it's good that I'm not spending time in the kitchen because I'm certainly not getting any exercise!  I've been using up things that I've had in the kitchen to avoid going outside in the frigid temperatures and I had some leftover butternut squash from the wild rice salad.  I found a recipe to puree the squash and mix it with orzo.  It turned out to be pretty good and a fun lunch idea.  It did remind me of macaroni and cheese, but without all of the cheese.  You can easily adapt it to whatever you like.  Add more cheese after the pasta is done.  Substitute different spices.  Season more as you go.  I added some green beans and cherry tomatoes to mine to incorporate some additional textures.  The original recipe included bacon but I didn't have any on hand.  Maybe Ron would've eaten it had I left the bacon in.
Butternut Squash Orzo
adapted from We are Not Martha
Ingredients
  • 1/2 butternut squash
  • 3 cloves garlic
  • 1/2 small white onion
  • salt and pepper
  • 1/2 C chicken broth
  • 1 C orzo, fully cooked
  • 1/2 cup parmesan cheese
Instructions
  1. Preheat oven to 425 degrees F.
  2. Cut your squash in half and clean the seeds and membrane out of the half you are using.  Put the squash, onion, and garlic on a foil-lined baking sheet.  Drizzle with olive oil and sprinkle with salt and pepper.  Roast at 425 degrees for about 45 minutes, until veggies are tender.
  3. While veggies are roasting, cook orzo according to package directions.  After draining orzo, stir in 1/2 cup parmesan cheese until evenly distributed and melted.
  4. Remove veggies from oven and let cool for a few minutes.  Remove skin from squash and add squash, onion, garlic and 1/2 C of chicken broth to food processor.  Puree, add more chicken broth if you want a thinner puree.
  5. Mix the puree in with the orzo.  Stir in additional ingredients as desired, including extra seasoning.  Serve with some pine nuts and extra parmesan cheese!

Monday, December 6, 2010

Wild Rice and Butternut Squash Salad

I never really ate wild rice until after we moved to Minnesota.  I'd always been more of a brown rice person and there aren't a lot of restaurants out east that offer wild rice on their menu.  But, after moving up here, I began noticing wild rice salads featured in grocery stores and started to make it more frequently.  This past Thanksgiving, I was drawn to the deli section each time I visited the store.  I kept checking out their wild rice salads with butternut squash and cranberries.  I bought one, realized I should make my own, and la!!  Here we go.  This recipe tasted exactly like the one I bought at the store, if not better.  It makes about 4-6 servings and would be a delicious side with a holiday meal!  Or, you could just eat it in a bowl like I did for 3 days straight.

Wild Rice and Butternut Squash Salad
from here
Ingredients
  • 1 cup Wild Rice mix
  • 2 cups cubed butternut squash
  • 2/3 cup pecans, chopped
  • 1/2 cup white onion, diced
  • 1 clove garlic, chopped
  • 1 carrot, sliced thin
  • 2 stalks celery, sliced thin
  • 1 Tbsp fresh thyme
  • 1/2 cup dried cranberries
  • 1 pinch red pepper flakes
  • 1 Tbsp vegetable oil
  • salt and pepper
Instructions
  1. Steps 2 and 3 take about the same amount of time to complete, so prepare them at the same time.
  2. Heat oven 400 degrees.  Place cubed butternut squash on a sheet pan.  Roast for 30-35 minutes.
  3. Cook the wild rice according to package directions.  Or, add 2 cups of water and a dash of oil.  Bring to a boil.  Turn heat down to medium-low, cover, and simmer until water has been absorbed, about 45-50 minutes.
  4. After rice and squash have cooked, heat a wide skillet on medium-low.  Gently toast pecans until aromatic, but watch carefully so they don't burn.  This should take about 1 minute.  Transfer nuts to a plate and reserve.
  5. Turn heat up to medium-high, add oil, and saute the onions and garlic until soft.  Add celery, carrot, and red pepper flakes and stir-fry for about 3 minutes.  Then, remove from heat and add cooked rice, squash, thyme, cranberries and pecans.
  6. Add salt and pepper, toss to combine, and enjoy!

Saturday, December 4, 2010

Winter Spiced Apple Granola

I haven't made granola in a while and was craving some the other day.  I always have to be very cautious when I have granola lying around the house because I tend to eat it within a few days.  That is a lot of granola to be consuming alone, but sadly, I've almost already plowed through this batch!  It is THAT good!   I was originally planning on making a pumpkin spice granola, but the Thanksgiving holiday kind of pumpkins me out.  So, the snow and the Christmas holiday inspired this idea.  Honestly, the cinnamon chips put it over the top!  As with any granola, you can easily adapt it to your preference.  Add nuts or seeds if you'd like and feel free to swap the flaxseed with wheat bran.  Serve with some yogurt and enjoy!
Winter Spiced Apple Granola
Yield:  About 4.5 cups
Ingredients

  • 4 cups old-fashioned rolled oats
  • 1/4 cup ground flaxseed meal
  • 1/2 tsp allspice
  • 1/2 tsp ground cloves
  • 1/4 tsp cinnamon
  • 1/4 tsp salt
  • 2 Tbsp canola oil
  • 3 Tbsp apple butter
  • 3 Tbsp honey
  • 1 tsp vanilla extract
  • 1/4 tsp almond extract
  • 3 oz. package of dried apples, chopped
  • 1/2 cup cinnamon chips
Instructions
  1. Preheat oven to 325 degrees F.
  2. Combine dry ingredients (oats, wheat bran, flaxseed meal, spices, and salt) in a medium bowl.
  3. In a small saucepan over medium heat, bring oil, apple butter, honey, and extracts just to a boil.  Stir and pour over dry ingredients.  Mix to combine thoroughly.
  4. Bake for 10 minutes; stir.  Bake for 15 minutes; stir.  Add chopped apples.  Bake for 5 more minutes; remove from oven and stir.
  5. Let cool then stir in cinnamon chips.
  6. Store in an airtight container for up to 4 weeks.

Friday, December 3, 2010

Hot Cocoa Cookies - Week Nine

I've noticed a lack of "real food" on my blog again.  BUT, it's not as though I've been eating junk for the past few days.  I've actually made quite a few really good recipes -- however, the pictures are completely unappetizing.  :(  That's the problem with having a food blog.  It's expected to have a photo with each recipe.  I made a decision that after school is over, I'd like to take some photography classes and buy one of those fancy schmancy cameras.  I've always been interested in photography, so maybe that could be my new adventure post-school.  Maybe then I'll learn how to take such unphotogenic photos and turn them into something delicious looking.

This recipe was my first almost-fail for 12 Weeks of Holiday Cookies.  Look at how FLAT they are!  To be truthful, I seriously contemplated making a whole other batch just to take a photo because the one above doesn't do the cookie any justice.  Then, I realized that I don't have time to do that.  So, flat cookie photo it is.

Honestly, I'm going to blame finals.  I NEVER have problems in the kitchen except for around finals period (I tend to overmix, overcomplicate, misread, mis-measure, etc.).  I'm guessing that my butter was too soft or I inadvertently beat the hell out of the cookies while I was mixing the batter and put too much air in there.  Whatever I did, they ended up flat and needed to be pried off of the baking sheet.  I saw them on How Sweet It Is blog and HAD to make them.  I have a ton of 'Hot Cocoa Cookie' recipes saved, but this one just stood out to me.  And despite the fact that they fell and melted into one giant cookie on the cookie sheet, they were absolutely delicious; smelling and tasting exactly like hot cocoa!  I think I need to try these after finals to get them looking just right!
Hot Cocoa Cookies
from How Sweet It Is
Yield:  approx. 24 cookies
Ingredients
  • 1 cup butter, at room temperature
  • 1 1/2 cups sugar
  • 2 eggs
  • 1 tsp vanilla
  • 2 cups AP flour
  • 1/2 cup cocoa powder
  • 1 tsp baking soda
  • 1/4 tsp salt
  • 1/4 cup marshmallow fluff
  • 1 cup chocolate chips
  • 1 cup mini marshmallows
Instructions
  1. Cream butter, sugar, eggs, and vanilla until fluffy.  Add flour, cocoa powder, baking soda, and salt.  Mix until combined.  Stir in marshmallow fluff.
  2. Fold in chocolate chips and marshmallows.  Cover dough with plastic wrap and refrigerate for 30-60 minutes.
  3. Preheat oven to 350 degrees F.
  4. Remove dough from fridge and roll into 1 1/2 inch balls.
  5. Bake at 350 degrees for 10-12 minutes.  (Make sure cookies are fully cooked because they will be sticky from the marshmallows.)  Allow to cool completely then remove with a spatula.  Allow to sit for another 30 minutes.

Wednesday, December 1, 2010

Wizarding World of Harry Potter

Warning:  Very, very long post.  Not food related in the slightest.  Contains a lot of spoilers about the Wizarding World of Harry Potter and other random Harry Potter related information.  
We are back from visiting Orlando!  I hope everyone had a wonderful Thanksgiving with family and friends.  And if you went out then I hope the Black Friday crowds didn't drive you insane.  We were traveling via the friendly skies so we didn't venture out and experience the shopping crowds.  But after the visit we had in Orlando, I can tell you that no crowd, NO CROWD could possibly compare to the complete and total chaos that is the Wizarding World Of Harry Potter (WWOHP).  I went down with the expectation that it was going to be insanely packed and was 100% correct.  When the park opened in June, people were lined up all the way outside of City Walk to get in.  Some people waited for 8 hours and never got to see anything.  The attraction has died down since then, and what we experienced wasn't even close to that, but it still wasn't pretty.  Disney was just as crazy.
Bottles of Pumpkin Juice at WWOHP

Having said that, the trip was awesome and quite relaxing, even with the insane crowds.  I'm sure that sounds odd, but our Disney trips have always been "jam as much as possible into the shortest amount of time and run a marathon during marathon weekend."  Granted, it still was a "jam as much as possible into the shortest amount of time" trip, but I did not participate in marathon weekend.  It was nice to be at Disney and not wake up at 2 am to go run 26.2 miles.  It was also nice to enjoy the parks at our leisure.  We've been there enough to know what rides are worth it and what rides we could miss.  We checked out a few shows that we've often overlooked and just took it easy enjoying what we know are our favorites.

I know that this is a food blog, but I'm going to take a short diversion from my blog's intentions to talk about the trip.  It's a quick and easy way to communicate with family and friends about the experience for those who are interested.  Plus, it was so amazing that it is necessary to document somewhere.  It will probably give a few spoilers about WWOHP so if you do not want to hear about it (or if you simply don't care about Harry Potter), I won't be offended if you decide not to read.  :)  It will also be a very long post as I have a lot to say!
Inside Disney's Grand Floridian Resort

We arrived on Tuesday evening and checked into the hotel before heading to Downtown Disney to browse the shops and dine at my favorite sandwich shop, Earl of Sandwich.  One of the main reasons why I wanted to head to Orlando at this chaotic time was because of the holiday decorations.  Disney decks out their hotels and theme parks in beautiful holiday decor.  Downtown Disney was no different.    Some of the parks (Epcot, Animal Kingdom, Universal) didn't start their holiday celebrations until the day we were leaving (sad face), but that is also when hordes of people start to arrive in Orlando so we opted to go at Thanksgiving.  We checked out some of my favorite shops in Downtown Disney, including the Christmas store, and then went back to the hotel to prepare for our big day in the morning.
Sign at Seuss Landing directing to WWOHP
I had started to look at the #wwohp hashtag on Twitter to see what people were saying about lines before we even got to Orlando.  Unsurprisingly, many posts were discussing how the WWOHP was the busiest that it has been since it opened and the park was once again giving out timed entrances into the Wizarding World.  If you haven't been to Universal Orlando, WWOHP is at Islands of Adventure.  The theme park is separated into several different areas:  Marvel Super Hero Island, Toon Lagoon, Jurassic Park, The Lost Continent, Seuss Landing, and Harry Potter.  Pre-WWOHP, guests could roam freely through any of the themed areas with no problem.  Since Harry arrived, guests often flock to the wizarding world and stay huddled there for most of the day.  The good news is that guests who are interested in riding other rides often find little wait time.  The bad news is that guests who are interested in visiting Harry's world often find that the 20 acre world fills up incredibly fast and many people are unwilling to leave once they get in, with good reason.  Once the crowd is at maximum capacity, Universal employees rope off both entrances to the area and begin to issue timed entrances just to get into the world.  (This does not mean that once you get inside you will have less of a wait time.)

Wizards from Durmstrang Institute and Beauxbaton Academy

Ron and I arrived at the entrance to Islands of Adventure at 8:00 a.m.  The park was set to open at 9:00 a.m. and guests who stayed on Universal property were able to enter the park one hour prior to its opening.  It was incredibly frustrating watching hundreds of people dart right past me for those 30 minutes, but at 8:30, the "regular" folk were let in and shuffled off to the left of the theme park, headed in the direction away from Harry Potter.  After walking like penguins for about 10 minutes, we were stopped at Toon Lagoon.  Universal employees began to give us a speech, "We will take you the safest way in . . . absolutely no running . . . you will be waiting in many lines today, this is just one of them . . ."  At 8:55 a.m., we started to head over to WWOHP.

A few years ago, Ron and I went down to Orlando for a marathon weekend in January.  We had checked out Islands of Adventure one of the days we were down there and were blown away by the lack of wait times.  Ron rode the Hulk within the first 3 minutes of our entrance inside the park.  Spiderman's wait was 2 minutes.  We rode Jurassic Park's River Adventure within 5 minutes of entering the ride queue.  All of the "wait" time was spent walking through the queue just to get to the ride entrance.  Once we got there, we had a boat entirely to ourselves.  We had literally covered all of Islands of Adventure, including random rides like the Seuss trolley, within 2 hours of the park's opening.  On Wednesday, I'm pretty sure that anyone visiting Islands of Adventure could have done the same thing, save for the WWOHP.  Every single person was headed in that direction.  There were absolutely no wait lines for any of the other rides.  I am so grateful that Ron was being such a good sport and did not suggest any diversions.  I'm sure he wanted to, but he saw the look in my eyes, knowing that it was not even an option, and kindly kept quiet.
Top of Hogwarts and Village of Hogsmeade
Eventually, we made our way to the entrance of Hogsmeade.  In the series, Hogsmeade is the only all-wizarding village in Britain.  It was the ideal choice of location to feature in the WWOHP because of its proximity to the Hogwarts castle.  It is often featured in the books because 3rd year + students are sometimes allowed to visit for weekend trips with permission.  There is also a hidden path from Hogsmeade to Hogwarts that is often frequented by the Weasley brothers and Harry.  The High Street is home to shops like Zonko's Joke Shop and Honeydukes Sweet Shop.  It is also located near the train station used by the Hogwarts Express, the train that the students board at Kings Cross in London on platform 9 3/4, to get to and from Hogwarts.

Entrance to Hogsmeade off of The Lost Continent
I am not going to lie.  The minute that we rounded the bend and I saw the Hogsmeade archway and the snowcapped buildings, I started to tear up.  I was honestly in complete amazement and I felt just as Harry did when he encountered the magical world for the first time (Harry's first experience was at Diagon Alley in Harry Potter and the Sorceror's Stone).  The WWOHP was absolutely mind-blowing, of course to no surprise.  Construction of the world cost nearly $236 million and J.K. Rowling (author of the Harry Potter series) had a huge role in ensuring the park's success, doing everything from overseeing the park's layout and approving the recipe for Butterbeer.

Hogsmeade
As we walked into Hogsmeade, I cannot imagine the look on my face.  The Hogwarts Express, complete with billowing steam and the iconic whistle, was to my right.  Zonko's Joke Shop and Honeydukes Sweet Shop was to my left.  Directly in front of me were more magical shops, restaurants, and a Butterbeer truck!  There were also a ton of people, as you can tell from the picture, but this was nothing near what we saw later in the day.  Thank goodness we opted to go first thing in the morning.  Despite the crowds, for a theme park, everyone seemed pretty respectful of everyone else.  Everyone is trying to take in as much as possible, so people are kind enough to get out of your way if you want a photograph.

Frozen Mug of Butterbeer
My first stop was to grab a Butterbeer.  Butterbeer, as mentioned previously, is a drink of choice among younger wizards.  It tastes like a buttery-shortbread-cream soda-butterscotch treat.  We forked over the $11.95 for the frozen version with the commemorative mug while Ron opted for the regular version.  Now, I'm not usually a theme-park diner.  I have been known to pay $5 for a regular apple at places that only sell caramel apples.  But, this was a once in a lifetime experience, so I downed the entire frozen butterbeer on our walk over to Hogwarts.  This would later turn out to be a stupid idea considering I hadn't eaten breakfast and was loaded on nothing but sugar for the 5 hours before lunch.  But, it was totally worth it at the time.  Butterbeer is so delicious!  And if you are wondering, the WWOHP's Butterbeer was 100 times better than the Butterbeer I made at home.  I'm pretty positive I totally mis-measured with that recipe... oops.

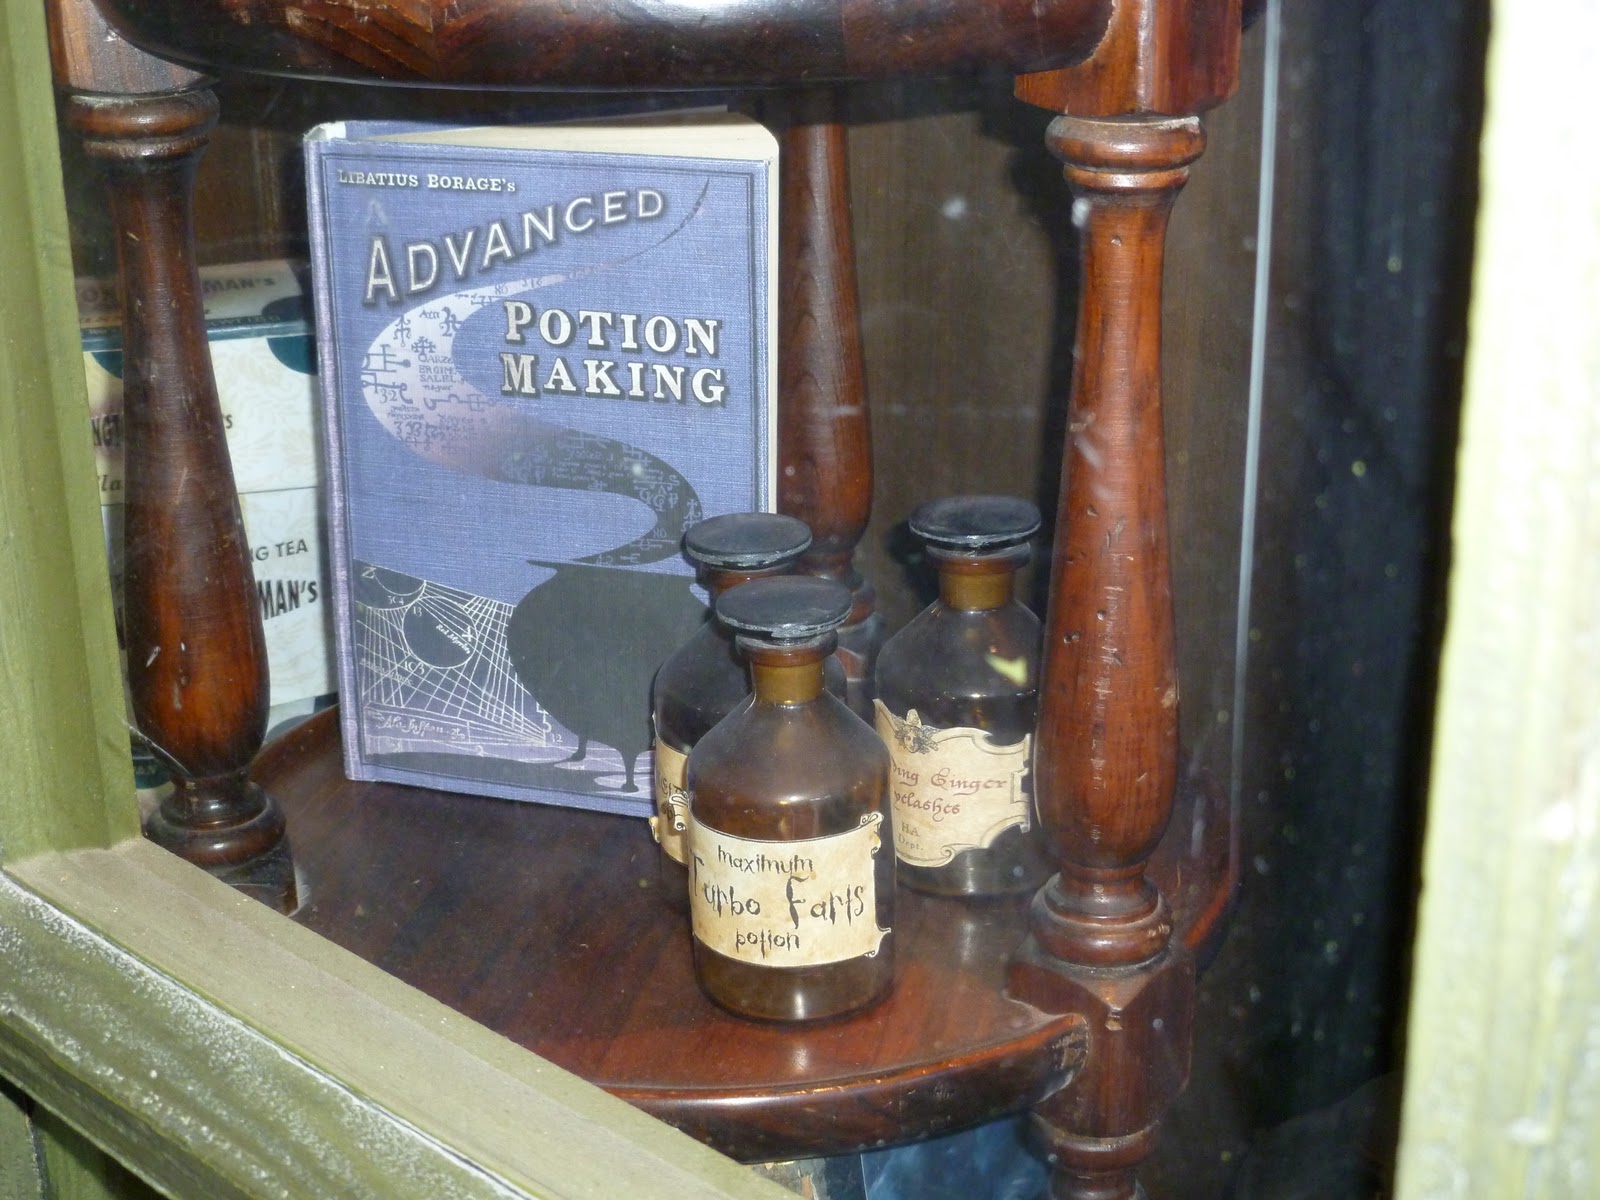
Potages Cauldron Shop
I grabbed tons of pictures as we continued to head towards the main attraction, the Hogwarts castle.  Hogsmeade is filled with tons of side shops that are display shops only, meaning that visitors can not go inside.  However, this certainly does not take away from the experience because the shop windows are full of magic!  I was blown away by the level of detail that went into these shops:  authentic looking magical books complete with wizard photos (in the wizard world, the people in the pictures are able to move from photo to photo), wands hanging seemingly from midair, Potages cauldron shops (this shop is in Diagon Alley, but a "branch" was moved to Hogsmeade for theme park purposes), musical instruments playing themselves, a plant store where baby mandrakes scream, and wizard robes being measured by a tape measurer at Gladrags Wizardwear.  The details were endless.  We passed a few more Butterbeer drink trolleys with other wizard staples such as pumpkin juice.  I didn't buy any pumpkin juice because I hadn't heard the best reviews, but the bottles looked fun!  We also passed near the Gringotts Bank, aka a standard ATM but themed to the goblet bank as featured in Harry Potter.
Standing in line after entering Hogwarts grounds.
RIDE SPOILER ALERT:  The main attraction inside the Wizarding World is the ride inside the Hogwarts castle.  Hogwarts School of Witchcraft and Wizardry is the heart of the Harry Potter series.  It is here where wizards attend school for 7 years (ages 11-17) and is featured in every single book in the series.  The wait for the main attraction, Harry Potter and the Forbidden Journey, was about 90 minutes when we arrived, but we didn't care.  With butterbeer in hand, we got in line.  The ride is "the forbidden journey" because the castle is forbidden to muggles (non-wizard folks).  The line weaves its way inside the castle and guests can interact with various characters and props from the Harry Potter series through-out the queue.  You'll recognize the Mirror of Erised and the Hogwarts house jewels.  You'll stand in the Herbology greenhouse where plants line the lights above and mandrakes are planted and contained in a cage.
Map of the Hogwarts Castle grounds

One of my favorite props was the map of the Hogwarts grounds.  (Did you know:  when the film-makers were first creating the sets for the movies, they contacted J.K. to receive help on the layout.  She quickly drew up a sketch of the grounds and the map hung on a bulletin board inside the director's office at Leavesden Studios for the entire ten years that the series was filmed?).

Wizard portaits that move and talk to other Wizards
You'll encounter talking portraits and meet all four founders of Hogwarts School of Witchcraft and Wizardry: Godric Gryffindor, Salazar Slytherin, Helga Hufflepuff, and Rowena Ravenclaw.  You weave past the giant gargoyle that guards Dumbledore's office and then head directly into Dumbledore's office where an incredibly life-like Dumbledore extends a welcome to all Muggles, directing them to Professor Binns lecture on the history of the school.  You next head into the Defense Against the Dark Arts room where various dark magical objects are placed through-out.  Then, the lifelike trio appears from under the Invisibility Cloak, and directs all guests to meet them in the Room of Requirement to sneak out to a Quidditch match.  Ron Weasley casts a spell and depending on how long you are in the room, you might experience one of several different spells.  We got snowed on before we were ushered out of the room but I did hear a different spell cast while we were leaving.  The sorting hat also makes an appearance.  Shortly after you see the hat, you are almost ready for the ride.  You're ushered onto an "enchanted bench" and off you go!
Chalkboard inside the Defense Against the Dark Arts room
The ride itself is a one of a kind experience.  It is an amazingly faithful recreation of the Harry Potter series in its entirety.  The ride uses cutting-edge technology that includes a high-tech robotic arm device and a high-def video projection system that creates 3-D holograms.  Basically, you sit in your enchanted bench and the arm moves you from scene to scene.  Some scenes are animatronics and others are movies.


After you are locked into your bench, Hermione casts a spell, dusts you with floo powder and off you go!  The robot arm moves you insync with the film footage that is projected before you and you fly off to the Astronomy Tower.  After you depart, you get an unbelievably gorgeous view of the castle and you begin flying with Harry and Ron around Hogwarts.  Then Hagrid asks if you've seen a loose dragon!  Naturally, the dragon appears moments later and the movie switches to a real set where you fly through burned debris and encounter the dragon himself, complete with smoke and heat.  Next, you encounter the giant spiders, called Acromantulas, that first made their appearance in Harry Potter and the Chamber of Secrets.  SO, SO GROSS!!  This is definitely not a scene for those who are afraid of spiders.  I kept my eyes shut for nearly the entire time on my first ride through because I was going to faint.  The spiders are giant, incredibly life-like, and actually squirt fake water-venom on you.  Poor Ron had his mouth open at the time.
Entrance to Hogsmeade from Jurassic Park

Hermione gets you out of the spiders but then you are warned to watch out for the Whomping Willow, a magical enchanted tree that fights back whenever anyone goes near it.  It was here that my initial experience started to go downhill.  You never go backwards or upside down on the ride, but the robotic arms tip you all the way onto your back and it makes for a very bumpy experience.  My stomach, full of nothing but sugary Butterbeer, started to lash out.  The Whomping Willow throws you back into the film and into the Quidditch pitch while a Quidditch match (wizard sport) is taking place.  The scenes are incredible as you actually feel like you are flying in the middle of a match and Malfoy (Harry's enemy) appears long enough to insult Harry ("Showing off for your Muggle admirers, Potter?").  But, as quick as the match appears, it disappears after it is interrupted by a dementor (dark magic guards of the Wizard prison) attack.  Harry leads you away but your bench falls into the Chamber of Secrets and you are then shifted back into the world of animatronics.  You see the snakes curled up in the chamber and the dementors surround you but Harry arrives to cast the "Expecto Patronum" spell to repel the dementors and save you.  But then the Chamber begins to cave in and you need to quickly escape!  Thankfully, you do, and you enter back into the movie footage, flying over the Black Lake and then into the Great Hall where students, professors and Dumbledore congratulate you and welcome your return.

Store window outside of Dervish and Banges

RIDE SPOILER ALERT ENDS:  Honestly, I was blown away.  I have never experienced such a ride in my entire life.  But, as mentioned above, I did start to get quite ill in the middle.  I was so disappointed with my stomach for making the ride slightly less enjoyable on the first time I rode it!  But, I got some food in my stomach to sop up the Butterbeer, braced myself for the experience and rode it again later in the day and absolutely loved the entire thing.  It is honestly amazing.  Perhaps the best tip I read before visiting WWOHP was to do the following:  Wait in line to experience the queue's special effects at least once and to ride the ride with other members of your party.  After this, go back through to experience the queue again as a walking tour without going on the ride.  After this, ride the ride subsequent times as a single rider, but leave carry-on items or bags with other members who are not riding at that same time.  Leaving your bag behind is important because once you get into the castle, you are directed to stow your bags in a locker.  You are not able to go into the single riders line until you get past this point.  The line for people riding with bags is usually completely full as people have spent the morning shopping, whereas the line for people riding without bags is usually nonexistent.  Once you are directed to go up the stairs as a single rider, you bypass all of the excitement inside the queue, but you literally get to ride the ride within minutes of arriving at the front.  I left Ron at the front of the castle with my bag, walked up the stairs, rounded the corner, and got seated immediately.  The ride was 4 minutes long and I was back to Ron within 7 minutes.  He had the same experience.  Totally worth it, even if it means not experiencing the ride with your family or friends.
Inside the Hogs Head
Ron and I did not elect to eat inside WWOHP.  I had done a lot of research before arriving at the park and basically knew that I was not going to particularly enjoy the options.  The main restaurant is The Three Broomsticks, a popular pub located on High Street and well-known in the series. The inside looks exactly as portrayed in the films.  The menu includes authentic British fare with entrees like fish and chips, shephard's pie, Cornish pasty, and turkey legs.  We didn't stick around inside for too long because the employees were kind of mean if you didn't intend to eat there, with good reason I suppose.  Next to the Three Broomsticks was the Hog's Head.  The Hog's Head is a pub that attracts more unusual guests as many are known to hide their faces.  In the series, the barman is Aberforth Dumbledore, the brother to Hogwarts Headmaster, Albus Dumbledore.  The Hog's Head has had quite a profound impact in the series as it was here that Sybill Trelawney revealed the prophecy to Professor Dumbledore which connected Lord Voldemort and Harry, ultimately sealing their fate.  It is also where Dumbledore's Army met for the first time in Harry Potter and the Order of the Phoenix.  It plays a huge role in Harry Potter and the Deathly Hallows, the seventh and final book, serving as an entrance and evacuation point before the Battle of Hogwarts (to be seen in Deathly Hallows Part Two this July).  The snarling hog behind the bar made for a great effect.  The pub has its own exclusive brew, Hogs Head Ale, that Ron drank and enjoyed while I sampled.
Enchanted flying brooms inside Dervish and Banges

Tons of Harry Potter merchandise can be purchased inside the park.  Caution:  You can go broke here.  After exiting the Forbidden Journey ride, you can stop at Filch's Emporium and purchase tons of replicas from the Potter films such as clothing, frames, stuffed animals, and other souvenirs.  Dervish and Banges sells Quidditch supplies, wands, other magical merchandise, and is attached to the Owl Post.  At the Owl Post, you can buy post with Owl stamps and receive a Hogsmeade seal to mail out from the village.  The line to get into the Owl Post varies during what time of day you go, but it took me about 60 minutes total to get inside, pay for and quickly write my postcards, and mail them.  After placing my post in the slot, I was told that my owl would pick up my post and take it out to deliver that night.  Naturally, I wrote one to myself.  I can't wait until it arrives!
Puking Pastilles and Extendable Ears at Zonko's Joke Shop
Other merchandise can be purchased at Zonko's and Honeydukes.  At Zonko's, the store sells various toy and joke magical gifts from the series such as puking pastilles.  The number of items in this store is endless and it was nearly impossible to get an idea of everything that was there because of the crowd.  But, I decided that it was well worth it to buy a jar of "U No Poo: The Constipation Sensation That's Gripping the Nation."  In Harry Potter and the Half-Blood Prince, Fred and George Weasley debut their joke shop, Weasleys' Wizard Wheezes, and advertise for "U No Poo" on a window outside their store.  It is essentially just a jar full of green M and M's that I will likely never eat, but it was well worth the $5 to have such a fun souvenir.
Inside Honeydukes Sweet Shop
Cauldron Cakes inside Honeydukes Sweet Shop
Honeydukes is one of the most famous wizarding confectionaries in the world.  In Harry Potter and the Prisoner of Azkaban, Harry enters the sweet shop illegally using a trapdoor in the cellar.  Inside Honeydukes at WWOHP, you can find all of the famous sweets that are mentioned through-out the series, such as chocolate frogs, acid pops, cauldron cakes, and treacle fudge.  I decided not to grab anything from inside Honeydukes, not because I didn't want anything but because the line was horrendously long!  To purchase an item inside Honeydukes, the wait was about 45 minutes.  Later in the day, I saw a wait of about 60 minutes just to get inside Honeydukes.  One of the employees was actually swearing quite loudly because she couldn't get around people with the trolley to restock the shelves.  All of these stores were so small inside and it was somewhat maddening to try and navigate your way through them.  Although slightly less magical, a wonderful tip is to acknowledge that the Universal Orlando store inside the Orlando airport sells a number of Harry Potter souvenirs, mainly the notable "popular" items.  You can buy replica wands, robes, clothes, stuffed animals (Buckbeak, Pigmy Puff, Fluffy, Hedwig), keychains/magnets, candy (chocolate frogs, acid pops, bertie bott's every-flavour bean), quaffle toys, sneakoscopes, mugs, and many other items before boarding your plane.  You can also purchase all of the merchandise online at the Universal Orlando Wizarding World store.
Ollivanders Wand Shop

The one attraction that we did not do was Ollivanders Wand Shop.  In the series, Ollivanders is located in Diagon Alley, but a branch was placed in Hogsmeade to serve as an attraction.  Ollivanders is where a wand chooses its wizard, aka where wizards get their wands before they head off to Hogwarts  I feel almost guilty admitting this, but I elected not to do Ollivanders even before we left for Orlando.  The reason:  several sites recommended against it if you did not have children.  Once we got down there, I quickly decided that my decision to avoid it was the correct one.  The line was absolutely insane (120 minutes; mostly waiting outside in the 90 degree sun) and the shop inside was so tiny and people are escorted in 20 at a time.  So, sadly I cannot provide a first-hand experience with the wand shop, but because I have read what occurs inside I know that Ollivander typically chooses one child to test a variety of wands until the right one is found.  The special effects during the testing phase are similar to Harry's experience in Sorceror's Stone:  shelves break with the bad wands and lights shine, wind blows, and music pipes when the right wand has been found.  After the experience, everyone is escorted into Dervish and Banges to purchase a souvenir wand.  I have read that if you dress your child in some type of Harry Potter related article of clothing, he/she has a better shot at getting chosen.  I've also read that it is important to get into this line first thing in the morning.
Sign encouraging TwiWizard champion Harry Potter
Ron elected to go on the Dragon's Challenge roller coaster by himself.  I can't go upside down on rides.  This is a proven fact, several instances of illness have confirmed this each and every time I have gone upside down, and as my initial experience with Forbidden Journey was somewhat discouraging, I decided not to test it as I was having the BEST DAY EVER.  Thus, I stayed off while Ron rode the coaster and it was during this time that I visited Honeydukes, Zonko's, and just sat down and took in the scenery.  Afterwards, Ron told me that I had to walk through the line to see some of the props because they were awesome.  One fantastic thing about the WWOHP is that they allow you to go through the queues to experience the props and scenery even if you are not riding.  This ride is themed to the fourth book in the series, Harry Potter and the Goblet of Fire, in which Harry and 3 other wizards participate in the Triwizard tournament.
Enchanted floating candles

The first task for the wizards is to capture a golden egg while fending off a dragon.  The ride is a high-speed roller coaster in which two of the dragons (the Hungarian Horntail and the Chinese Firebolt) swoop and swirl through-out the sky, nearly colliding at one point (Ron was in the front and almost had a heart attack when he saw the oncoming coaster!).  This ride is somewhat "borrowed" from a previous Universal attraction, the Dueling Dragons, but Ron loved it nonetheless.  As you walk through the queue, you see encouraging signs dedicated to each of the champions.  You can also get a beautiful view of the castle from this line.  Other notable appearances are made by Mr. Weasley's enchanted car, the Triwizard cup itself, the golden eggs, and some very cool floating candles!
Hagrid's Hut
Flight of the Hippogriff is the last ride in WWOHP.  Like the Dragon Challenge, it served as a previous coaster, The Flying Unicorn, but was re-themed for the WWOHP.  This is a shorter, more kid-friendly roller coaster that features Buckbeak, the Hippogriff.  Buckbeak made his Harry Potter debut in the third book, Harry Potter and the Prizoner of Azkaban, and was Hagrid's pet before he saved Sirius's life and went to live with Sirius.  As you walk through the line queue, you see an amazing replication of Hagrid's hut.  The ride itself is very short, but it's fun to ride for a quick thrill, especially for younger kids.  However, if you have limited time in Harry Potter and if the line is over 20 minutes long, I wouldn't advise waiting around.  The only thing that you will really miss is watching a life-sized version of Buckbeak bow to you as you go up the first hill.  Naturally, I forgot to bow back, but whatever.  I was too excited and completely giddy the entire day.  I think I need to go back with a much calmer frame of mind to actually remember the experience!  For this ride, you can always walk through the line to take a picture of Hagrid's hut and Buckbeak in his nest if you don't have the time to ride the ride..
Gilderoy pays a visit!
Honestly, the park is incredible for wizard lovers and non-wizard lovers alike.  Of course, being a fan of the series and the movies will certainly help you understand the minute details and story-lines themed throughout (I'd recommend brushing up on the topic if you are unfamiliar), but the enchantment is enough to take your imagination to a new level.  The amount of detail in this park is just truly remarkable.  I ventured down some tiny back alley, one that is used for Universal employees and not frequented much by Muggles, and discovered more magic!  The window that connects to the Three Broomsticks makes noise as though dishes are being washed, magically, on the inside.  Combine that with Moaning Myrtle's bathroom visit, the Harry Potter themed music through-out the park, the Hogwarts conductor, the visit from the frog choir, and the tremendous amount of magical detail in every small crevice of this park, and anyone is sure to have a good time.
The Hogwarts Express

I'm certain that this park is going to be an amazing experience for everyone for a very long time.  The Forbidden Journey will likely take theme park rides to a whole new level and parks around the world will need to reconstruct their own ride experiences to match that of the one inside Hogwarts!  It was amazing experience and I am so glad we were able to go.  We stopped back a few times during the day, but most of our WWOHP experience occurred from 9:00 a.m. - 1:00 p.m.  The crowds at WWOHP seemed to triple throughout the day.  We stayed in Islands of Adventure until around 6:00 and went on several other rides.  Worth noting was that I was less than impressed with Spiderman after riding the Forbidden Journey.  The new technology just blew Spiderman's 3D experience out of the water.  Though, Spiderman still rocks, I'm wondering if other spots in Universal are going to start upgrading.
Main Street, Magic Kingdom, Orlando, FL
The Disney portion:  Usually, I am such a die-hard Disney fan.  But, this trip was dedicated to Harry and I have to admit that he took the cake.  However, our day with Disney World was magical as always.  On Thanksgiving, we woke up at 7 a.m. to head to the Disney parks.  We were at Magic Kingdom by 9 a.m. and decided that getting soaked on Splash Mountain was an appropriate first ride of the day.  We got our FastPass for Thunder Mountain, checked out the new updates to Winnie the Pooh, then made our way to Epcot where we took in a few rides, got our FastPass for Soarin', which had a 120 minute wait at all times through-out the day, then walked around the World Showcase.  I had made reservations well in advance (highly encouraged no matter what time of year you are going) and we ate a delicious Thanksgiving meal at Rose and Crown Pub in the United Kingdom.  Then, we took the ferry over to MGM Hollywood Studios where we watched the Indiana Jones stunt show, the 3D Muppet show, and waited for 80 unfortunate minutes to ride the Toy Story ride for our first time.  I kicked Ron's butt:  his score - 91,000, my score - 131,000.  Toy Story - eh, not so much.  It kept breaking down.
Lights at Osbourne Spectacle of Lights
After leaving, we walked over to the backlots to experience the Osbourne Spectacle of Lights.  They were absolutely breathtaking.  Then, we boarded the ferry back to Epcot to ride Soarin' and to grab a quick bite for dinner.  After Illuminations, we made our way back to Magic Kingdom where we finished the day with some more fireworks and some glorious Celebration Fudge from Mickey's Confectionary.  We were on the shuttle back to our hotel at 11:30 p.m., exhausted and with some serious cramping in our legs, but feeling as though we totally got our money's worth for the Park-Hopper pass.  That greedy little mouse took $289 from us on Thursday, but we showed him that we could totally make the most of it by spending 15 hours in his parks!

On Friday morning, we left.  We were in Orlando for such a short visit this time around and I honestly think it was best.  Originally, I was bummed that we weren't staying for longer, but I don't think I could have taken much more.  The first week in January seems to be a really good time to go.  It can be a bit chilly, but crowds are sometimes nonexistent and I was just not loving the crowds in the parks at this time of year.  But all in all it was an absolute wonderful visit.  When we originally made the trip, it was to check out the site for our then-planned May wedding.  Though plans shifted and I was seriously bummed when we saw the venue (wedding plans again!?!), the trip was a success.  The only downfall was being far from our families on Thanksgiving, but luckily, Christmas is right around the corner and our visit back to the 'Burgh is quickly approaching!
Side view of Enchanted Cinderella's Castle