Search My Blog!!

Showing posts with label Cookies. Show all posts

Thursday, December 29, 2011

Double Chocolate Peppermint Patty Cookies

When we lived in Minnesota, I LOVED going to the grocery store. Not just because I love grocery shopping, but also because I would treat myself at the check-out line. I'd grab an individual piece of candy (if at Kowalski's: it was a sea salt caramel, or if at Byerly's: it was a chocolate, pecan, caramel thing) and savor it when I got in the car. I never kept candy in the house so the grocery store was the only time I'd indulge. In fact, the candy was so traditional, that the one time I did not get a piece of candy, I was stopped by a police officer for speeding. Gasp! (In my defense, we had just moved into the neighborhood and I had no idea what the speed limit was. No no, that's not an excuse but it does play some relevance to the situation. It was my first ticket in years and I was not going very fast but I was crossing over an uphill bridge that apparently was 30 mph because I was in a residential area. Ooops. But I must put partial blame on Ron for this incident. I had asked him to grab me my candy as I ran elsewhere to finish another task. Apparently, the noob thought it was wise to buy his own piece of candy, never offering to share it and I was left without any candy, and I might have been upset about this and probably yelling about the fact that I had never left the Highland Park Lunds without a piece of Lunds chocolate.)

Nowadays, I've kicked it up a notch. Anytime I am at the Metropolitan Market, I leave with several dark chocolate miniature mint patties. Like my favorites from Minnesota, these candies are locally made and just delicious. I just can't get enough of them. I go on and off with my love for mint and mocha but when it is here, it is in full swing. As a kid, I always turned to Mint Chocolate Chip ice cream at the ice cream shop. I've been obsessed with Junior Mints ever since Kramer knocked one into that person's body cavity during that episode of Seinfeld where him and Jerry watch a surgery. I share my mom's love of York Peppermint Patties. I often indulge in peppermint hot chocolate. So when I first tried these mints after moving to Seattle, I was instantly hooked. And I have to leave with several because I don't have a car on most days. In Minnesota, I used to find reasons to go the grocery store "for groceries" just so I could get my candy. Now, I don't have that luxury as the grocery store is a 2 mile walk up a steep hill. Not terrible but also not pleasant in a downpour. Thankfully, I exercise restraint when it comes to the mints when they are in the house. They have a special place in the pantry.

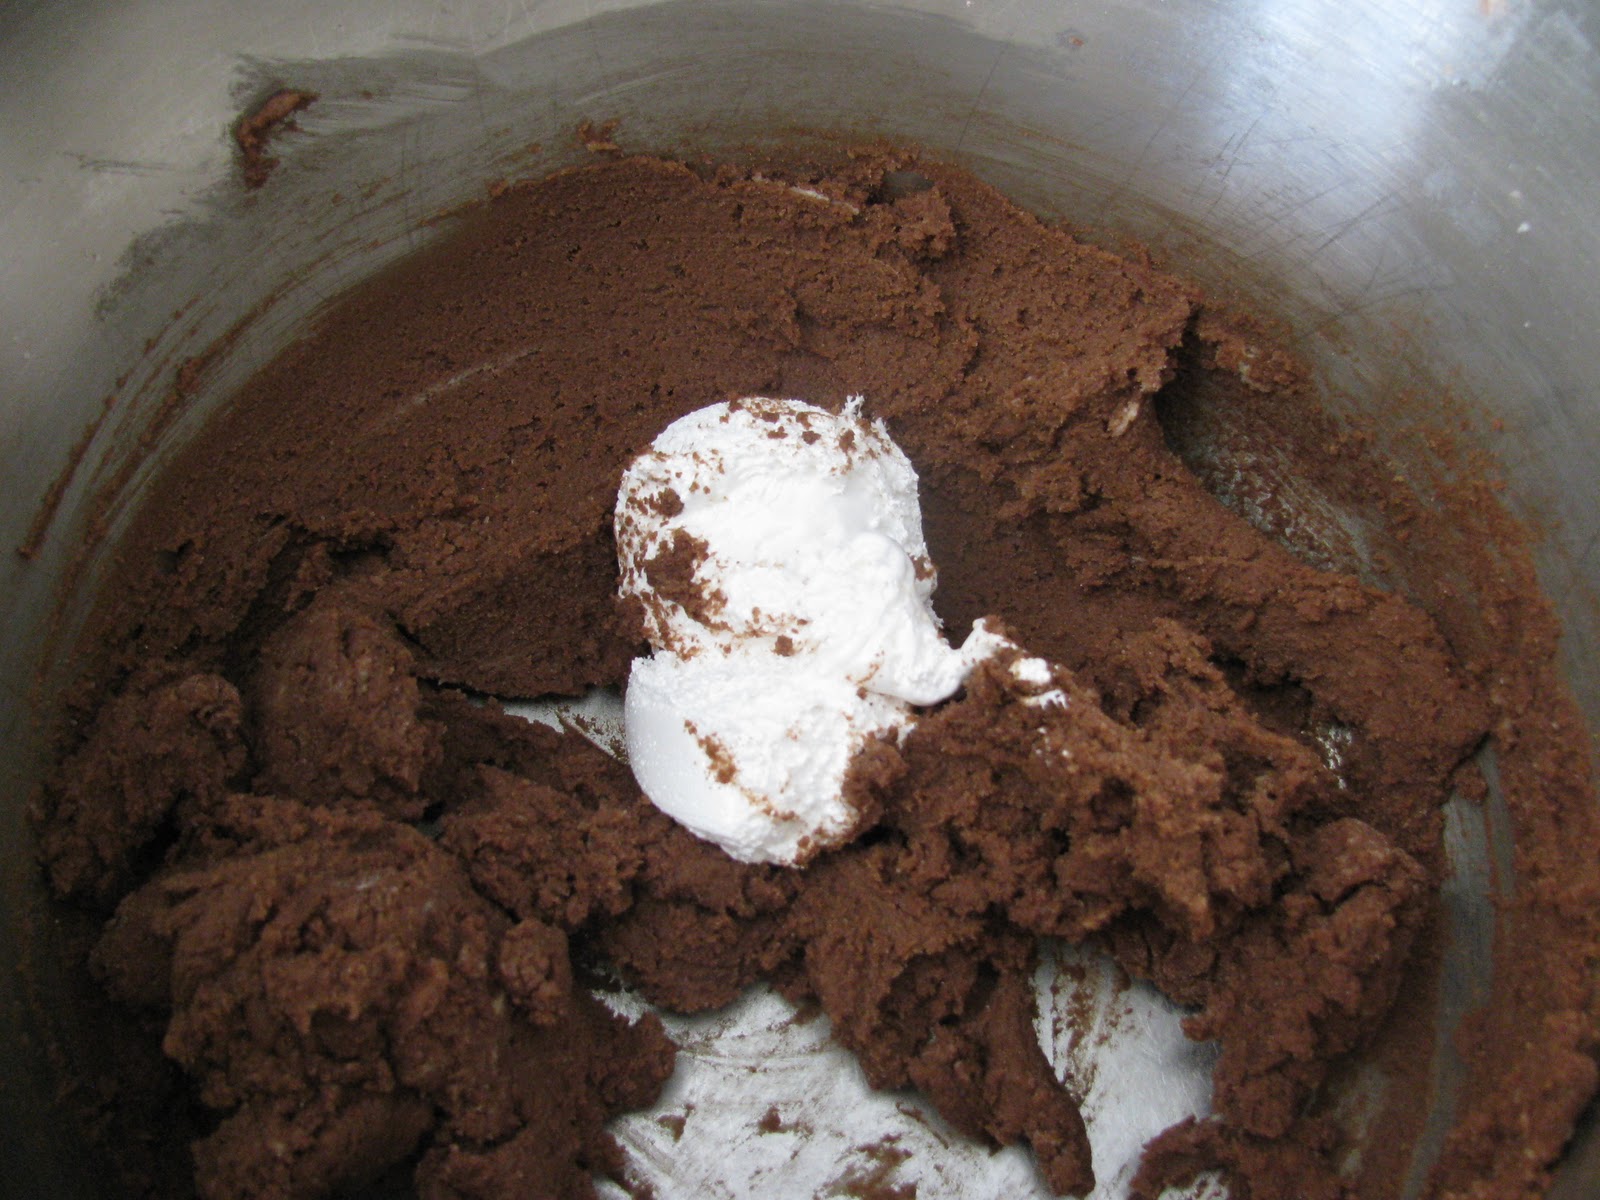
On our recent trip back to Seattle, I picked up a copy of Every Day with Rachael Ray for reading pleasure on the plane. It's not very often that I find a recipe that appeals to me so much that I simply must make it as soon as I see it. But that's pretty much how I felt with these mint cookies. I had been craving thin mints and knew that this cookie would be off the hook! I decided against using my locally made peppermint patties. Reason being, they are a bit bigger than typically miniature York patties and they also cost about $.69 a piece! I cut the recipe in half to make 12 cookies but felt the York would work better here because it was an appropriate size. And they did. These cookies are the best cookies I've ever made. And that's saying something because I've made a buttload of cookies in the past several years. They are soft, chocolately, fudgey, minty, and incredible. If you like the chocolate and mint combination, you absolutely must try these! The recipe takes some planning because it needs to be chilled. The chocolates need to be chilled as well. I found that it worked best to press out the dough and have a helper stand near the fridge to take out a piece of chocolate one at a time.
Thanks, Mom and Dad for the external flash! I've been slowly learning how to take pictures with my new DSLR camera. The flash comes in handy during late night photo sessions!
Double Chocolate Peppermint Patty Cookies
from Every Day with Rachael Ray
Yield: about 24 delicious cookies
Ingredients
  • 1 1/2 cups flour
  • 1/2 cup unsweetened cocoa powder
  • 1/2 cup granulated sugar
  • 1/4 cup light brown sugar
  • 1 tsp salt
  • 1/2 tsp baking soda
  • 1 1/2 stick (6 ounces) unsalted butter, slightly softened
  • 1 egg
  • 24 miniature (about 1 1/2 inch) peppermint patties, such as York, unwrapped and chilled
  • 6 oz. white chocolate (not chips), chopped (Note: I used chips here. Take that!)
  • peppermint candy canes, crushed, optional (I did not use these.)
Instruction
  1. Using an electric mixer, beat the flour, cocoa powder, both sugars, salt and baking soda on low speed. Beat in the butter, then the egg. Turn out the dough onto a large piece of plastic wrap and flatten into a disk; seal. Refrigerates until firm, about 1 hour.
  2. Preheat the oven to 350 degrees. Line 2 large cookie sheets with parchment. Working with 1 Tbsp of dough at a time, use your fingers to evenly encase each peppermint patty with dough. Place on the prepared pans and smooth the dough with your fingers. Bake, switching the pans halfway through, until just firm to the touch, about 15 minutes. Remove the pans from the oven and let cool slightly. Transfer the cookies on the parchment to a rack to cool completely.
  3. Melt the white chocolate in the microwave or in a double boiler. Drizzle the white chocolate over the cooled cookies. If using, immediately sprinkle the crushed peppermint candies over the cookies. Let set completely before serving or storing.

Thursday, December 8, 2011

Soft Frosted Sugar Cookies

I'm here. And I'm hanging in there. I've been wanting to blog. When Ron mentioned to me this morning that he recently saw my previous post - and said no one would ever read my blog again because it was so sad - it made me realize that I miss cooking, and food, and blogging! I wanted to take the time to thank everyone who reached out to me over the past few weeks. I appreciate your kind, heartfelt words and I cannot begin to tell you how much your support means to me. Thank you.
We're adjusting to a household without Salem... but it's been a little bit tricky. This is the first semester of finals that I haven't had her on my desk, kicking me and spilling coffee all over my books. I attribute most of my law school success to Salem. :) Before a final, I used to teach her everything there was to know about a subject. What the heck am I going to do come January when it's time to start studying for the bar exam? Cali tends to swat at me when I'm being too loud around here... so I suppose its back to studying like a "normal" person.

It's been rather busy around here. Recently, I finished a 71 page paper. Yep, 71 pages. Honestly, if you were a professor and you saw a 71 page paper in your inbox, what would you think? It was quite a project. But it's complete. Phew. I also finished up an externship with a local attorney who opened his own Immigration Firm in Seattle. He is a Mitchell grad, extremely down to earth, very successful, and working with him saved me from me over these past few months. I felt bad for him; he was the only social interaction I had apart from Ron, so some days I was likely a bit too amped for work. Now I'm studying for finals... annnddd getting ready for our wedding!! It's so crazy that our wedding day is almost finally here. 15 days to be exact. Ron and I have been together for nearly 8 years. We already feel married, obviously, but there's something to be said about a formal ceremony surrounded by your family. We're having a small, intimate ceremony on the evening of December 23rd. Honestly, I would have loved to have planned a big gathering with all of our family and friends. But we plan to have a lovely dinner with my parents, Ron's parents, our siblings and their significant others. Christmas in Pittsburgh with some wonderful holiday music and wine. Naturally, we're a bit behind the ball when it comes to our planning, so thank goodness this is untraditional. Ron just got his suit... his alterations are supposed to be done a few days before we leave. And I think he ordered his cufflinks too late so they probably won't arrive before the wedding. And me? Well, dress #1 became X-rated when it fell off of me. After realizing I lost some unplanned weight and realizing that dress #1 looked like I was draped in a really pretty garbage bag, dress #2 fits beautifully.

I haven't been doing a whole ton of cooking lately. I'm still dealing with that pesky stomach thing so my appetite has been a bit off. But, I'm also avoiding the kitchen for big meals because I'm burning everything! I remember back in 2007, when I was studying for the LSAT, and I was a bit preoccupied. I messed up boxed mashed potatoes three times before I finally got it right. So, you can imagine what happened when I tried to cook something for Thanksgiving dinner this year... oh my. Think kitchen disasters. I'm not exaggerating. I did decide to bake the other day. I was rummaging through some recipes that I had saved a while back and stumbled upon these sugar cookies. I have to admit that while sugar cookies are not my ultimate favorite, I do enjoy them... particularly those ones that you can get from the grocery store that are just so sweet that your teeth hurt. I don't think I'd choose a sugar cookie over another type of cookie but sometimes you are just in the mood for a specific type of cookie. And on this particular day, I was in the mood for a really good sugar cookie. Have no mistake. These cookies are not healthy cookies. But they are really quite good. They are as soft and fluffy as sugar cookies get. So if you are a sugar cookie fan, I highly suggest you add these to your holiday cookie spread. Note: the recipe calls to chill the dough for one hour, so plan accordingly. Enjoy!
Soft Frosted Sugar Cookies
Annie's Eats
Yield: about 2 dozen large cookies
Ingredients
For the Cookies
  • 4 1/2 cups AP flour
  • 4 1/2 tsp baking powder
  • 3/4 tsp salt
  • 1 1/2 cups (3 sticks) butter, at room temperature
  • 1 1/2 cups sugar
  • 3 large eggs
  • 5 tsp. vanilla extract
For the Frosting
  • 5 cups confectioners' sugar, sifted
  • 1/3 cup (5 1/3 Tbsp) unsalted butter, melted
  • 1 Tbsp vanilla extract
  • 7-8 Tbsp milk (plus more, as needed)
  • Food coloring (optional)
  • Sprinkles (optional)
Instructions
  1. To make the cookies, preheat the oven to 350 degrees F. Line baking sheets with parchment or silicone baking mats. In a medium bowl, combine the flour, baking power and salt, and whisk together to blend. In the bowl of an electric mixer, combine the butter and sugar; beat together on medium-high speed until soft and fluffy, about 2-3 minutes. Beat in the eggs one at a time, mixing well after each addition and scraping down the bowl as needed. Blend in the vanilla. With the mixer on low, add in the dry ingredients just until incorporated and evenly mixed. Cover and chill the dough for one hour.
  2. When you are ready to bake the cookies, scoop a scant quarter cup of dough and roll it into a ball. Flatten the ball slightly and place on the prepared baking sheet. Repeat with the remaining dough, spacing the cookies at least 2-3 inches apart. Bake about 10-12 minutes or just until set. (Do not overbake. The edges should be no more than very lightly browned, if at all.) Let cool on the baking sheet for several minutes before transferring to a wire rack to cool completely.
  3. To frost the cookies, place the confectioners' sugar in a medium bowl. Add the melted butter, vanilla, and milk and whisk until smooth. Add additional milk as necessary, 1 tsp at a time, until you reach your desired consistency. If desired, tint with food coloring. Frost the cookies and top with sprinkles if desired. Enjoy!

Monday, August 22, 2011

Homemade Oreos

I'm still here. But I've been away from my computer. We've had beautiful, gorgeous weather here in Seattle. I think I understand now why people live here! It might suck in the winter but my goodness, I've really begun to appreciate the scenery. It's mesmerizing. And because so many people have told me about the dreary, cloudy, sludgy winters, I think that subconsciously I've been forcing myself to spend every waking second outside to bask in as much sunshine as possible. I obviously don't know what to expect in winter. But I'm bracing for the absolute worst nightmare possible. But I must admit that I'm quite exhausted from all of this outdoorsy'ness. Morning coffee walks. Mid-morning jogs. Lunchtime hikes. Mid-afternoon kayaking. Late afternoon running or cycling. Pre-dinner rollerblading. After dinner strolls to watch the sunset. I'm friggin' tired! But I love this sunshine so I'm just going to live outside until it hibernates and my seasonal affective disorder hightails to full swing.

Fortunately, running seems to cure my S.A.D. pretty quickly. It was hard to overcome in the MN winters because we'd go months without seeing grass! Sure, the crisp air, blue skies and gleaming sunshine were amazing, but the cold and bitter temperatures often kept me indoors on the treadmill. I did enjoy a nice run in the freshly fallen snow but I would have such a difficult time regulating my body temperature in negative degree weather! I don't think I'll miss the days where I waited until the temperature hit at least zero degrees before heading out. I'm very much looking forward to Seattle winter weather for running. I've been running a lot lately. It's amazing how much I've missed it. I've reacquainted with my love of the sport. The weather is ideal for running year-round and it's where I thrive. So perhaps I'll set up personal records!

My last semester of law school is about to begin and I just don't know what to think about this. It's been an extraordinary three years on so many levels. It's somewhat anti-climatic that my last semester of law school is going to be spent alone, all independent work, all managed by me. But so have it. We're just rollin' with the punches over here. To celebrate, I decided to try my hand at making a classic at home.
I've been wanting to make some oreos for a while. These were so yummy. Mine turned out a little bit bigger than they should have been (clearly my small cookie scoop is actually quite bigger than a teaspoon) but they were just delish! We enjoyed these, dunked in milk, for a few days. And they do taste very, very similar (especially the cream) compared to the store-bought kind. But the added perk is that the ingredients below are much more satisfying to read than the ingredients in an actual oreo.

Homemade Oreos
from Sunny Side up in San Diego
Ingredients
For the Chocolate Wafers
  • 1 1/4 cups AP flour
  • 1/2 cup unsweetened Dutch process cocoa
  • 1 tsp baking soda
  • 1/4 tsp baking powder
  • 1/4 tsp salt
  • 1 - 1 1/2 cups sugar
  • 1/2 cup plus 2 Tbsp (1 1/4 sticks) room-temperature, unsalted butter
  • 1 large egg
For the Filling
  • 1/4 cup (1/2 stick) butter, softened
  • 1/4 cup vegetable shortening
  • 2 cups sifted confectioners' sugar
  • 2 tsp vanilla extract
Instructions
  1. Preheat the oven to 375 degrees F.
  2. In the bowl of a stand mixer fitted with the whisk attachment, mix together the flour, cocoa, baking soda, and powder, salt and sugar. While the mixer is running, on low-speed, add the butter and then the egg. Continue mixing until dough comes together.
  3. Drop rounded teaspoons of dough two inches apart on a baking sheet lined with parchment paper. Slightly flatten the dough. Bake for 9 minutes, rotating once for even baking. Set baking sheets on a rack to cool.
  4. To make the filling: beat together the butter and shortening in a medium bowl. Then, starting at low speed, gradually beat in the sugar and vanilla. Turn the mixer on high and beat for 2-3 minutes until filling is light and fluffy. Transfer to a pastry bag fitted with a large round tip.
  5. To assemble: match the cookies up by size and lay one cookie bottom size up. For "regular stuffed" oreos, swirl ~1 tsp of filling on to each cookie. For "double stuffed" oreos, swirl ~2-3 tsp of filling on to each cookie. Place the matching cookie on top and gently press into a sandwich.

Sunday, May 8, 2011

Oatmeal Raisin Cookies

I'm guessing that if I took a "what is your favorite cookie?" poll, I'd get a lot of "chocolate chip" or "peanut butters." I personally have no idea what my favorite cookie is -- it depends on the mood. At the holidays, I want my mom's thumbprint cookies or snickerdoodles. During the spring, I want sugar cookies. But my year-round go-to cookie is probably just going to be your regular ol' delicious chocolate chip, or peanut butter, or those little mexican wedding cookies. Ah! I can't decide. Cookies are too awesome to pick just one.
But, I'm guessing it's really hit or miss with oatmeal raisin. I enjoy a good oatmeal raisin cookie but people are pretty finicky with oatmeal in cookies. So I was quite surprised when I made oatmeal raisin cookies for two people in the past six months. Both times, they suggested oatmeal raisin as their favorites. And these were quite delicious. They were buttery. Sugary. Deliciously chewy. And had just enough spice. The link below will take you to the original recipe with a recipe for cream filling. I did not make the cream filling but I totally should have. It would have been like circa elementary school when I was totally hooked on Little Debbie Oatmeal Creme Pies.
Oatmeal Raisin Cookies
Pennies on a Platter
Ingredients
  • 1 cup butter, softened
  • 1 1/2 cups light brown sugar, packed
  • 1/2 cup granulated sugar
  • 2 eggs
  • 1 tsp vanilla
  • 1 3/4 cups AP flour
  • 1 tsp baking soda
  • 1/2 tsp salt
  • 1 1/2 tsp cinnamon
  • 1/4 tsp nutmeg
  • 3 cups rolled oats
  • 1 cup raisins
  • 1 cup walnuts (optional)
Instructions
  1. Preheat oven to 375 degrees F.
  2. In a large bowl, beat butter, brown sugar, granulated sugar, eggs and vanilla with a mixer until blended. 
  3. In a medium bowl, combine flour, baking soda, salt, cinnamon and nutmeg.
  4. Add dry ingredients to butter mixture, stirring until just combined.
  5. Fold in rolled oats, raisins, and walnuts (if desired). Drop dough by rounded tablespoons about 2 inches apart on a cookie sheet lined with parchment paper.
  6. Bake for 8-10 minutes or until edges are lightly browned. Cool 2 minutes and remove to wire rack to cool completely.

Tuesday, April 5, 2011

Almond M & M Cookies

Short post today. Tis a busy time in my life! This recipe was inspired by a craving for M and M's. I basically went off of random knowledge for the cookie recipe but I was determined to add extra crunch to these cookies and make them more unique than your average M and M cookie. So, I added some crushed almonds and added a smidge of almond extract to bring out the flavor. I was very happy with the results. These cookies puffed up beautifully and never fell flat. The addition of almond was divine! You can easily omit the almonds and just use regular vanilla for a great M and M cookie. Enjoy!
Almond M and M Cookies
from Me
Yield: Half batch, about 2 1/2 dozen
Ingredients
  • 1/2 cup dark brown sugar, packed
  • 1/4 cup granulated sugar
  • 1/2 cup butter, at room temperature
  • 1 egg
  • 1/4 tsp almond extract
  • 1/2 tsp pure vanilla extract (preferably organic; without added corn syrup)
  • 1 1/4 cup all purpose flour
  • 1/2 tsp baking soda
  • 1/2 tsp salt
  • 1 cup M and M's
  • 1/2 cup finely crushed almonds, unsalted
  • coarse sea salt, for sprinkling, optional
Instructions
  1. Preheat oven to 350 degrees F and line baking sheet/s with parchment paper.
  2. In a large mixing bowl, mix butter, brown sugar, white sugar, and egg until combined. Add extract and mix thoroughly.
  3. Stir in flour, baking soda, and salt until just combined.
  4. Pour in M & M's and finely crushed almonds. Fold in M & M's and almonds until mixed throughout.
  5. Drop by rounded teaspoons onto lined baking sheets. Sprinkle with coarse sea salt, if desired. Bake at 350 degrees for 9-11 minutes, or until desired doneness. Cool on baking sheet for a few minutes, then transfer to wire racks to cool completely.

Monday, March 7, 2011

Caramel Macchiato Thumbprint Cookies

It's always hard to get back into the swing of things after a break. This past week was our spring break and classes resume today. I am currently looking at my list of things to-do in the next seven weeks and I cannot say that I am particularly thrilled. Normally I get excited at the prospect of tackling my upcoming assignments, but this list seems somewhat daunting. Go-go Gadget Time Management skills!
Perhaps I am cranky because Ron and I had a rude awakening early this morning. At 5:00 a.m., I heard a noise on the shelf above our bed. I assumed it was Salem who finally conquered the task of jumping onto the shelf. But then I heard a gentle flapping and Salem flew to the opposite side of the room. BUT, Salem is a cat. And although it was super early, I know that cat's don't have wings. Praying it was a dream, I turned on the light next to the bed. Sure enough, there was a bat frantically flying around our bedroom. And Salem, such a little over-achiever, was sprinting back and forth across the room trying to get it. Naturally, I remained calm under the circumstances.

"AGHHHHHHHHH, RONNNN!!!!  GET UPPP!!! GETTTTTT UPPPPP!!!!!!"  Ron, who is always a wonder of words first thing upon awakening, shouted something incomprehensible. Then we ducked under the covers while the bat landed on the window opposite of our bed and discussed what we should do. It's rare that I actually pull the "you are a man and this is a man job" card, but today was one of those days. I grabbed Salem, who was doing everything in her power to help get the bat, and took off into a closed location. Ron screamed. The bat squealed. Ron plowed down the stairs and out the front door. And the bat was released to fly away in the dark sky (and likely back to our home to save its family). Later on he started talking about radioactive powers and Batman. Um, ok. Keep your superhero dreams out of my living quarters.

It certainly started the week off with a bang. Because I have been somewhat down in the dumps, I decided that I needed to post a fun, yummy recipe on here. I had intended to post this delicious blueberry buttermilk bread that I made a few weeks ago, yet discovered that I have misplaced the recipe. Go figure, speaking from the person who created this blog to save and track recipes. So, here is a recipe for some amazingly delicious cookies that I made a few weeks ago. Ron loves anything coffee flavored. He had been out of town and I wanted to surprise him with a fun dessert. These fit the bill. The recipe uses a packaged mix, but I ended up being OK with it because I'm not 100% sold on my recipe converting skills just yet. Plus, upon tasting one of the cookies, I had no qualms about their method of preparation. I did use the advice of one commenter and used a packet of Starbucks Via in lieu of the instant coffee granules. I also melted some cappuccino chips with the chocolate to make the drizzle, but the chocolate chips alone would taste just fine. I would advise to go easy on the caramel unless you want to overpower the coffee flavor. Overall, they were amazing. They truly tasted like a caramel macchiato in a cookie form.

Caramel Macchiato Thumbprints
Betty Crocker
Yield: about 3 dozen cookies
Ingredients
  • 1 packet Starbucks VIA instant coffee packet, or 2 tsp instant espresso coffee powder or granules
  • 1 Tbsp hot water
  • 1 pouch (1 lb 1.5 oz) Betty Crocker sugar cookie mix
  • 1/4 cup AP flour
  • 1/2 cup butter, melted
  • 2 tsp pure vanilla extract
  • 1 egg
  • 18 caramels (from 14-oz bag), unwrapped
  • 2 Tbsp milk
  • 1/2 cup semisweet chocolate chips
  • 1 tsp shortening
Instructions
  1. Preheat oven to 375 degrees. 
  2. In a large bowl, dissolve coffee as directed by package (or in hot water if using granules). Stir in cooke mix, flour, butter, vanilla and egg until very soft dough forms.
  3. Shape dough into 1 1/2-inch balls. On ungreased cookie sheets, place balls 2 inches apart. Using thumb, make indentation in center of each cookie.
  4. Bake 8-10 minutes or until edges are light golden brown. Cool 2 minutes; remove from cookie sheets to cooling racks.
  5. In small microwavable bowl, microwave caramels and milk uncovered on High 1 minute to 1 minute 30 seconds, stirring once, until caramels are melted. Spoon 1/2 tsp caramel into indentation in each cookie. Cool 15 minutes.
  6. In another small microwavable bowl, microwave chocolate chips and shortening uncovered on High 1 minute to 1 minute 30 seconds or until chips can be stirred smooth. Drizzle chocolate over cookies. Let stand about 30 minutes or until chocolate has set.

Tuesday, February 1, 2011

Brookies

Not too long ago, Ron and I watched a show on Food Network that highlighted a Pumpple Cake. The Flying Monkey, located in Philadelphia's Reading Terminal Market, created this amazing dessert: pumpkin and apple pies baked in chocolate and vanilla cake.  Everything is fused together and surrounded by buttercream icing.  Now, there are some fusions that I don't have much desire to try (for instance, a turducken) but I would be more than willing to give any dessert fusion a try.  I love fusing desserts!  Honestly, what can make sugar even more appealing?  Add more sugar!

These, my friends, are Brookies.  Brookies consist of half chocolate chip cookie and half fudge brownie.  How fun!  I was on a search to find an enjoyable treat to bring in to the office to celebrate a birthday. When I saw these, I had to make them.  They seemed fun, festive and they were something I hadn't tried before.

The original recipe called for a rich buttercream frosting layer to top the brownies.  I struggled for a good while determining whether I should mix up the frosting.  And while I admit that the buttercream would have made these even more amazing, I was a bit concerned that the frosting would make the treat toooo sweet.  So, I opted to leave it off this time but I think they turned out just fabulous.  The recipe itself was incredibly easy to mix up.  The bottom layer is a classic chocolate chip cookie batter.  It bakes for 20 minutes or so.  In the meantime, you mix up the brownie layer and once the cookie layer is baked, you get to pour the brownie layer over top, an oddly satisfying step.  The end result? A delicious, buttery, chocolate filled birthday treat that is definitely worth sharing!
Brookies
from Bakingdom
Yield: One 8x8 inch pan
Ingredients
  • Cookies
    • 3/4 cup all-purpose flour
    • 1/2 tsp baking powder
    • 1/2 tsp salt
    • 6 Tbsp unsalted butter, melted and cooled
    • 3/4 cup brown sugar
    • 1 egg
    • 1 tsp vanilla extract
    • 1/2 cup semi-sweet chocolate chips
  • Brownies
    • 1/2 cup (1 stick) unsalted butter
    • 1 cup sugar
    • 2 eggs
    • 1 tsp vanilla
    • 1/3 cup dark cocoa powder
    • 1/2 cup flour
    • 1/4 tsp salt
    • 1/4 tsp baking powder
Instructions
  1. Preheat the oven to 350 degrees. Spray an 8x8-inch square baking dish with non-stick baking spray.
  2. Make the Cookie Layer: In a small bowl, combine the flour, baking powder, and salt; set aside. In a medium bowl, whisk the melted butter and brown sugar together. Add the egg and vanilla; mix until well combined. Fold the flour mixture into the egg mixture until just mixed. Fold in the chocolate chips and spread the batter into the prepared pan and bake for 20 minutes.
  3. While the cookie layer bakes in the oven, Make the Brownie Layer: In a medium saucepan, melt the butter. Once melted, remove from heat and whisk in the sugar until combined. Add the eggs, one at a time, mixing well after each addition. Stir in the vanilla. Whisk in the dry ingredients until combined. Once the cookie layer comes out of the oven, immediately pour the brownie batter on top and return the pan to the oven. Bake for 30-35 minutes, or until toothpick inserted in the middle comes out with a few crumbs clinging to it. 
  4. Allow to cool completely before serving.

Friday, January 21, 2011

Steelers Smiley Cookies

Technically, these are just regular sugar cookies.  But, in light of the upcoming AFC Championship game, I've made them into Steelers Smiley Cookies.  They aren't as good, but they will suffice.  You see, living in Minnesota means that we can no longer take part in the Steelers celebration festivities.  This makes me incredibly, incredibly sad.  Though I enjoy Minnesota, there are so many traditions that carry on around sports in Pittsburgh.  Not being surrounded by them can be really crappy.  (Especially when you've missed out on two major events since moving from Pittsburgh: winning a Superbowl and winning the Stanley Cup!)

For instance, in Pittsburgh, every single store is currently decked out in black and gold.  When I say decked out, I mean decked out: terrible towels handing from the ceiling, Steelers emblems plastered all over the place, store employees in black and gold from head to toe.  Grocery stores have been selling Steeler themed foods since pre-season.  They have arranged their giant Coke display in the window to read, "Go Steelers!" since August.  Men are walking around with faces full of hair as they all try to grow their play-off beard.  Restaurants are selling Steelers themed food, such as a "Roethlis-burger."  You can't get in the car without hearing a Steelers song.  People have been wearing black and gold for weeks and if you own a Steelers jersey, you are wearing it today!  Attending the pep rally is essentially considered "work" and is a viable excuse to take a 5 hour lunch and come back slightly buzzed.  And the tailgates?  The tailgates are insane!  I can't even get into the tailgates. . . Dem folks are drinkin' as much Irn City as they can dahntown and cheering for dem 'Stillers now!

I've been streaming in DVE Steelers songs all week and wearing Steelers gear every single day.  My Terrible Towel rests on the dashboard of my car and I've been prepping my game-day menu, but it's not the same.  There is nothing that compares to Pittsburgh.  After living in a different part of the country, in different fan territory (and witnessing that the recreation paths seem to be MORE crowded during said fans respective game that day; gasp!!), I can honestly say that Steelers fans are the best.  There is a reason why it's called 'Steeler Nation' and there is a reason that there is a Pittsburgh Steelers dedicated sports bar in nearly every single city in the world.  Pittsburgh is definitely a sports town (with a drinking problem ;) ) but it is a place that I miss very much, and especially around these times.  I've been a Steelers fan since I was in diapers and that is absolutely never going to change.

A local restaurant on the east coast, Eat-n-Park, opened in 1949 and has since greatly expanded.  It was a place that I frequented often in high school for late-night hangout sessions and to buy mozzarella cheese sticks at 2 a.m.  But, they are also known for their delicious Smiley Cookies.  They are sugar cookies that rock!  You can purchase the cookies and have them shipped anywhere (and if you live in the opposing team's area, you can get them shipped for free!) but I chose to make my own.  The yellow is slightly more yellow than I would have liked, but they taste delicious just the same and they feel like home.  The cookie recipe itself was easy (though sticky!) to mix up and roll out.
Sugar Cookies (for Cut-Out cookies)
from Brown Eyed Baker who used the recipe from Baking Illustrated
Yield:  About 24 cookies
Ingredients
  • 2 cups (10 ounces) AP flour
  • 1/2 tsp baking powder
  • 1/2 tsp salt
  • 16 Tbsp (2 sticks) unsalted butter, softened but still cool
  • 1 cup (7 ounces) granulated sugar
  • 1 Tbsp light brown sugar
  • 1 large egg
  • 1 1/2 tsp vanilla
  • 4 cups powdered sugar
  • 2 Tbsp meringue powder
  • 6 Tbsp water
  • Additional Tools: icing bags, tip for icing, water for flooding, toothpicks, etc.
Instructions
  1. Whisk together the flour, baking powder, and salt in a medium bowl; set aside.
  2. Cream the butter, sugar, and the brown sugar at medium speed until light and fluffy, about 3 minutes.  Add the egg and vanilla; beat at medium speed until combined, about 30 seconds.
  3. Add the dry ingredients and beat at low speed until just combined.
  4. Shape the dough into a disk and wrap tightly with plastic wrap.  Put in fridge for at least 1 hour.  (You can refrigerate for up to 2 days, or freeze it and take it out and put in fridge for about 12 hours prior to baking tie.)
  5. Remove dough from fridge and let sit at room temperature for 10-15 minutes.
  6. Flour a working space, the dough, and a rolling pin.  Roll out the dough to a 1/4-inch thickness.  Dip a cookie cutter in flour and cut out your cookies, placing them on a parchment-lined baking sheet.
  7. Place the baking sheet in the fridge for at least 15 minutes before baking.  Preheat the oven to 375 degrees F.
  8. Bake for 8-9 minutes until the edges are just ready to turn the slightest bit brown, rotating the pan about 180 degrees halfway through baking.
  9. Cool completely on a wire rack before frosting the cookies.
  10. To make royal icing: combine the powdered sugar, meringue powder, and water in a bowl fit with a mixing attachment.  Mix on low, 7-10 minutes, until icing has lost it's shine.  Separate icing into bowls as you desire and color each with icing color.  (I use Wilton.)  Cover bowls with a damp towel so icing does not dry out.  Decorate cookies as desired!  

Friday, December 24, 2010

Peanut Butter Blossoms - Week Twelve

Merry Christmas Eve!!
Ron and I are back east for the holidays and have been for a few days (hence the lack of blogging).  Naturally, I've been on my feet from 8 a.m. to 11 p.m. nearly every night.  The holidays are always full of so much excitement.  Family, friends, holiday cooking, holiday shopping, holiday traffic, holiday visiting, holiday wrapping, holiday decorating, and of course, holiday baking.  I literally have hundreds of cookie recipes saved that I would have loved to make during the "12 Weeks of Holiday Cookies" but I decided on good ol' peanut butter blossoms to finish off the project.  To recap:
Twelve weeks of holiday cookies has been fun and exciting.  I'm not quite sure which one was my favorite.  Probably the Take Five's.  Ron said the same.  Therefore, you should probably make them.  But honestly, who doesn't love cookies??  And, when you get to eat them twelve weeks in a row, all the better.  Peanut butter blossoms are so easy to make and so delicious to eat.  I'd say they were a perfectly delightful final cookie choice.  Oomph, now it's time to go detox for the next twelve weeks.  :)

Enjoy your time with your loved ones!  Happy Holidays!  Eat good food and share good company!
Peanut Butter Blossoms
from How Sweet Eats
Yield:  About 4 dozen
Ingredients
  • 2 sticks butter, softened
  • 1 1/2 cups creamy peanut butter
  • 1 cup sugar
  • 1 cup packed brown sugar
  • 2 eggs
  • 1 tsp vanilla extract
  • 3 1/2 cups flour
  • 2 tsp baking soda
  • 1/2 tsp salt
  • 2 Tbsp milk
  • 1/2 cup sugar, for rolling
  • Hershey Kisses, about 48, unwrapped
Instructions  
  1. Cream butter and peanut butter together until smooth.  Add sugar and cream for 2-3 minutes.  Add eggs, one at a time, beating until combined.
  2. Stir in vanilla.
  3. Add flour, baking soda and salt, just mixing until combined, then add in milk.
  4. Cover and refrigerate dough for 30 minutes or for up to 2 days.
  5. Preheat oven to 375 degrees F.
  6. Roll cookies into 1 inch balls and roll in sugar.
  7. Lay on baking sheet about 1 inch apart.  Bake at 375 degrees for 5 minutes.  Remove from oven and puss Hershey's Kiss down into the middle of each cookie.  Return to oven and bake for 2 1/2 minutes more.  Remove and let cool completely.

Friday, December 17, 2010

Cinnadoodles - Week Eleven

I almost feel like I am cheating in '12 Weeks of Christmas Cookies' by posting this recipe.  You see, I have another delicious snickerdoodle recipe already posted on my blog.  This one isn't a heck of a lot different... but it's good and so I'm using it as week eleven's cookie!  This was actually the cookie I chose to bake for a coworker's cookie exchange party this past weekend.  I had over 8 dozen of them by the time I was done baking them.  But, because I could not get out of my driveway to get to the cookie exchange party, and because our freezer is small, neighbors and mailmen were able to experience the cinnamon/sugar goodness and not my coworkers.  :(

I am not going to lie.  12 weeks of Christmas cookies has me cookie'd out.  I suppose it may be a good thing.  Normally, mom and I bake anywhere from 4-6 different types of cookies shortly before the holiday.  Normally, I average about 4-6 cookies a day for about 4-6 weeks (or so it seems).  We try to do something all of the cookies to prevent this major indulgence and we often freeze them, which in turn makes the boys incredibly angry.  But, I don't think I'm going to be eating a ridiculous amount of cookies this year.  Let's face it - I've been baking cookies for eleven weeks straight!  Not to mention, mom sent 4 dozen of favorite cookie of all time, thumbprints, that arrived somehow on the morning of the blizzard (poor UPS man!)!  Between the thumbprints, the 8 dozen cinnadoodles, the past ten weeks of cookies, and the upcoming baking session with mom, I'm done with cookies.  I'm cookie'd out.

But, because you probably have not been suffocated with cookies, I do feel that you should find some cinnamon chips to make a batch of these cinnadoodles.  If you love cinnamon and sugar, they are amazing.  And, the cinnamon chips are the best thing ever.  I actually just used up the last of my bag in some eggnog cinnamon scones (recipe to be posted soon!) and questioned whether I should sprint to the store to buy more before some freak factory disaster removes them from the shelves for all eternity!  But, I didn't.  I actually just decided to bite into another cinnadoodle.  Oh boy.  Thank goodness I'm allowed to eat like a piggie during the winter months.  It's cold in MN; we could all use some extra skin!
Cinnadoodles
from Two Peas and Their Pod - A Martha Stewart recipe
Yield:  About 48
Ingredients
  • 2 3/4 cup AP flour
  • 2 tsp baking powder
  • 1/2 tsp salt
  • 1 cup (2 sticks) unsalted butter, softened
  • 1 1/2 cups sugar
  • 2 large eggs
  • about half a bag of cinnamon chips
  • 3 Tbsp sugar
  • 3 Tbsp cinnamon
Instructions
  1. Preheat oven to 350 degrees.
  2. Sift together flour, baking powder and salt; set aside.
  3. Put butter and 1 1/2 cups sugar in a bowl and mix with an electric mixer on medium speed until light and fluffy, about 3 minutes.  Mix in eggs.  Reduce speed to low; gradually mix in flour.  Add in cinnamon chips.
  4. Stir together 3 Tbsp cinnamon and 3 Tbsp sugar in a small bowl.  Shape dough into round balls; roll in cinnamon sugar.  Space 3 inches apart on baking sheets lined with parchment.
  5. Bake cookies, rotating sheets halfway through, until edges are golden, 12-14 minutes.  Don't overbake!  Let cool on a cookie sheet for a minute or two, then transfer to a cooling rack.

Friday, December 10, 2010

Brazil Nut "Joy" Cookies - Week Ten

Happy Birthday to the Best Mom in the entire world!

Mom loves chocolate covered brazil nuts.  We get them for her every year around her birthday and the holidays.  She also loves almond joy candy bars.  So, I decided to celebrate mom's birthday by making her a cookie she would love and shipping it to her to enjoy on her special day!  These cookies were very, VERY good.  I call them brazil nut joy cookies because they are similar to an almond joy, but they use brazil nuts.  Go figure.  You could easily sub in almond for the brazil nuts, but I'd suggest adding some more coconut (or even coconut extract) if you are a fan of the stuff!
Brazil Nut Joy Cookies
adapted from Taste of Home
Yield:  4 1/2 - 5 dozen
Ingredients
  • 1 cup butter, room temperature
  • 1 cup sugar
  • 2 eggs
  • 1 1/2 tsp vanilla
  • 2 1/4 cups AP flour
  • 1/2 tsp salt
  • 1/4 tsp baking soda
  • 2 cups chopped brazil nuts
  • 1/2 cup coconut
  • 1/2 - 3/4 cup chocolate chips
Instructions
  1. Preheat oven to 350 degrees F.
  2. In a large bowl, cream together butter and sugar.  Add eggs one at a time and beating after each addition.  Beat in vanilla.
  3. Sift together flour, salt, and baking soda.  Slowly add to the wet ingredients and stir until combined.
  4. Fold in chopped nuts, coconut, and chocolate.
  5. Using a rounded teaspoon, drop cookies 2" apart on a baking sheet lined with parchment paper.  Bake for 11-14 minutes or until bottoms are lightly browned.
  6. Cool completely on wire racks.

Friday, December 3, 2010

Hot Cocoa Cookies - Week Nine

I've noticed a lack of "real food" on my blog again.  BUT, it's not as though I've been eating junk for the past few days.  I've actually made quite a few really good recipes -- however, the pictures are completely unappetizing.  :(  That's the problem with having a food blog.  It's expected to have a photo with each recipe.  I made a decision that after school is over, I'd like to take some photography classes and buy one of those fancy schmancy cameras.  I've always been interested in photography, so maybe that could be my new adventure post-school.  Maybe then I'll learn how to take such unphotogenic photos and turn them into something delicious looking.

This recipe was my first almost-fail for 12 Weeks of Holiday Cookies.  Look at how FLAT they are!  To be truthful, I seriously contemplated making a whole other batch just to take a photo because the one above doesn't do the cookie any justice.  Then, I realized that I don't have time to do that.  So, flat cookie photo it is.

Honestly, I'm going to blame finals.  I NEVER have problems in the kitchen except for around finals period (I tend to overmix, overcomplicate, misread, mis-measure, etc.).  I'm guessing that my butter was too soft or I inadvertently beat the hell out of the cookies while I was mixing the batter and put too much air in there.  Whatever I did, they ended up flat and needed to be pried off of the baking sheet.  I saw them on How Sweet It Is blog and HAD to make them.  I have a ton of 'Hot Cocoa Cookie' recipes saved, but this one just stood out to me.  And despite the fact that they fell and melted into one giant cookie on the cookie sheet, they were absolutely delicious; smelling and tasting exactly like hot cocoa!  I think I need to try these after finals to get them looking just right!
Hot Cocoa Cookies
from How Sweet It Is
Yield:  approx. 24 cookies
Ingredients
  • 1 cup butter, at room temperature
  • 1 1/2 cups sugar
  • 2 eggs
  • 1 tsp vanilla
  • 2 cups AP flour
  • 1/2 cup cocoa powder
  • 1 tsp baking soda
  • 1/4 tsp salt
  • 1/4 cup marshmallow fluff
  • 1 cup chocolate chips
  • 1 cup mini marshmallows
Instructions
  1. Cream butter, sugar, eggs, and vanilla until fluffy.  Add flour, cocoa powder, baking soda, and salt.  Mix until combined.  Stir in marshmallow fluff.
  2. Fold in chocolate chips and marshmallows.  Cover dough with plastic wrap and refrigerate for 30-60 minutes.
  3. Preheat oven to 350 degrees F.
  4. Remove dough from fridge and roll into 1 1/2 inch balls.
  5. Bake at 350 degrees for 10-12 minutes.  (Make sure cookies are fully cooked because they will be sticky from the marshmallows.)  Allow to cool completely then remove with a spatula.  Allow to sit for another 30 minutes.

Saturday, November 27, 2010

Biscoff Cookies - Week Eight

Ron and I recently traveled via the friendly skies on a short vacation down to Florida.  I'm excited to report that I will be posting a full, detailed (and rather long) overview of our trip at some point in the next few days.  But, for now, I'm posting week eight's cookie recipe!  It is coming late because we were traveling, but better late than never.

This cookie was actually inspired by our recent air travels.  I cannot tell you how excited I get when the Delta flight attendant approaches my seat and says "cookies or pretzels?"  So, I was very unhappy when I looked at our ticket and realized I had booked AirTran for our flights.  What was I thinking?  Nevermind the fact that our plane was taking off from the crappy Humphrey terminal with terrible dining options and no shopping whatsoever (though, one positive was that we didn't have experiences with full body scanners over there), but we also wouldn't be getting any Biscoff cookies on the flight!  Frick.  Major fail.  I love Biscoff cookies.  They are a cinnamony, sugary, biscuity cookie and taste absolutely delicious with coffee. (Biscoff cookies are actually Belgium's favorite cookie known as speculoos cookies.  It is a crisp, spice cookie similar to a gingerbread, but more dense.)  The cookie is full of delicious spices and is delightful for a holiday spread.

On our return flight, the (rather rude) flight attendants walked down the aisle about 2 hours into the flight with a surprise treat:  BISCOFF COOKIES!  They were smaller than the ones we get on Delta, but delicious still the same.  I was so excited and knew that it called for a celebration so I searched for a copycat recipe.  Once found, I baked this batch up to celebrate week eight.  I left these in the oven for about 15-16 minutes to get them firm.  Once they cooled, they hardened up to that same buttery, crumby crunch that I love from Biscoff cookies.  Copycat recipe win!
Biscoff Cookies
from Cupcake Project
Ingredients
  • 2 C AP flour
  • 2 tsp ground cinnamon
  • 1/4 tsp ground nutmeg
  • 1/4 tsp ground ginger
  • 1/4 tsp ground allspice
  • 1/4 tsp ground cloves
  • 1/2 tsp salt
  • 1/4 tsp baking soda
  • 1/4 tsp baking powder
  • 1 C unsalted butter, room temperature
  • 1/2 C sugar
  • 1/4 C firmly packed brown sugar
  • 1 tsp vanilla
Instructions
  1. Preheat oven to 350 degrees F.
  2. In a medium sized bowl, mix together flour, spices (cinnamon, nutmeg, ginger, allspice, and cloves), baking soda, baking powder, and salt.
  3. In a separate large bowl, cream together butter, sugar, and brown sugar with an electric mixer on low speed.  Mix in vanilla extract.
  4. Gradually blend the flour mixture into the butter mixture until well combined.
  5. Roll out dough to 1/4 inch thickness.  Use cookie cutters to make desired cookie shapes.  Chill dough first if you find that it is difficult to roll.
  6. Place dough shapes onto parchment paper and bake for 13-16 minutes.  Cool on rack before serving.  Best served once they have cooled.

Friday, November 19, 2010

Butter Pecan Sandies - Week Seven

Ron isn't always a man of many words.  He can talk about sports for hours.  And, he can talk about his technology job for hours.  And, he can talk about his favorite movies or shows for hours.  But, when it comes to daily chit-chat, he pretty much just doesn't do it.  Sometimes our conversations remind me of an episode of The Wonder Years where Kevin's mom is asking his father about his day.  "How was work?"  "Work was work."  "How was traffic?"  "Traffic was traffic."  You get the gist.

I've inherited this annoying trait from my mom that I like to refer to as the question game.  The question game consists of one person, namely me, asking as many questions that can possibly be on my mind to the listening party.  I've developed a bad habit.  Any time that Ron is in a talkative mood, I subconsciously start thinking about all of the questions that I've had building up to ask him.  They are always something mundane like "what do you want for dinner?"  or "do you want to do this tonight?"  But, somehow it turns into an overload of questions and I can't help myself.

For week seven, I wasn't sure what cookie to make.  Having annoyed Ron with cookie questions for the prior six weeks, I didn't ask him what kind he wanted.  Imagine my excitement as we walked through the aisle at Lunds and Ron asked, "What kind of cookie were you planning this week?"  I had to tread around these waters carefully.  If I sounded like I was too overzealous about such an inquiry, Ron might back off and resort to cranky grocery shopping Ron.  I replied calmly, as if I hadn't been pouring over recipes for the past five days, "Umm, I'm not sure.  Do you have something you want?"  He looked at all of the nuts that were right in front of us and said, "How about some type of nutty cookie?"  SCORE!  A nutty cookie!  A request from Ron himself.  My brain started flooding with thoughts but we still had several aisles to go and I didn't want to ruin the trip; cranky grocery shopping Ron always ends disastrous.

But the next morning, all hell broke loose.  The "nutty" cookie recipes on the internet and in my saved "to make" que were inundating.  I couldn't handle it!  What kind of "nutty" cookie did Ron want?  What exactly did he have in mind when he requested a nutty cookie?  Did he want something soft?  Did he want some type of shortbread?  Did he want a specific nut in the cookie?  Did he want multiple types of nuts in the cookie?  Did he want some type of nutty thumbprint cookie with some type of frosting in the center? If so, what kind of frosting did he want in the center?  Did he want a nutty drop cookie or a nutty roll out cookie?  Was he craving chocolate or vanilla?  Did he want baking chips mixed into his cookie with the nuts?

Needless to say, Ron woke up and... well... too many questions were involved for a Sunday morning.  Ron will not be requesting a specific cookie again for 12 Weeks of Holiday Cookies.  But, the good news is that these butter pecan sandies turned out beautifully and they were a delicious choice for week seven.  They were reminiscent of a shortbread cookie and absolutely delectable.
Butter Pecan Cookies
Martha Stewart
Yield:  12 cookies
Ingredients
  • 3/4 cup pecans
  • 1/2 cup (1 stick) unsalted butter, room temperature
  • 1/3 cup sugar, plus more for coating
  • 1 tsp vanilla
  • 1/8 tsp salt
  • 1 cup AP flour
Instructions
  1. Preheat oven to 350 degrees F.  On a baking sheet, toast pecan until fragrant, about 6 minutes, stirring once.  Let cool completely; finely chop.
  2. With an electric mixer, cream butter and 1/3 cup sugar until light, about 1 minute.  Beat in vanilla, salt, and flour, scraping down sides of bowl, just until dough comes together.  Fold in pecans.
  3. Separate dough into 12 pieces; squeeze dough to shape into balls.  Roll in sugar.  Place 3" apart on a baking sheet.  Gently flatten with the bottom of a glass. Sprinkle with sugar.
  4. Bake until golden brown, rotating sheet halfway through, about 15 minutes.  Sprinkle with sugar.  Cool cookies on a wire rack.

Friday, November 12, 2010

Dark Chocolate Peanut Butter Sandwich Cookies - Week Six

These actually started out as Red Velvet sandwich cookies (aka whoopie pies).  I haven't been in a baking mood this week (sigh; I know!) and I wanted to whip up something quick and easy to fill this week's cookie.  So, I spotted a recipe for Red Velvet sandwich cookies and thought it would be quick and painless.  Then, I realized that I don't exactly like using food coloring products and I didn't have any natural color.  So, I decided that I would omit the food coloring step* and just use the cocoa powder to keep them a true chocolate color.

Beautiful adaption.  Though, I wouldn't exactly call it an adaption as I simply left out one ingredient.  Anyway.  I planned to keep the white frosting but as I began to bake the cookies I knew that peanut butter would put these over the top.  I mixed up a quick peanut butter frosting using natural, crunchy peanut butter.  It totally worked!

We've been eating quite a lot of cookies in this household so I opted to cut the recipe in half and make larger whoopie pies.  I ended up only getting 4.  Ooops!  They are pretty decadent though so we don't need too many of these lying around.  You could make them smaller to get bite sized cookies.  Actually, that would be awesome.  Ron coined these the best cookies I've ever made.  He said they were baked absolutely perfectly and he also told me I should start selling them on the street!  Hmm.... Challenge Accepted!

*If you'd like to make red velvet cookies, simply incorporate 1 x Tbsp red food coloring with step #4 below.  Then mix up your favorite cream cheese frosting or buttercream frosting to pair with the cookie cakes!
Dark Chocolate Peanut Butter Whoopie Pies
adapted from The Family Kitchen
Yield:  10-15
Ingredients
Cookies
  • 1/4 cup butter, softened
  • 1 cup sugar
  • 2 eggs
  • 2 Tbsp buttermilk
  • 1 tsp vanilla
  • 1 1/3 cups AP flour
  • 4 Tbsp Hershey Special Dark cocoa powder (or use regular)
  • 1 tsp baking powder
  • 1/4 tsp baking soda
  • 1/2 tsp salt
Frosting
  • 1/4 cup softened butter
  • 1/2 cup peanut butter
  • 1 cup confectioners' sugar
  • 1 Tbsp + 1 1/2 tsp milk, or as needed
Instructions
  1. For cookies:  Preheat the oven to 375 degrees F.
  2. In a large mixing bowl, cream together butter and sugar.
  3. Add in eggs one at a time, beating after each addition.
  4. Beat in buttermilk and vanilla.
  5. Whisk together flour, cocoa powder, baking powder, baking soda and salt in a separate bowl (or in your wet ingredients if you are feeling like taking a risk!).
  6. Stir the dry ingredients into the wet ingredients.
  7. Scoop the dough onto a lined cookie sheet using a generous medium scoop (2-3 Tbsp) and place about 2 inches apart.
  8. Bake at 375 degrees F for 10-12 minutes until center appears set.  Allow to cool slightly, then pull the liner onto the wire cooling rack to cool completely.
  9. For frosting:  Cream the butter and peanut butter together in a mixing bowl.  Gradually mix in sugar and when it starts to get thick, slowly add milk until all of the sugar is mixed in and the frosting is spreadable.  Beat at least 3 minutes to get the frosting fluffy.  
  10. Once cookies have cooled, spread the frosting onto one cookie and place another cookie on top to create a sandwich.  Enjoy!

Friday, November 5, 2010

Take 5 Cookies - Week Five

For week five, I made yet another "drop" cookie.  These babies were inspired by Halloween.  We passed out Take 5 miniature candy bars and miniature Rolos to the trick-or-treaters.  My head started spinning with excitement because I realized that the candy could easily make one amazing cookie.  

I was absolutely thrilled with the result.  These cookies turned out pretty good.  I did leave them in the oven a tad too long (does anyone know how to work with a fluctuating oven?) so they were slightly harder than I wanted them to be, but they still tasted great.  In the future, I will likely add more peanut butter and less cocoa powder because the chocolate was definitely prominent, but the peanut butter not so much.  I actually worked with a base recipe that I've used dozens of time and then added the pretzels and peanuts on a whim.  I used honey roasted because I thought it might enhance the flavor more even though true Take 5 candy bars use roasted peanuts.

I thought that I had created some groundbreaking cookie, but of course I turned to the internet and found out that people have been making similar cookies since the Take 5 candy bar first hit the shelves several years ago.  Oh well.  Most of their recipes used actual Take 5 bars in the batter.  And, mine was more innovative, so I'll take it! :)
Take 5 Cookies
adapted from Picky Palate
Yield:  3 dozen cookies
Ingredients
  • 1 cup butter, softened
  • 1 cup white sugar
  • 3/4 cup brown sugar
  • 2 eggs
  • 1 tsp. vanilla
  • 1/2 cup - 3/4 cup creamy peanut butter
  • 1 3/4 cup flour
  • 1 1/4 cups cocoa powder (I used Hershey's Special Dark)
  • 2 tsp. baking soda
  • 1/4 tsp salt.
  • 3/4 cup crushed pretzels
  • 1/2 - 3/4 cup crushed honey roasted peanuts
  • One package of rolo candies, unwrapped
Instructions
  1. Preheat oven to 350 degrees and line cookie sheets with parchment paper.
  2. In a large bowl, cream together the butter and sugars until light and fluffy.  Slowly add eggs and vanilla until well combined.  Then add peanut butter until combined.
  3. In another bowl, combine the flour, cocoa, baking soda and salt.  Slowly add to wet ingredients (batter will be very thick) then stir/fold in the pretzels and peanuts.
  4. Using a medium (Tbsp.) cookie scoop, scoop out rounds of dough.  Slightly flatten the dough and place one unwrapped rolo candy in the center.  Fold up the sides and wrap around the rolo to form a ball, making sure that the rolo is completely covered.  Place onto prepared cookie sheet and repeat as follows.
  5. Bake for 9-12 minutes until the cookies are still slightly soft but will firm up while cooling on the sheet for 5 minutes.  Remove cookies to a wire rack to cool completely.

Thursday, October 28, 2010

Ricotta Cheese Cookies - Week Four

For week four of 12 weeks of holiday cookies, I made up ricotta cheese cookies.  These are one of Ron's favorite cookies.  A few years ago, he mentioned that his mom used to make them around the holidays.  Until that time, I had never heard of ricotta cheese cookies, let alone putting any kind of cheese in a cookie.  For the holidays that year, I got the recipe from his mom and ended up whipping up a batch.  For some reason, I fell asleep and left them sitting out all night.  Put that in the What was I thinking category.  I woke up the next day realizing that they were hard as rocks.  Thankfully, Ron's family was kind enough to look passed my mistake and the cookies were enjoyed by all.

I couldn't find the original recipe I made, but I did find another recipe in my giant cookie recipe book.  These cookies are delicious.  If you put them away within a few hours of baking (and don't leave them out for an entire night), they are still so delicious and moist the next day.  If you've never had them, I would describe them as a lighter and fluffier sugar cookie.  I cut this recipe in half, but it still made over 2 dozen cookies.  This recipe makes a lot so factor that into your baking.  And, sadly I couldn't find my multi-colored sprinkles, so there's a mixture of Independence Day and Christmas colors on those racks :)
Ricotta Cheese Cookies
Good Housekeeping Favorite Recipes: Cookies!
Yield:  About 72 cookies (don't worry - they freeze well!)
Ingredients
  • 1 cup margarine or butter (2 sticks) softened
  • 2 cups granulated sugar
  • 1 container (15 ounces) ricotta cheese
  • 2 tsp vanilla extract
  • 2 large eggs
  • 4 cups AP flour
  • 2 Tbsp baking powder
  • 1 tsp salt
  • 1 1/2 cups confectioners' sugar
  • 3 Tbsp milk
  • colored sugar crystals
Instructions
  1. Preheat oven to 350 degrees F.
  2. In large bowl, beat butter and granulated sugar until blended - light and fluffy.
  3. Beat in ricotta, vanilla, and eggs until well combined.
  4. Add flour, baking powder, and salt; beat/stir until dough forms.
  5. Drop dough by level tablespoons, about 2 inches apart, on ungreased cookie sheet.
  6. Bake until cookies are very lightly golden, about 15 minutes (they will be soft).
  7. With spatula, transfer cookies to wire rack to cool.  Repeat with remaining dough.
  8. When cookies are cool, prepare icing: in small bowl, whisk confectioners' sugar and milk until smooth.  With small spatula, knife, or dip method, spread icing on cookies; sprinkle with colored sugar crystals.
  9. Set aside on wire rack until icing is completely dry, about 1 hour.

Friday, October 22, 2010

French Vanilla Ghiradelli Luxe Pretzel Cookies - Week Three

For week three, I was interested in baking a good chocolate chip cookie.  I've baked tons of variations of chocolate chip cookies before.  Nestle's go-to recipe, the famous NY Times recipe, Alton Brown's The Chewie, etc.  The list is endless.  Some are made with nuts.  Some are made with oats.  Some are made with cake flour.  But, one thing remains the same:  flour, baking soda, baking powder, salt, sugars, butter, egg, and vanilla.

I was hoping to make more of a savory chocolate chip cookie this time, so when I saw a recipe that appealed to me, I decided to swap out regular vanilla extract with french vanilla extract.  It totally did the trick.  The addition of french vanilla made the house smell delicious and it made the cookies taste incredible.  They were very rich tasting, but the salt from the pretzels made them simply divine.  As always, I cut the recipe in half, but this is the first time that I kind of wish I hadn't.
French Vanilla Ghiradelli Luxe Pretzel Cookies
adapted from Korean American Mommy
Yield:  About 3-4 dozen cookies
Ingredients
  • 1 3/4 cup AP flour
  • 1/2 tsp baking powder
  • 1/2 tsp baking soda
  • 1/2 tsp salt
  • 1/2 cup (1 stick) butter, melted
  • 1 cup light brown sugar
  • 4 Tbsp granulated sugar
  • 1 egg
  • 1 tsp french vanilla extract (or regular vanilla extract)
  • 2 x 3 oz. Ghiradelli LUXE bars, broken into little pieces
  • 1 cup pretzels, broken into little pieces
Instructions
  1. Preheat the oven to 350 degrees F.
  2. Sift together flour, baking powder, baking soda, and salt in medium bowl.
  3. Prepare add-ins:  break up chocolate bar and pretzels into tiny pieces.  Set aside.
  4. Melt butter in microwave.
  5. In large bowl, cream melted butter and sugars together until well blended.
  6. Add egg and vanilla; beat for about 30 seconds.
  7. Slowly add in the flour mixture until combined.
  8. With a rubber spatula, fold in chocolate and pretzel pieces until well combined.
  9. Drop teaspoonfuls (I used my small cookie scoop) of dough onto a parchment lined baking sheet.
  10. Bake at 350 degrees F for 8-14 minutes, until cookies are lightly browned on the top and just set.  (Time will vary depending on how big your cookies are and how well your oven works.)

Wednesday, October 13, 2010

Peanut Butter Cookies - Week Two

I'm finding that picking a different cookie recipe to produce for 12 weeks is difficult.  For starters, there are thousands, thousands of cookie recipes out there.  There are hundreds, hundreds of variations of those thousands of cookie recipes.  How do you choose?  Some are easy.  Some are complex.  Some involve interesting ingredients.  Some involve pantry staples.  In order to keep things interesting, I am going to choose a mixture of easy, complex, interesting and old-time favorites for my project.  This week's is an old-time favorite.

Earlier this week, I asked for Ron's input.  Like a little kid, he yelled "PEANUT BUTTER."  Then, for some reason, he added with a scowl, "And make sure you do the little fork indentations."  Ok.  Like there is any other way?  (But apparently in some past cookie baking adventure I forgot to do this and it offended him.)

My sister and I would help my mom bake cookies when we were younger.  I have a vivid memory (perhaps with the help of a few photographs) of sitting on the counter with a fork, a determined look on my face and making the little fork indentations. And although I didn't sit on the counter this time, I can assure you that I had that same determined look on my face as I was doing the little fork indentations.  :)  This is a pretty simple and basic recipe that took about 20 minutes from start to finish (with the prep work complete; softening the butter and letting the egg come to room temp).  Next time you have an inkling for cookies, whip these up!
Peanut Butter Cookies
Southern Cookbook
Yield:  About 3 dozen
Ingredients

  • 1/2 cup butter, softened
  • 1/2 cup peanut butter
  • 1/2 cup granulated sugar (plus more for rolling)
  • 1/2 cup packed brown sugar
  • 1/2 tsp baking soda
  • 1/2 tsp baking powder
  • 1 egg (room temp)
  • 1/2 tsp of vanilla
  • 1 1/2 cups AP flour

Instructions 

  1. Preheat oven to 375 degrees F.
  2. Beat butter and peanut butter in a large bowl until creamy.
  3. Add sugar, brown sugar, baking soda and baking powder.  Beat until well combined.
  4. Beat in the egg and the vanilla until combined.
  5. Beat or stir in the flour until combined.
  6. Roll the dough into 1-inch balls, then roll into granulated sugar.  
  7. Place cookie dough balls on a cookie sheet and make your little fork indentations!
  8. Bake for 7-9 minutes, watching carefully.

Wednesday, October 6, 2010

Mexican Chocolate Wedding Cakes - Week One

Those who know me know that I simply don't know what to do with myself when I don't have an event on the horizon.  Sure, law school itself is an event every single day, but I need to have something else going on in my life in order to avoid total insanity.  The TC marathon is done and over with (and boy was it a doozy, but we don't need to go into the unfortunate details of the fact that I had to literally walk miles 11-26.2) and I haven't yet decided what to do or when I will start prepping for my August 28, 2011 adventure.  Sure, other things will come up, but for now I am focusing on getting healthy and recovering from the injuries I sustained during Twin Cities.

As I was hobbling past William Mitchell around mile 24, I realized that if I didn't come up with something to occupy my time, I would likely have a break down around finals (yes, yes, I break down around EVERY finals period, but I can assure you that this one would be worse).  I realized how much I love the season and what is to come over the next few months.  On Summit Avenue, the beauty of the historic homes and gorgeous changing leaves were mesmerizing.  I just kept thinking about how much I LOVE fall.  And, I love the fact that what arrives next is the holiday season.  The holidays make me feel warm:  family, good friends and company, fantastic food, cozy sweaters, and comforting music.  I just love this time of year.

So, as I stumbled across the finish line, realizing that I was in dire need of a cookie, I decided on what I was going to do to occupy my time.  I'm starting the holiday season a bit early this year.  Today marks the beginning of my 12 weeks of holiday cookies adventure.  And it actually works out quite nicely.  Each year I've considered doing some type of 12 days of Christmas cookie.  But, then you just have a whole lot of cookies to eat in a short period of time.  So, this way I soften the calorie blow a bit, use some recipes I've been dying to try, and I have something to look forward to every week.  Every week (mostly Tuesdays) I will be baking a new batch of cookies.  And from now until Dec.21 (when I will likely be at home making the annual cookie smorgasbord with my mom), I will post a cookie recipe.

Yay!  So, here is the first recipe:  mexican chocolate wedding cakes.  The recipe arrived in my mailbox last year during the newspaper's 31 days of cookies series.  For some reason, I knew I wanted to make these first, perhaps because I have been craving little powdered sugar covered dough balls.  I'm so glad I did.  They were quick, easy, and delicious!  They are unlike the typical teacakes because they added chocolate.  But, I'm not complaining.  I cut the recipe in half and got about 2 dozen cookies.  Well, 22 cookies to be exact.  Cali decided she should be able to eat one and knock another on the ground while doing so.
Mexican Chocolate Wedding Cakes
Pioneer Press 31 Days of Cookies email series
Yield:  5 dozen
Ingredients
  • 3/4 cup firmly packed brown sugar
  • 3/4 cup butter, softened
  • 3 squares (1 ounce each) unsweetened baking chocolate, melted
  • 1 tsp vanilla
  • 2 cups AP flour
  • 1/2 tsp salt
  • 1 cup chopped walnuts or pecans
  • powdered sugar
Instructions
  1. To make cookies:  In a large mixing bowl, combine brown sugar and butter, beating at medium speed for 3 minutes until light and fluffy.  Add melted chocolate and vanilla.  Continue beating, scraping bowl often until well mixed.  Reduce speed to low.  Whisk flour and salt together, then add to butter mixture.  Continue mixing until flour is blended (a food processor would work well for this type of dough).  Stir in nuts.
  2. To bake cookies:  Shape teaspoonfuls of dough into 1-inch balls.  Place 2 inches apart on cookie sheets.  Bake in a 350-degree oven for 8-10 minutes or until set.  Cool for 5 minutes on cookie sheets, then carefully remove from sheets and cool for 5 minutes on cookie rack.  Roll in or sprinkle with powdered sugar while still warm and again when cool.